Shooting To Live for the 21st Century – Session 2
Shooting Practice for a Criminal Encounter
#fridayfundamentals a little late
I think of my year long series about practicing on Shooting Illustrated as an update to Shooting To Live. Fairbairn and Sykes didn’t talk about followon training and practice at all. This is understandable given their time and resource constraints but won’t lead to as good results as periodic practice will.
This is the February 2024 article. https://www.shootingillustrated.com/content/shooting-practice-for-a-criminal-encounter/ It’s unclear how long the Shooting Illustrated website will be up since the publication was discontinued, so here’s a reprint of the entire article.
The second installment of this series will use the Louisiana Concealed Handgun Permit Qualification Course as the basis for structuring a Live Fire Practice Session. The Louisiana Course itself is fairly simple, as most CCW Qual Courses are. Some variations are included in this article to increase the Course’s value as practice for self-defense and personal protection.
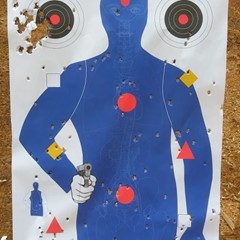
The basic Louisiana requirements are to shoot a live range fire session of a minimum of 12 rounds each at 6 feet, 10 feet, and 15 feet for a total of 36 rounds. The shooter must complete at least one safe reload of the handgun at each distance. The target is the NRA B-27 and the shooter must score 100 percent hits within the silhouette portion. Having a 100 percent standard is what makes the Louisiana Course a little different from most States’ qualification courses. Typically, other States require a 70 to 80 percent hit standard.
The Louisiana Concealed Handgun Permit Laws And Administrative Rules are available at https://www.lsp.org/media/e04occ5m/chrulebook.pdf .
To use the Course as practice for self-defense, include some variations that go beyond the bare minimum requirements. The B-27 target is extremely large. To make it more challenging, accept only hits inside the 8 ring. An even more difficult variation would be to use a sheet of paper on the B-27 target as your acceptable hit zone.
Additional variations are to break the 12 shots into shorter strings and include some one-hand shooting during the six feet phase. Hold something in your non-dominant hand to simulate a situation in which you are carrying something valuable and have to shoot with one hand only.
Six feet Phase
- Load with 6 rounds
- Two hand shooting
- Come to Low Ready. Any time you come to Low Ready, the pistol should point completely below the target.
- String 1 – Fire 1 shot. Return to Low Ready.
- String 2 – Fire 2 shots. Return to Low Ready.
- String 3 – Fire 3 shots.
- Check the hits on your target and cover your hits with masking tape.
Checking your hits regularly and then covering them with masking tape or pasters is a crucial part of marksmanship development. A target should have no more than 12 unmarked hits at a time.
Shooters often blast an entire box of ammunition at the target without checking and then marking it consistently. This is one of the worst mistakes that can be made when practicing for marksmanship development and self-defense.
Best practice is to check and mark your target after every string. When shooting this practice session, check and mark the target after every six shots.
- Reload with 7 rounds
- Primary hand shooting
- Place the pistol in the Primary Hand only. This is the hand you write with. Hold something like a briefcase or range bag in your other hand. Come to Low Ready.
- String 1 – Fire 1 shot. Return to Low Ready.
- String 2 – Fire 2 shots. Return to Low Ready.
- String 3 – Fire 3 shots.
- Unload
- Remove the magazine.
- Work the slide at least 3 times.
- Visually and physically check that the pistol is clear of all ammunition.
- Check the hits on your target and cover your hits with masking tape.
Ten feet Phase
At this distance, continue shooting shorter strings and include a malfunction clearance practice.
- Load with 6 rounds
- Begin at Low Ready
- String 1 – Fire 1 shot. Return to Low Ready.
- String 2 – Fire 2 shots. Return to Low Ready.
- String 3 – 3 shots.
- Check the hits on your target and cover your hits with masking tape.
- Remove the empty magazine.
- Let the slide go forward but do not press the trigger. Leave the pistol cocked.
- Reload with 7 rounds
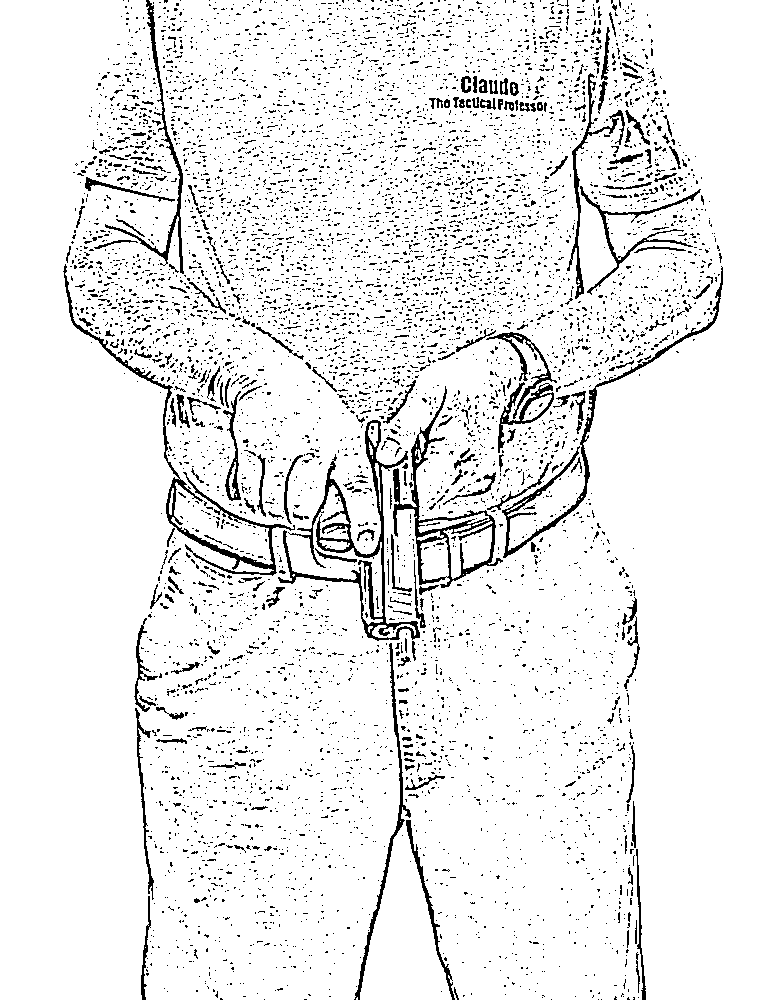
- Begin at the MidPoint of the Drawstroke. At the MidPoint, the pistol is at chest level, the line of the sights is underneath the dominant eye, and the bore is parallel to the ground.
- String 4 – Aim at the target.
- Press the trigger to get a click. Work the slide to put a round in the chamber. This simulates either Empty Chamber Carry or having a malfunction. At the click, notice if the sights bounce around when encountering the empty chamber. If they do, it’s a sign of flinching.
- Fire 1 shot.
- Return to the MidPoint.
- String 5 – Fire 2 shots. Return to the MidPoint.
- String 6 – Fire 3 shots.
- Unload
- Remove the magazine.
- Work the slide at least 3 times.
- Visually and physically check that the pistol is clear of all ammunition.
- Check the hits on your target and cover your hits with masking tape.
Fifteen feet Phase
- Load with 6 rounds
- Begin at Low Ready
- String 1 – Fire 1 shot. Return to Low Ready.
- String 2 – Fire 2 shots. Return to Low Ready.
- String 3 – 3 shots.
- Check the hits on your target and cover your hits with masking tape.
- Remove the empty magazine
- Let the slide go forward but do not press the trigger. Leave the pistol cocked.
- Reload with 7 rounds
- Begin at the MidPoint of the Drawstroke.
- String 4 – Aim at the target.
- Press the trigger to get a click. Clear the malfunction just as you did at 10 feet.
- Fire 1 shot.
- Return to the MidPoint.
- String 5 – Fire 2 shots. Return to the MidPoint.
- String 6 – Fire 3 shots.
- Unload
- Remove the magazine.
- Work the slide at least 3 times.
- Visually and physically check that the pistol is clear of all ammunition.
- Check the hits on your target and cover your hits with masking tape.
Additional Practice
At 10 feet
- Load with 6 rounds
- Aim at a specific spot on the target
- Shoot the smallest group you can at the spot.
- Unload and check that the pistol is clear.
- Check the hits on your target and cover your hits with masking tape.
At 15 feet
- Load with 6 rounds
- Aim at a specific spot on the target
- Shoot the smallest group you can at the spot.
- Unload and check that the pistol is clear.
- Check the hits on your target.
Total – 48 rounds for the session.
In this session, you will have fired almost a box of ammunition and included several additional tasks relevant to self-defense. Firing short strings of fire and marking your target regularly will accelerate your marksmanship development. The MidPoint starting position is acceptable at ranges that do not permit drawing from a holster but starting from the MidPoint builds the skill of acquiring the sights as early as possible in the drawstroke. Beginning the strings from different positions and practicing clearing malfunctions are important self-defense skills that go beyond basic marksmanship. You will also have practiced unloading your pistol with a round in the chamber and ensuring that it is clear. The one sheet pump target is available at https://thetacticalprofessor.net/ . The sheet has the image of a gun on it, so no one can say you’re practicing to shoot unarmed people.
Friday Fundamentals – Getting Started
#Fridayfundamentals
Shooting To Live for the 21st Century – Concealed Carry Skills and Drills
Session 1
This session derives from two contemporary Courses of Fire, the original Michigan Council On Law Enforcement Standards Basic Pistol Safety Training Assessment and the New York State Concealed Carry License Live-Fire Proficiency Assessment https://troopers.ny.gov/minimum-standards-new-york-state-concealed-carry-firearm-safety-training to mimic and expand on the Recruit Training Programme described by Fairbairn and Sykes in their classic text Shooting To Live. Together the Assessments mimic the first live fire Practices of the RTP. To expand on it, the distance is increased from two yards used by F&S to 4 yards, the boundary in Proxemics between Social Space and Public Space.
The target consists of three sheets of printer paper stacked vertically in landscape mode. Fold one in half and use it as the top sheet. Put this array on whatever target backer is convenient. The Shoot-N-C is an optional addition on the middle sheet, used as the ‘aiming mark’ mentioned in STL.

This session can be done either at an outdoor range or almost all indoor ranges. The draw for the NYS Assessment is dry, i.e., no ammo in the gun, and most indoor ranges will permit it. There is no time limit so even ranges that require shooting no faster than one shot every three seconds can be placated.
Part I – MCOLES Safety Training Assessment
- String 1
- Load five rounds in the pistol and come to Low Ready.
- Bring the pistol to eye level, acquire a sight picture, and fire one shot.
- Return to Low Ready.
- Repeat four more times for a total of five shots.
- String 2
- Repeat String 1 for another five individual shots.
- String 3
- Load five rounds in the pistol and come to Low Ready
- Bring the pistol to eye level, acquire a sight picture, and fire two shots.
- Return to Low Ready.
- Bring the pistol to eye level, acquire a sight picture, and fire three shots.
The passing standard established by MCOLES was hybrid. Of the three strings, two had to have all five shots hit anywhere on all three sheets of paper. So it’s basically a 100% standard but you get to throw out your worst String.
The second part of this session is the New York State Concealed Carry License Live-Fire Proficiency Assessment. It uses the same target as the MCOLES Assessment. The distance is also four yards.
Part II – NYS CCL Live-Fire Proficiency Assessment
- Verify that the pistol is unloaded.
- Safely holster without loading.
- Draw the unloaded pistol, acquire a sight picture on the target, and dry snap one time.
- Safely holster without loading
- Draw the pistol and load with five rounds.
- To load, use the push method of loading as described by Fairbairn and Sykes.
- “To load the pistol, turn it over, grasping the slide firmly with the thumb and forefinger of the left hand.”
“Push forward with the right hand until the slide is felt to be open to its fullest extent.”

“Immediately that point is reached, release the hold with the left hand. The slide flies forward, taking with it and forcing into the breech, the topmost cartridge of the magazine, the pistol pointing to the ground meanwhile.”

- Achieve a proper firing grip and come to Low Ready.
- Bring the pistol to eye level, acquire a sight picture, and fire five shots.
- Verify that the pistol is unloaded.
- Safely holster
The passing standard for the NY State Proficiency Assessment is that 4 of the 5 shots (80%) must hit somewhere on the three sheets of paper.
The total round count for this session is twenty rounds. While that may seem low by some people’s standard, it is as much as many owners of snub nose revolvers and small pistols like the Ruger LCP will want to fire at one session. As a beginning, shooting this session provides some familiarity with shooting the pistol, what its concussion and recoil feel like, and an indicator of the shooter’s capability within a distance envelope that most criminal victimizations take place in.
Friday Fundamentals for 2026
#fridayfundamentals
Over 10 years ago, I began writing a series called #fridayfundamentals. https://thetacticalprofessor.net/2015/09/25/friday-fundamentals-01-establishing-your-baseline/ It started with ideas from a couple of my friends, Mark Luell and Cecil Burch.
“My friend Mark Luell, the author of Growing Up Guns suggested I provide a ‘Friday Fundamentals’ post weekly. We got the idea from my colleague Cecil Burch who wrote a blog post about Fundamentals. It’s a great idea to stay in touch with the basics.”
The #fridayfundamentals series has continued intermittently ever since. An opportunity has arisen to continue to expand it. As the saying goes, “In the middle of difficulty lies opportunity.” https://quoteinvestigator.com/2021/10/07/difficulty/
For the past two years, I’ve been writing a monthly column for the digital edition of the NRA magazine Shooting Illustrated. https://www.shootingillustrated.com/ Sadly, we authors have been notified that both the digital and print editions of the magazine will cease to be published at the end of this year.
My 2024 monthly columns were about practice sessions derived from Concealed Carry License Qualification Courses. The sessions were focused on a theme and mostly limited to 50 rounds or less. While highly skilled shooters consider qualification courses to be ‘sobriety tests,’ that’s not true for the majority of gunowners. Especially when a person buys their first pistol, actually having to prove they can shoot it at even an elementary baseline level is intimidating. And because qual courses are designed for ease of administration rather than to have any training or feedback value, they can be segmented into smaller sections that actually do have some training and feedback worth.
First and foremost in my mind when I wrote the series was the Resource Constrained Environment that most gunowners have to practice in. Only a tiny minority of gunowners have access to an outdoor range where movement is possible and shot timers are workable. Almost all gunowners are limited to a booth at an indoor range where universally they can’t move, drawing from a holster isn’t allowed, and a shot timer is useless. Sometimes shooting faster than one shot every three seconds is prohibited. One of the benefits of qual courses is that they are mostly designed with this limitation in mind, so I capitalized on that benefit for the series.
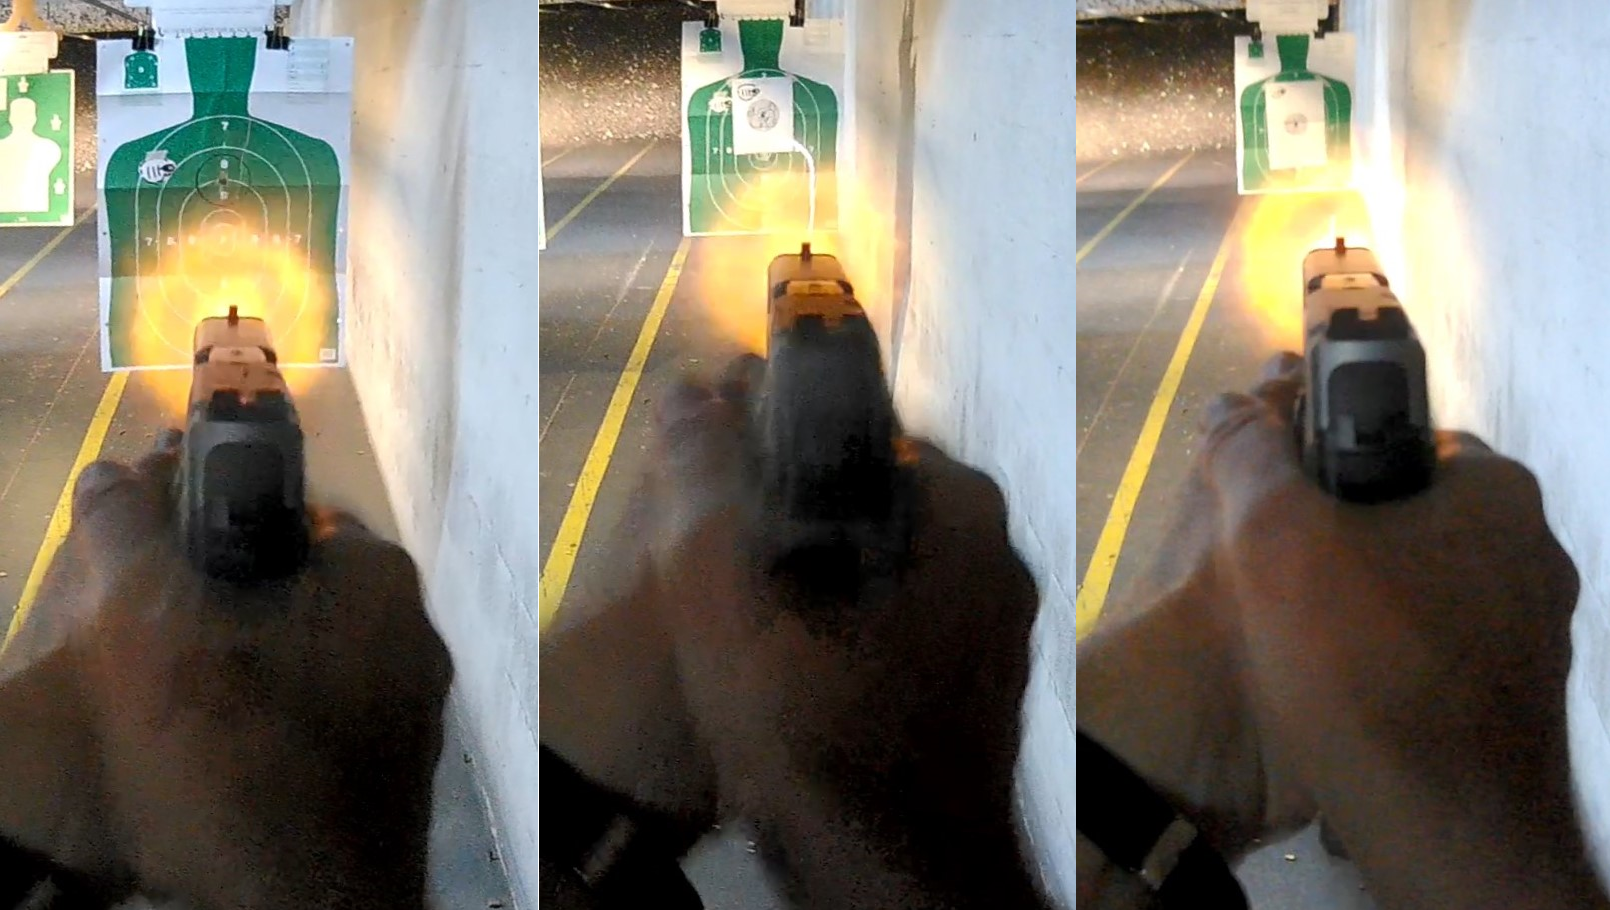
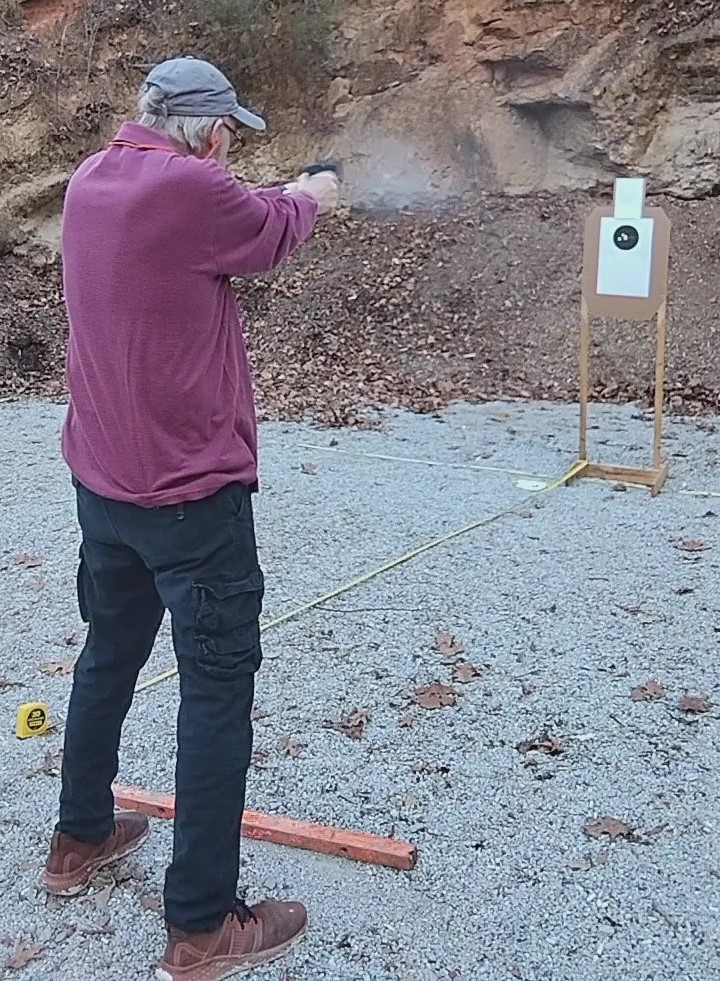
Since Shooting Illustrated is going away, I’ll be re-publishing the series on a weekly basis here on my blog. In addition to the articles, I’ll be creating videos of what each session looks like from a third person POV and the shooter’s POV. YouTube has been taking down some of my videos for vague reasons unspecified other than:
“We think your content violated our firearms policy.
Content that facilitates the sale of certain regulated goods, like firearms, ammunition, or prohibited firearm accessories, isn’t allowed on YouTube.”
As a workaround, I’ll just post a Short of the specified qualification course on YouTube. Then the video of the course with the training enhancements will go up on my Patreon page https://www.patreon.com/TacticalProfessor as a free post because Patreon does not give me a hard time about them.
It’s my hope that gunowners who want to increase their proficiency will find the series useful as practice regimens. There are no shortage of incidents where gunowners find out that the gun they’re depending on doesn’t work or they can’t work it. In the context of personal protection, just knowing you can make the gun go off https://thetacticalprofessor.net/2025/09/17/testing-a-new-gun/ has a lot of value. Being able to hit something with it is even better.

You must be logged in to post a comment.