Final SCCY Report
Now that SCCY Industries https://sccy.com/ is out of business, it’s probably moot but some thoughts about my experiences with the guns are in order.
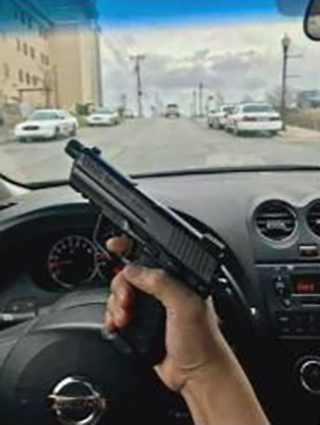
My first SCCY was provided to me in 2015 at no cost as a Testing and Evaluation sample. It was produced in 2014, as best I can tell by the serial number. At the time it was furnished, I was doing my second iteration of 1,000 Days of Dry Fire and I used it extensively for dry practice. I also eventually fired about 1,600 live rounds through it. The firing pin broke after about 10,000 dry snaps. During live fire, I had two Failures to Feed between 400 and 500 rounds. No other malfunctions. The ejector broke about the 1200 round mark but it still ejected, just sluggishly and erratically. In both cases, SCCY serviced the pistol and it then ran fine.
Last year (2024), I purchased a SCCY Gen 3 with my own money because I wanted to see what the upgrades had been. This time, it was a disappointment. The gun had a Failure to Chamber every 25 rounds. I traced this to sharp edges around the chamber mouth. SCCY sent me a new barrel and two more magazines, gratis, but the chamber in it had very noticeable machining rings. I didn’t know if it would work but installed it anyway.
A couple of months ago, I purchased an early production used Gen 2, produced in 2013, for $80 at a local range. The trigger on it was much better than my original Gen 2. Whether it has the original mainspring or a replacement, IDK. It had occasional Failures to Eject. The source of those Failures turned out to be a broken ejector. I bought a replacement on eBay and installed it.
For Memorial Day, in remembrance of my Army friends who are dead, I took all three to the range and practiced the destruction of the enemies of our great Nation. Since I’m going to be teaching the NRA Defensive Pistol Course https://www.nrainstructors.org/CatalogInfo.aspx?cid=41 for a Private lesson soon, the Course of Fire I chose was the DP Qualification Course. It consists of 34 rounds fired at distances of 3 to 10 yards. I shot it once with each of them.

All three SCCYs made it through without a malfunction. That’s not a 10,000 round torture test but probably more than 99 out of 100 gunowners will ever fire their handguns. Although they’re not target pistols, they all were sufficiently accurate to group in the eight inch 10 ring of the NRA AP-1.

Bottom line of the whole exercise is that when purchasing a pistol, shoot at least a box of ammo through it to be sure it works. Preferably a structured and measured session. Feeling the trigger and knowing the results it can produce is useful. Inspect the pistol for broken parts after shooting it. My colleague, the late Paul Gomez, was fond of saying “Shoot Yor Guns!” and that’s good advice.
Trigger Press Casualty
A post is circulating on Facebook about a fellow whose hand became a casualty when the chambered round in his Glock 44 (.22 Long Rifle caliber) failed to eject. He then pressed the trigger and a loud noise occurred instead of the ‘click’ he expected. Unfortunately for him, his hand was over the muzzle and the bullet injured his hand.

Many, in fact most, of the comments involve some version of Rule 2 “Never let your muzzle cover anything you’re not prepared to destroy.” This is true. While that statement tells you what NOT to do, it doesn’t cover what the correct thing you SHOULD do is.
The correct thing to do is always establish a proper grip and deliberately take a sight picture whenever you press the trigger. It doesn’t matter when, do it at all times. When clearing your pistol at the range, take a sight picture on some particular target and observe what the sights do when you press the trigger. When you have to press the trigger to disassemble the pistol, aim at something that will involve the least amount of “damage to property and/or injury to personnel.” Aim at a door frame or something else solid that is more likely to stop a bullet than an interior wall made of Sheetrock.
“Avoid damage to property and/or injury to personnel”, was repeated to us daily during the Weapons phase of the Special Forces Qualification Course. We spent all day handling and working on small arms so the instructors drummed it into our heads regularly. It was my first exposure to the concept of Negative Outcomes and set the concept firmly in my mind.
Establishing grip and taking a sight picture even when you don’t expect the pistol to fire reinforces good marksmanship principles and mitigates safety risks simultaneously. It’s a total WIN WIN.
Back to Basics WheelgunWednesday
#wheelgunwednesday
Going back to basics occasionally helps me get back in the groove. Two basic exercises I like for the snub revolver are the LAPD Retired Officer Qualification Course and the NRA Basics of Pistol Shooting Level 1 test.
The LAPD course is described in the LAPD Manual.
“The starting position for this qualifying course of fire will begin at the 7 Yard Line. When the target faces, the shooter will draw and fire 10 rounds at a single silhouette target. A score of 70 percent is required to pass the qualification. All rounds impacting anywhere on the body and head will receive full value and rounds impacting upon the arms are half value.”
Basics of Pistol Shooting Level 1 test consists of shooting five shots into a circle that is four inches in diameter at a distance of 10 feet. All five shots must hit or cut the circle. It must be done four time, not necessarily consecutively, to pass BOPS.

For both tests, I include opening and spinning the cylinder periodically to create ball and dummy practice. In the LAPD Course, I also include a few initial dry practice draws, a la the NY State CCL Qualification, staggered loading with loose rounds during the first five shots, presenting from Low Ready, firing different numbers of rounds, and a reload with a loading device for the second five.
During my initial run of LAPD (I did four), I noticed that a couple of my shots went high. Upon repeating it, I realized that I was ‘hammering’ instead of firing a ‘controlled pair.’ That was probably the reason I had a couple of high hits during the Rangemaster Pistol Match https://thetacticalprofessor.net/2024/04/10/tactical-conference-2024-pistol-match/.
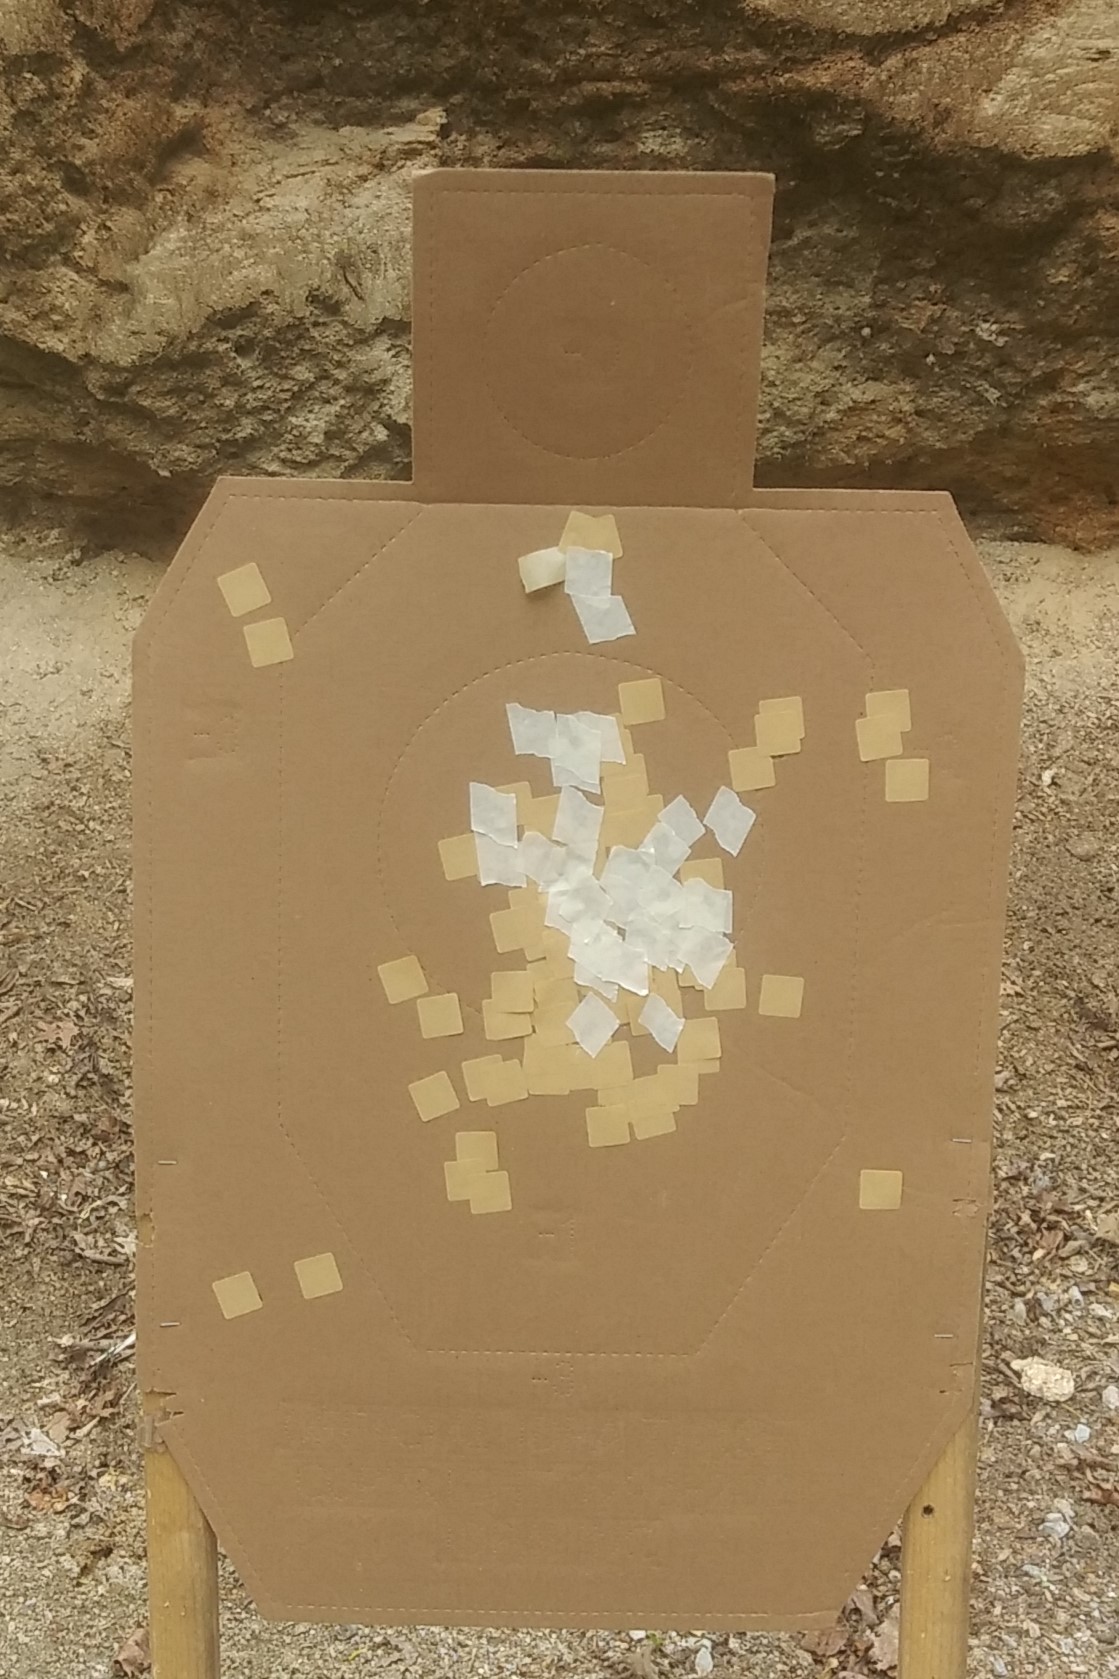
I used a target that I found on the range. The hits covered with masking tape are mine. The ones with pasters are from the previous and unknown shooter. The two hits just below the neck line were the ones probably the result of hammering.
Since BOPS has four strings, I used the opportunity to tune up with several different loading devices. One was an HKS speedloader and the others were various tools from Zeta6 that I like. All the Zeta6 devices are modified with Retention Rings. I find the Retention Ring is a handy addition for getting the device out of my pocket.

It was a nice little tuneup. The day was nice and the results were satisfying.
Snub Dry Practice Training Aids
#wheelgunwednesday
All discharges of a firearm by LAPD officers must be reported to the LAPD Force Investigation Division. Each discharge is thoroughly investigated, adjudicated by the Board of Police Commissioners (BOPC) for LAPD policy compliance, and a public report posted on the BOPC webpage.
https://www.lapdonline.org/police-commission/categorical-use-of-force
Of particular interest are the off-duty discharges. These usually involve one of two situations. First, situations of self-defense similar to what would be encountered by any non-sworn person who owns a firearm for personal protection. Or, second, Unintentional Discharges due to administrative gunhandling such as: placing or removing the firearm in a storage location, cleaning the firearm, or dry practice “to improve accuracy.” In one rare instance, both situations were involved; a firearm was discharged while being retrieved during a ‘tactical situation.’
In adjudicating Unintentional Discharges cases, the LAPD BOPC subdivides them into two categories.
A. Unintentional Discharge
The definitions for an Unintentional Discharge, both Accidental and Negligent, are as follows:
Accidental Discharge: The unintentional discharge of a firearm as a result of an accident such as a firearm malfunction or other mechanical failure, not the result of operator error.
Negligent Discharge: Finding where it was determined that the unintentional discharge of a firearm resulted from operator error, such as the violation of firearm safety rules.
Administrative Disapproval – Negligent Discharge. Finding where it was determined that the unintentional discharge of a firearm resulted from operator error, such as the violation of a firearm safety rule (Los Angeles Police Department Manual, Volume 3, Section 792.05).
From 2005 to 2023, five Unintentional Discharges of five shot revolvers, which are authorized for backup and off-duty carry, occurred. All five were adjudicated as Negligent Discharges and received Administrative Disapproval. Negligent Discharges are one category of Negative Outcomes https://store.payloadz.com/details/2617872-ebooks-true-crime-serious-mistakes-gunowners-make.html and we obviously want to avoid them.
Four of the five involved preparation for dry practice. The cause of all four was the same. Not all five rounds were ejected from the cylinder when the revolver was unloaded. One round remained in the cylinder when the other four ejected. At some point during the dry practice, a loud noise occurred when a click was expected. That universal cause reinforces my concept of how to prepare for dry practice with a revolver.
https://thetacticalprofessor.net/2020/08/21/dry-practice-safety-part-ii/
Since that article was posted, Zeta6 and I teamed up to create the SafeSnap Training Disc.

https://zetasix.com/product-category/safesnap
I now keep a SafeSnap Disc in my storage box, along with an empty HKS speedloader, to make my dry practice even safer. Although I don’t carry an HKS, I find it’s the easiest of all speedloaders to put ammunition in.

I rotate the revolver so the muzzle is pointing straight up, eject the live rounds from the snub, place them in the speedloader, and then put the SnapSafe in the revolver. Holding the revolver completely vertical is an important aspect of ejecting the live ammunition. Holding it at angle and catching the rounds in the palm of the other hand is a dangerous technique and is “cruisin’ for a bruisin’.” Sooner or later, doing that will bite you in the ass; hard.
This procedure makes the possibility of having a Negligent Discharge during dry practice fairly remote. I also have a Zeta6 K-PAK2 https://zetasix.com/product/k-pak2/ with dummy rounds for reloading practice in the box. It is set up with a Retention Ring https://retentionring.com/ to mimic my EDC reload.
All the live ammunition stays in the box and the box gets closed while I’m practicing. When I’m finished practicing, I rigidly follow the post-practice safety protocols described in the above linked article.
Dry practice is a key component of learning how to shoot well. When doing it, we want to avoid having the Negative Outcome of “causing damage to equipment or injury to personnel,” which was a graded aspect required to pass the Special Forces Weapons Qualification Course that has stuck with me for the past 44 years. Having the right training aids and following safety protocols in a disciplined manner is how we can avoid those Negative Outcomes.
FTC Note: I have a relationship with Zeta6 and Retention Ring but receive no compensation for mentioning their products.
A Way of the Wheelgun
#wheelgunwednesday
In 2022, I created a four month Patreon series for developing shooting and gunhandling skills with snub nosed revolvers. There are a total of 65 articles in the series and it is the online equivalent of a book. All the articles are now available as a Collection on my Patreon page. Unlike a book, you can read it at your leisure on your Smartphone.
The basis for the Series is the principles and techniques of the Snub Nose classes I taught for decades and the two DVDs I made about snubs. Also included are examples of what went right and wrong in several real life incidents involving snubs.
There is a great deal of emphasis in the Series on ‘dry practice,’ i.e., practice without ammunition. There is also periodic live fire (originally monthly) of no more than 50 rounds. The live fire is compatible with either indoor or outdoor ranges because the vast majority (999/1000 by my calculation) of gunowners only have access to indoor ranges.
The first three posts in the Collection are unlocked and available for anyone to read. These initial posts describe Safety Protocols during dry practice to avoid putting bullet holes in people, places, and things where they are undesirable. Tragedies can and do take place during dry practice and we want to avoid those at all costs.
For anyone who owns and/or carries a snub, this is a good program. Anyone who does any dry practice, whether with a revolver or autoloader, will benefit from at least reading the first three posts about Safety Protocols.
https://www.patreon.com/posts/snub-revolver-97045992
Subscribers to my Concealed Carry Skills Tier ($3/month) https://www.patreon.com/TacticalProfessor have access to all the articles in the Collection plus all the articles I write on Patreon about marksmanship and gunhandling. In the financial industry, we’d say the Return On Investment (ROI) is very high.
P-Press the Trigger Smoothly
My friend and colleague Greg Ellifritz kindly mentioned this post in his Weekly Knowledge Dump https://www.activeresponsetraining.net/weekend-knowledge-dump-december-1-2023 and it is worth repeating.
https://thetacticalprofessor.net/2018/11/16/press-the-trigger-smoothly/
Empty Chamber Carry – II
#fridayfundamentals
As mentioned last week, the discussions of Empty Chamber Carry rarely include any commentary about what to do after the pistol is loaded during an incident. A simplistic explanation of what the person will do often reduces to this.
“If I don’t have to shoot, I’ll immediately download the chamber when I get back to my car.”
There are several contextual issues with this.
- The car may be some distance away. Is the person going to walk to the car with gun in hand? Or are they going to holster a loaded pistol, something that they’re not used to doing, before they walk to the car?
- Once they reach the car, are they going to unload outside or inside the car?
- What procedure will be used to unload the pistol? Doing it standing outside the car? If so, is the pistol pointing at the car or away from the car? If the idea is to unload after entering the car, is the pistol in hand when getting in, placed on the seat before entering, or holstered?
- What direction is the pistol pointed inside the car during the unload process? There is no direction inside the car that doesn’t violate Rule #2 “Never point your pistol at anything you’re not prepared to destroy.” However, pointing it at yourself is the worst possible direction.
- Has the person ever practiced their unloading procedure with dummy ammunition?
If the incident occurs while the defender is in the car, the situation becomes even more complicated. The February 2022 Armed Citizen page
of the official NRA publications contains this incident in which a woman foiled a carjacking attempt. https://www.americas1stfreedom.org/content/the-armed-citizen-january-24-2022/
Woman With Concealed Carry License Fires At Would-Be Carjackers
https://www.cbsnews.com/chicago/news/ccw-holder-fires-gun-attempted-carjacker-roseland/
“I had just come out of the bank and was sitting in my car about to lock my door to pull off [and] leave, and he opened my door and put a gun in my face”
In a situation like this, both loading the gun and later unloading it come into play. Complicating the issue is that ‘workspace’ behind the steering wheel of a car is extremely limited.
If she hadn’t fired at the carjacker and had carried Empty Chamber, she would have then had to unload her pistol. However, she fired and then went for help.
“She reversed her Nissan Versa, and pulled up right outside the Chase Bank – then ran inside for help.”
If there was no malfunction, the chamber was now loaded. She then chose to go to a place of safety, the bank she just left. Obviously, running into a bank with a gun in hand wouldn’t be a great idea. Her choices at that point were:
- Holster the loaded gun or put it back in her purse. Her carry method wasn’t specified so it’s possible she just leaves the gun in the car in general. In that case, she would only have options 3 or 4.
- Unload the gun while sitting in the car, secure it somewhere on her person, and then go into the bank.
- Run into the bank and leave the gun in the car loaded.
- Unload the gun, leave it in the car, and run into the bank.
For those who choose to carry with an Empty Chamber, practice at gun manipulation is vital. Dummy rounds are a very useful training aid and every gunowner should have some. Empty Chamber carriers in particular should use them regularly to practice loading and unloading under realistic conditions.
Empty Chamber Carry – I
https://thetacticalprofessor.net/2023/10/13/empty-chamber-carry-i/
The Value of Historical Methods
A viewer of my Shooting to Live Advanced Methods demo YouTube video asked an interesting question.
“Do you think that there is any value added by practicing the WWII Combatives shooting methods beyond learning historical training firsthand?”
In a conversation with him, he further elaborated that he was asking from his perspective as a competent shooter who practices regularly using demanding time and accuracy standards. From that perspective, my answer was NO. The only value to him would be for historical academic interest. There is nothing that will be learned of practical value for someone with his level of proficiency.
However, I continued on by saying that to the millions of first time gun buyers of the past few years, MAYBE. Only a miniscule fraction of those people will ever take a class on gun safety and learn how to shoot to some standard, whatever that standard might be.
For those millions of first time gun buyers, studying actual WWII shooting combatives, such as Shooting to Live and Field Manual 23-35 Pistols and Revolvers (1946), could have some value. Shooting to Live and its immediately successor, US Army Combat Firing, at least provide some structure and standards for brand new pistol shooters. Any system based on real combat is preferable to going to an indoor range and randomly blasting away based on what’s shown on TV.
I began the long term series about ‘Unsighted Fire’ aka Point Shooting on Patreon for a very specific reason. It is that obviously the vast majority of people who write about point shooting or make YouTube videos on “Fairbairn Method” shooting have never really read or studied any of the literature about it, including Shooting to Live. From the perspective of an historian and researcher, this lack of fact based information is both annoying and disturbing.
The gunhandling and safety aspects of WWII pistol combatives alone have a great deal of merit. Gripping the pistol properly. A strong emphasis on practical gunhandling in addition to marksmanship. Including malfunction clearance in early stages of Live Fire. Equal weight on Dry Practice as Live Fire, especially prior to the initial firing practice. Highlighting the concept of treating a pistol as always loaded. Emphasizing the importance of muzzle direction when handling a pistol. Practicing clearing and making the pistol safe when less than a magazine has been fired. Those are all highly useful skills, probably even more so than the marksmanship standards, which were not very high.
But please avoid muzzling your instructors. We won’t be happy about that. We will try to keep away from putting ourselves in a position where you can.
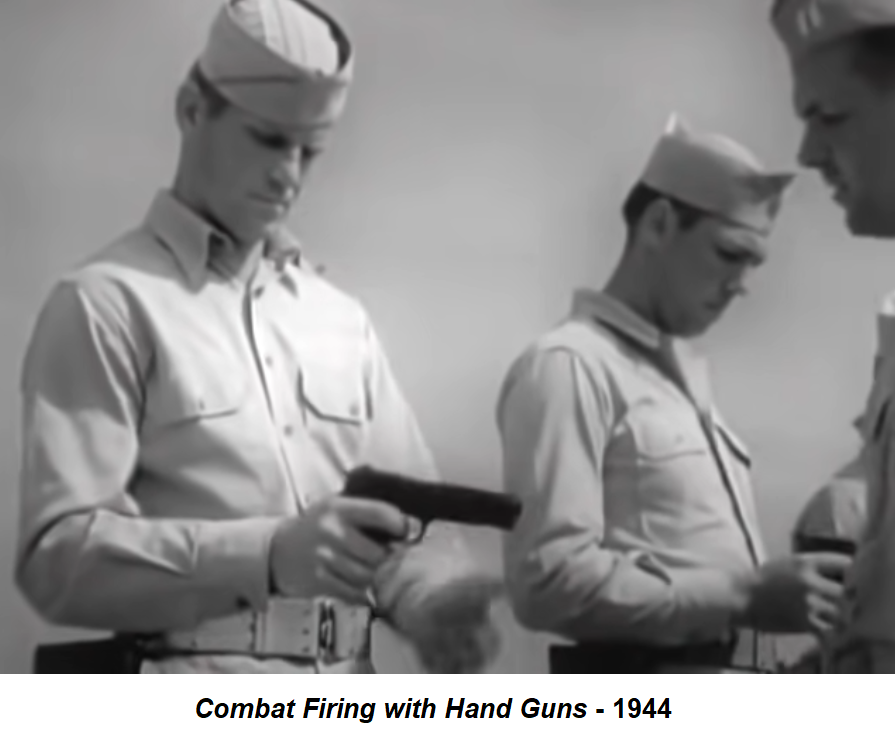
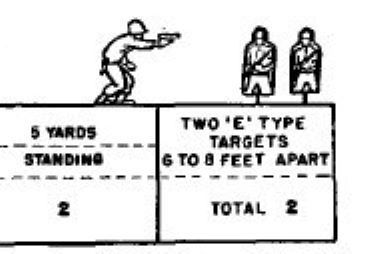
While the hit standards Shooting to Live and Field Manual 23-35 Pistols and Revolvers (1946) establish are rudimentary, they do give new shooters an idea that they’re supposed to actually hit something when shooting. The standard in Shooting to Live is 50 percent hits on a silhouette for single presentations within Social Space (4 yards). The 1946 US Army standard was 100 percent hits for single presentations on an E Silhouette at 5 yards.
Although most proficient shooters today would consider the techniques obsolete and the standards mediocre, at best, they’re still better than practicing what’s seen on TV and in movies. TV and movies are where most gunowners’ training takes place and that’s bad news.
If you would like to follow my Patreon page to go into more depth about point shooting and personal protection incidents, click on the image below.
Friday Fundamentals
To kick off my new Fundamentals of Pistol Shooting Tier https://www.patreon.com/TacticalProfessor?fan_landing=true on Patreon, I’ve chosen to use the Dry Practice Circle Drill.
The kickoff post is available to the public without subscribing. https://www.patreon.com/posts/64582173
I’m excited to offer this Tier so that for $1 a month people can learn how to shoot better than this and it won’t take years to do.
Training the trigger finger
#fridayfundamentals
The trigger finger should move back as parallel to the bore as possible when pressing the trigger. Here’s a little exercise I designed at the elite Rogers Shooting School to help our clients practice moving the finger correctly. It requires no equipment and gives biofeedback on your performance. It is also the safest form of dry practice, other than from quizzical looks by others.
For revolver shooters, this is a powerful learning exercise.
I enjoy wearing my NRA Certified Instructor cap when I’m teaching, even when it’s not an NRA class. 🙂

You must be logged in to post a comment.