Practicing the First Shot
This really should be #fridayfundamentals but I feel compelled by some recent conversations to send it.
As I mentioned previously https://tacticalprofessor.wordpress.com/2021/04/09/the-importance-of-the-first-shot/, the importance of the first shot shouldn’t be underestimated. How to practice that remains a bit of mystery when people are shooting. Shooting multiple shot, often full magazine, strings of fire is the most common way people practice. Unfortunately, that masks the result of the first sight picture and trigger press.
For new shooters, we also need to keep in mind the concept of ‘progression,’ which is a fundamental concept of two of the world’s elite shooting schools, the Rogers Shooting School https://rogersshootingschool.com/ and the Mid-South Institute of Self-Defense Shooting https://weaponstraining.com/ .
The concepts of First Shot Drill and progression can be easily combined. Consider a series of Levels for hitting with the first shot. Start out at the 3 yard distance.
- Level 1 – hit a silhouette consistently
- Level 2 – hit a sheet of paper consistently
- Level 3 – hit a half sheet of paper consistently
- Level 4 – hit a quarter sheet of paper consistently
Shoot each Level using a progressively difficult start position; Low Ready, Midpoint of the drawstroke, and from the Holster.
You can use any silhouette you like. Having a face, a weapon, and an aiming point is more important than the type of silhouette used.

For those who don’t have access to or don’t wish to purchase a silhouette, a perfectly acceptable substitute can be made out of posterboard.

Start by doing dry practice. Level 1 would look like this.
My colleague Lee Weems https://thatweemsguy.com/ made an incisive comment at the Tactical Conference.
Enough Force used soon enough means less force used later.
Lee Weems
That could also be paraphrased as ‘a good enough hit with the first shot means less shooting later.’
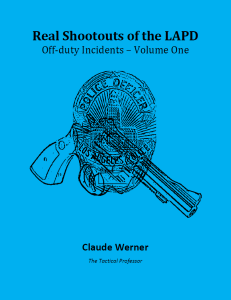
If you would like to purchase my book about actual shootouts that are not a figbar of someone’s imagination, click on the image below.
The Importance of the First Shot
#fridayfundamentals
Some principles are just as fundamental as is technique. One of the unintentional themes of the 2021 Tactical Conference was the importance of the first shot. One class even had that as its title. Several other instructors touched on it as part of their classes and presentations.
Rolf Penzel and Mike Treat titled their class Making the First Shot Count.
John Murphy made the comment “It’s not a ‘one shot drill,’ it’s a ‘first shot drill’” in his class.
During his presentation Secrets of Highly Successful Gunfighters, Darryl Bolke stated “training efficiency means using the sights.”
Chuck Haggard used the term “Target Picture” to illustrate the concept of placing the sight picture on the part of the target we want to hit initially.
In his AIWB Skills class, John Daub instructed his clients to “think about where you want the muzzle to end up” at the conclusion of the draw.
Scott Jedlinski’s comment “The original 1911 sights were suggestions” in his class was a humorous illustration of why point shooting was so common in days gone by. Tom Givens has also written about the dismal quality of factory sights on pistols and revolvers of yesteryear and how that affected technique training of a century ago.
One of trends that is apparent in the Categorical Use of Force Reports by the LAPD is how often one or two shots solve the problem. This is true through the entire database of over 1,000 incidents, not just the off-duty incidents chronicled in my first book about LAPD Shootouts. LAPD’s emphasis on marksmanship and frequent scored qualification is no doubt responsible for this difference from other large departments that have minimal standards.
In a gunfight, the shooter who first scores a hit above the diaphragm of his opponent is the one who seizes the initiative in the incident. Making a good hit with the FIRST SHOT fired is key to seizing the initiative and then retaining it until the incident is over. No one’s performance improves after he gets shot in a vital area.
In terms of operationalizing this principle, the fact that most common autoloaders don’t have a second strike capability during dry practice becomes irrelevant to the fundamental of making a good hit with the first shot. Your dry practice should mostly focus on the first shot anyway.
During live fire, the majority of our practice should be ‘first shot drills.’ Do a little recoil management practice but don’t overestimate its priority relative to the first shot in the real world. As John Farnam put it, “Our desired range product is victory.”
If you would like to purchase my book, click on the image below.
Decisions and experience
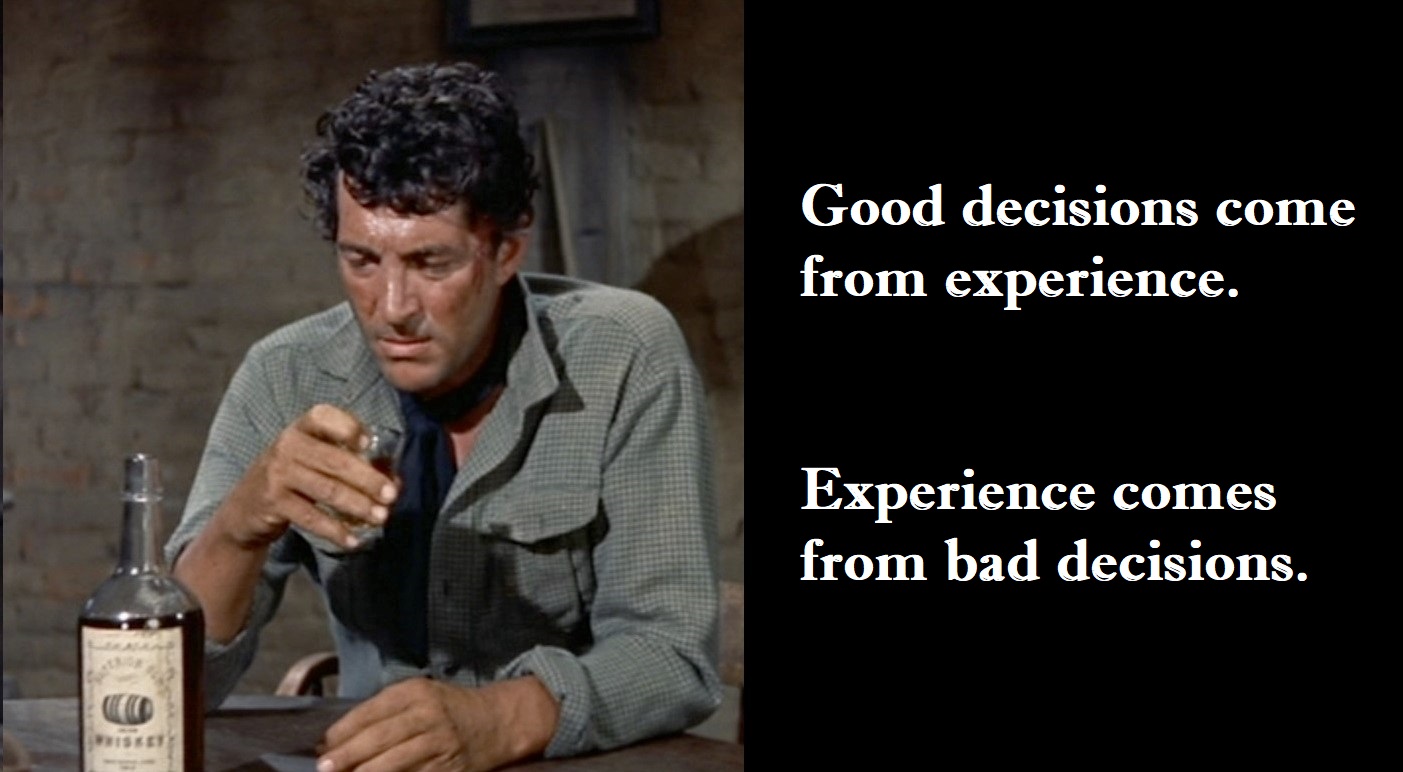
Good decisions come from experience. Experience comes from bad decisions.
Although incorrectly attributed to Will Rogers, the concept of learning from other peoples’ experience rather than our own still has value. We can use the Intelligence community’s technique of ‘walking back the cat’ to de-construct an incident. This allows us to visualize it and learn from the experience of someone else.
The concept of ‘Decision points’ has been emphasized by both Gary Klein, PhD., a noted expert on the decision-making process, and President George W. Bush. Any drama contains not just one, but a sequence of decisions and decision points we can study.

The Don’t Shoot/Shoot decision is the one most commonly focused on the training and firearms communities. However, any Defensive Gun Use, whether shots are fired or not, contains a plethora of decisions and decision points. These occur before, during, and after the shooting or display of a firearm takes place.
A rich source for walking back the cat is the Categorical Use of Force reports by the LAPD Board of Police Commissioners. The following is an analysis of one incident by an off-duty LAPD officer. The analysis will use the phases of an incident as described in my book Real Shootouts of the LAPD. http://realshootoutsofthelapd.com
The incident began as an Aggravated Assault on an LAPD off-duty officer. The full report by the Board of Police Commissioners, including its Findings about Tactics, Drawing and Exhibiting of a Firearm, and Use of Lethal Force can be found here. http://www.lapdonline.org/assets/pdf/011-11_Harbor-OIS.pdf
Incident Summary
The Situation
Officer A, who was off-duty, walked to his vehicle parked in the driveway of a residence. He did not see anyone around at the time. His duty weapon was in the right front pocket of his pants. After driving out of the driveway, he backed his vehicle up and left the lights on. He then walked back to the gate to close it.
- Decision point — Leave home armed with his weapon on his person or at least accessible? Even for POlice officers, this is not as absolute a decision as it would seem, as can be seen in other LAPD off-duty incidents.
- Decision point — Close gate (initial entry barrier to home) or not? As mundane as this decision seems, many people leave their garage doors open when they drive away from their home.
The Buildup
Officer A saw the Subject walking on the sidewalk coming toward him. The Subject then began to run toward Officer A. As the distance to the Subject became closer, Officer A saw the Subject had a handgun in his hand. The Subject pointed the handgun at Officer A.
- Decision point — Maintain awareness of surroundings or focus on telephone or other attention divider?
- Decision point — Maintain surveillance on the suspect or not?
- Decision point — Recognize and accept that an armed attack is imminent or not?
Drawing and Exhibiting
Officer A drew his service pistol from his pocket.
- Decision point — Draw own pistol or not?
The Gunfight
Immediately after drawing his pistol, Officer A fired one round at the Subject.
- Decision point — Don’t Shoot or Shoot?
- Decision point — Fire in place or Shoot on the Move?
- Decision point — Obtain an adequate sight picture to make a hit or fire without visual reference?
The Subject seemed unaffected, so Officer A fired a second round at the Subject.
- Decision point — Don’t Shoot or Shoot a second time?
- Decision point — Fire in place or Shoot on the Move?
- Decision point — Obtain an adequate sight picture to make a hit or fire without visual reference?
After running past Officer’s A car, the subject collapsed on the sidewalk behind a short block wall.
Post Gunfight Actions
Because he could not see him and wanted to wait for responding officers to arrive, Officer A did not approach the Subject.
- Decision point — Approach the suspect or not?
Officer A retreated to cover at the house and called 911.
- Decision point — Hold position or retreat to cover?
- Decision point — Call 9-1-1 or do something else?
While he was calling 911, Officer A observed another male come over to the Subject, squat down, then stand up and adjust his shirt. The second male then walked away.
- Decision point — Interact with/challenge the secondary suspect or not?
Two other males walked to the fallen Subject, leaned over to look at him, and then walked away.
- Decision point — Interact with/challenge the tertiary suspects or not?
There are also implied decision points subsequent in the drama but were not elaborated on by the BOPC.
- Actions on approach of responding officers.
- What statements, if any, should be made to responding officers and then to detectives.
- Whom else to notify about the incident; Significant Other, etc.
- Retain an attorney or call pre-paid legal assistance plan.
At least 21 decisions/decision points are readily discernible in this incident. There are perhaps even more, despite this being a relatively uncomplicated DGU. Also note that of the 21, only six (Don’t Shoot or Shoot [X2]), (Fire in place or Shoot on the Move [X2]), and (Obtain an adequate sight picture to make a hit or fire without visual reference [X2]) can be readily practiced with live fire. Those and another, (Draw own pistol or not) can be practiced dry. The other two-thirds of the decisions are more in the nature of ‘soft skills’ that are best decided upon in advance and then practiced away from the range.
“Best decided upon in advance and practiced away from the range” represents our opportunities during the current ammo shortage. Rather than sit on our hands because ammo has become so precious, we can begin developing and practicing a more complete repertoire of the skills we need for Personal Protection. If you would like to read my analyses of the rest of the incidents described in the book, please subscribe to me on Patreon. Patreon link I will be posting the rest of them there.

Dry Practice on the Road
#safetysunday
When traveling, we can still do our dry practice. In fact, it may be more important when traveling than any other time. We’re more vulnerable and lack the underlying knowledge of our surroundings that we have during our usual activities in our home area.
Since we’re not at home, some of our usual safety protocols may not be available to us. For instance, our usual safe practice area is no longer available to us. Also, if our home practice regimen involves using a target that is generally concealed unless we are practicing, that will not be an option.
These limitations mean we have to use alternate safety protocols for our dry practice. Having an Unintentional Discharge in a motel room or in the home of a friend or relative will certainly lead to a Negative Outcome. Anyone who has run a major firearms training facility has stories of clients who had UDs in their motel rooms and the consequences. At the very least, the POlice will become involved to some extent. At worst, someone is killed and the consequences are grave. Having a UD in a friend or relative’s home may not result in POlice involvement but is unlikely to have a positive effect on the relationship.
Some of our home protocols can be modified but still used to some extent. The most important thing to remember is that safety protocols have the same importance when we are on the road as when we are at home.
In terms of the practice area, we want to choose the least dangerous direction for our practice. Depending on the nature of the building’s construction, a bullet resistant wall simply may not be available. In that case, we must choose the direction that is least likely to result in a casualty if a round is fired. A bullet hole in a door that opens out to a brick wall has less consequences than a bullet hole in a guest in an adjoining room. Consider carefully where an errant bullet might go before choosing your practice direction.
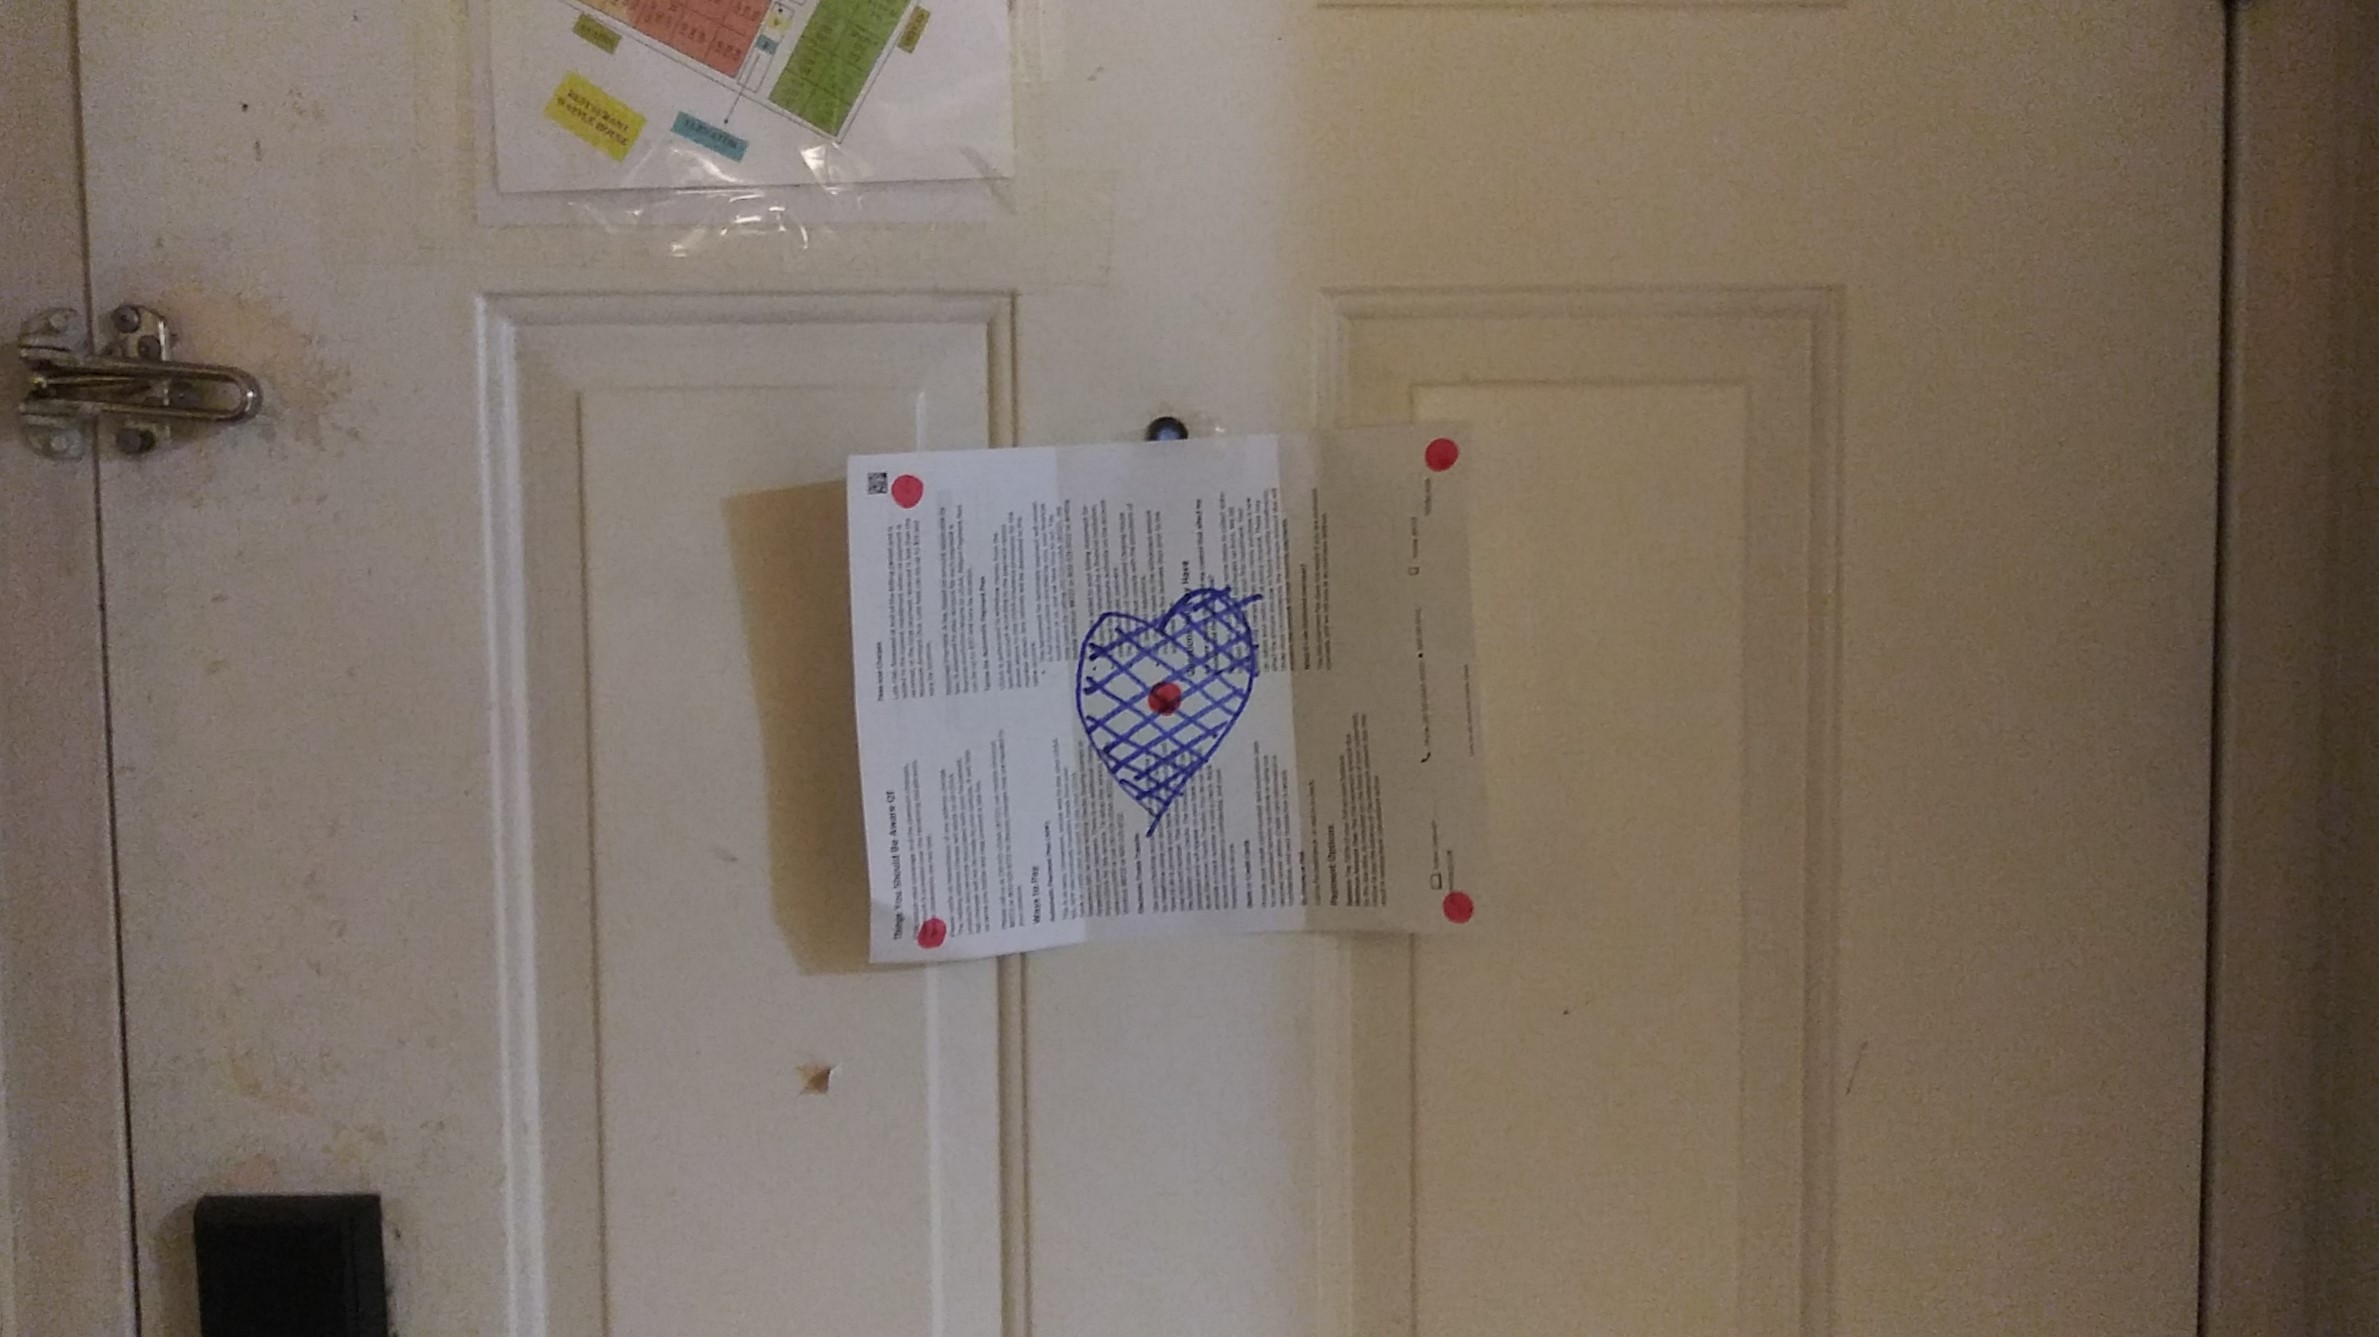
Next, use a target. A sheet of paper with a heart drawn on it is a good target for a ‘3 shots in 3 seconds at 3 yards’ Even more about Skill Development practice regimen. Putting a few small spots on it provides targets for precision aiming and trigger practice work.
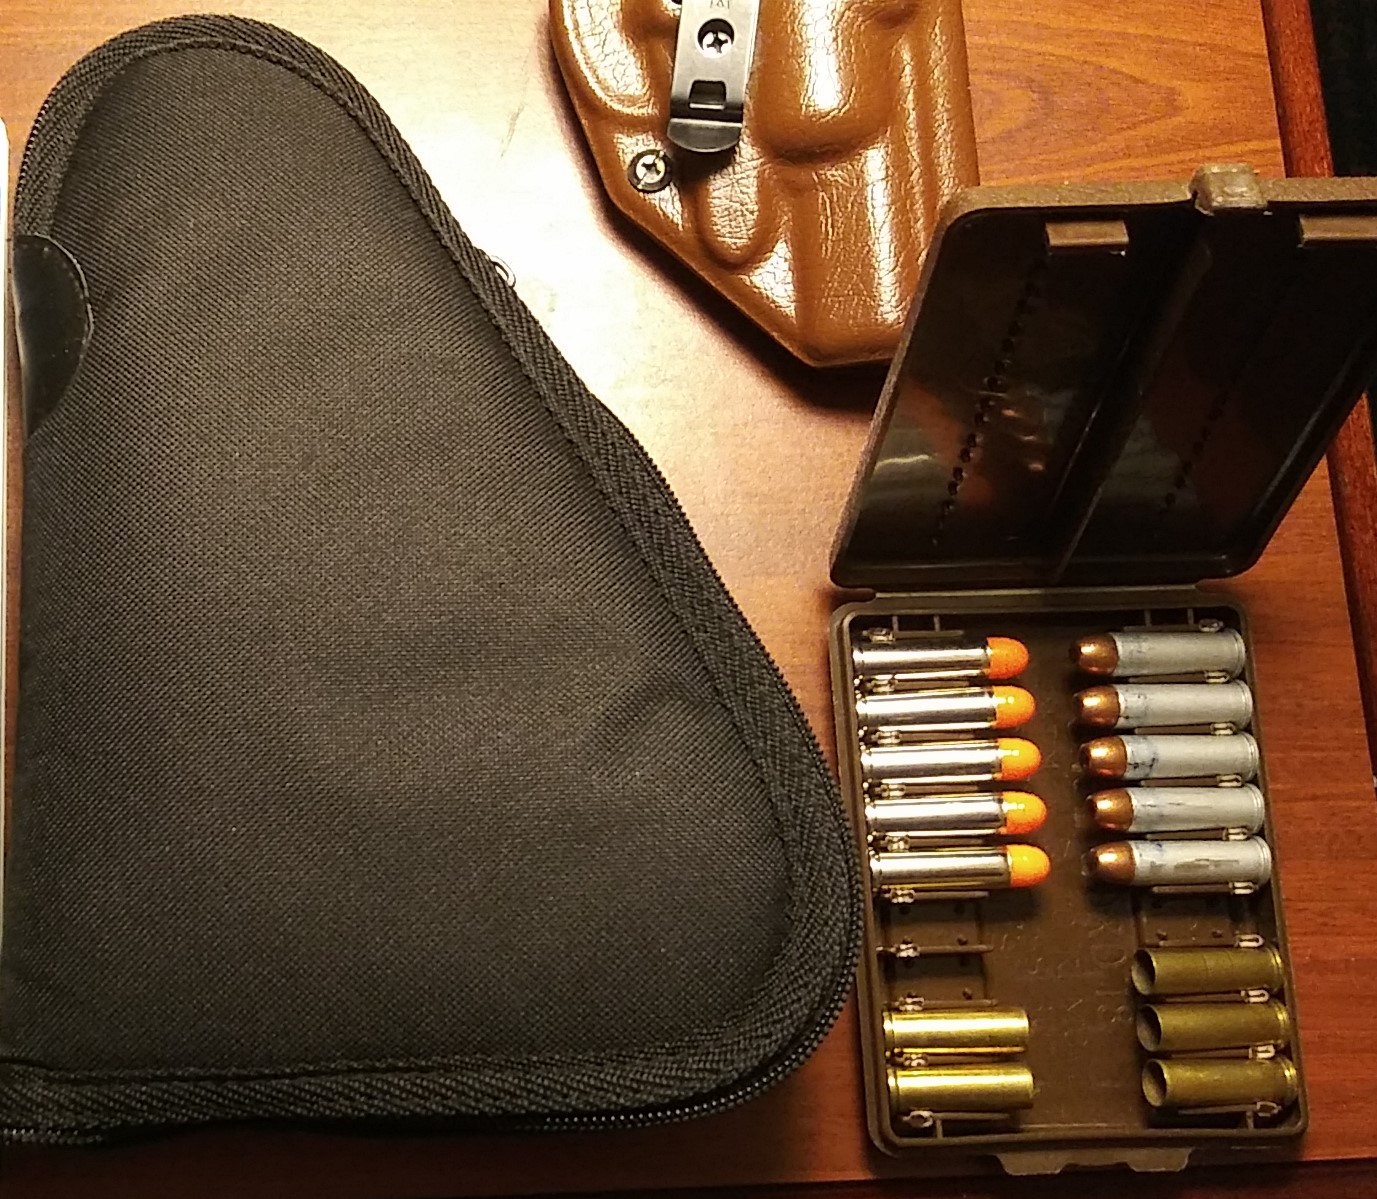
A few easily carried training aids are useful for ensuring safe practice with a revolver. The first is inert ammunition. Three different types of inert ammunition are easily carried in an 18 round MTM Ammo case. The Ammo Case is itself a part of the safety protocols.
The first training aid is snap caps. Different varieties are available. If the primer pocket isn’t filled, such as with the ST-Action Pro inert ammo, you can fill the pockets in with a hot melt glue gun and trim the excess off. This will protect the firing pin or hammer nose of your revolver. Good snap caps are easily identifiable by their color. A-Zoom has recently started making their snap caps in orange, which are more identifiable when loaded in a blue steel gun than the darker A-Zoom offering. The spring loaded primer type of snap caps have a limited service life and are not recommended for serious practice.
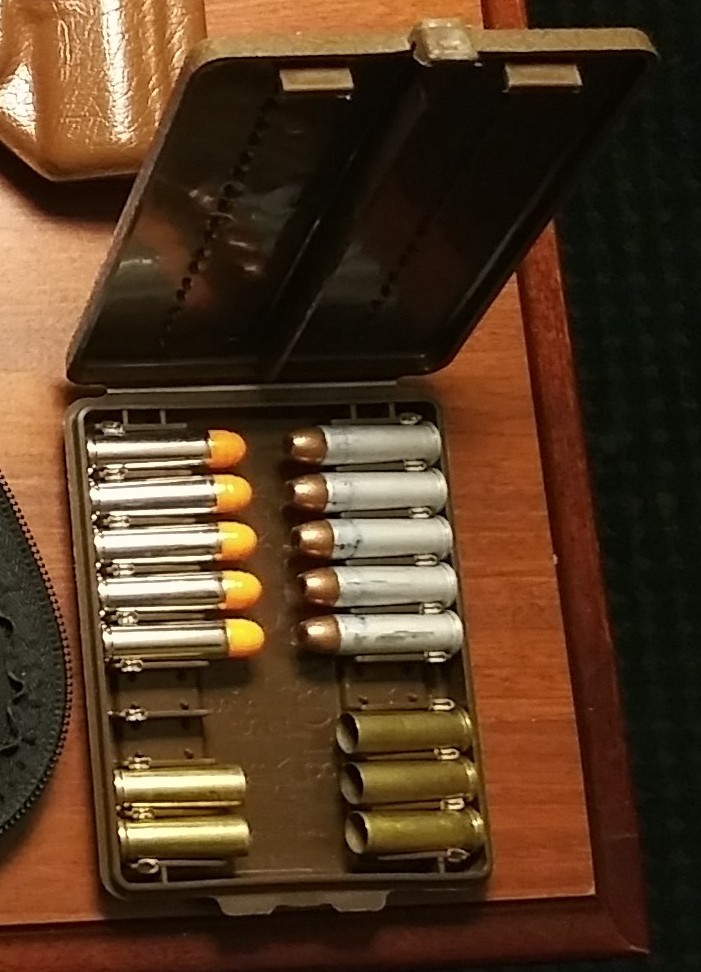
After unloading the revolver, replace the live ammunition with snap caps. Since two objects cannot fit in the same place at the same time, this precludes leaving one live round in the cylinder, which is not an unknown occurrence, as gunowners sometimes discover. After the snap caps have been loaded into the revolver, put the live ammunition in the Ammo Case and count the number of rounds. If the rounds you place in the case are less in number than the capacity of your revolver, the FBI calls that ‘a clue.’
A second training aid is full weight dummies for reloading practice. Snap caps are a good safety aid and for protecting the revolver, however, they usually lack the weight necessary for effective reloading practice. Dummy ammo should be easily identifiable, which is often a problem with homemade dummies. The dummies in the picture were made from Blazer Aluminum cases scrounged from a local indoor range. The bullet noses and cartridge base are colored blue with a Magic Marker for additional visual identification.
The third training aid is fired cases. Reload practice with revolvers should always include getting the empty cases out in addition to reloading with fresh ammo/dummies. A new speedloader manufacturer that was displaying at the SHOT Show years ago failed to consider this in their demonstration. When asked how the empty cases were to be ejected while holding the revolver in one hand and the speedloader in the other, a blank stare was the only answer.
A pistol case is another training aid for practice on the road. The pistol case is for placing the pistol in after the practice session has been finished and the gun reloaded.
The sequence for finishing the session is:
- Declare out loud “This session is finished.”
- Take the target down.
- Remove whatever snap caps/dummies/fired cases are in the gun.
- Set the gun down completely empty.
- Again, declare out loud “This session is finished.”
- Load the pistol with live ammunition.
- Place the loaded pistol in the pistol case. The case does not have to be complete zipped but should be at least partially. This is a visual and situational indicator that the gun is loaded and not available for practice.
- Do something else to remove dry practice from your thoughts.
Reading something dry and difficult is a good way to remove dry practice from your thoughts.
Keeping an awareness of safety in mind allows us to maintain our proficiency on the road without menacing innocent people around us.
The circumstances of Unintentional Discharges at home are covered as the third Section of Real Shootouts of the LAPD. Off-duty Officer Involved Shootings and Officer Involved Animal Shootings are the first two. If you would like to purchase the book, click on the cover below.
What does effective Dry Practice actually look like?
#fridayfundamentals
Since many people have never seen a structured Dry Practice session, here’s an example.
This session uses a State’s (Louisiana) Concealed Handgun Permit Qualification Course as the basis for structuring the session. Having a structured Dry Practice session accomplishes several objectives. Among them are safety, avoiding “grabasstic gun clicking,” and effective time management, among others.
Although the session seems simplistic, the way it is structured provides multiple repetitions of at least 10 different skills that are common in Defensive Gun Uses. In his groundbreaking book How to Win Friends and Influence People, https://www.amazon.com/gp/product/B003WEAI4E/ Dale Carnegie wrote,
“Remember that the use of these principles can be made habitual only by a constant and vigorous campaign of review and application.”
Those words are every bit as true for physical skills as they are for human relations skills. The way we learn to do things competently by practicing them repetitively. As an aside, human relation skills can be very useful in defusing bad situations and Carnegie’s book is well worth reading for general interest.
Skills practiced in the session
- 36 Good First Round Hits.
- Good, for my purposes, means creating a serious enough wound that the shootee has to go to a hospital to seek medical treatment. At that point, the POlice will start asking those uncomfortable questions about how he got the wound. More about that definition in the next #mindsetmonday.
- There are several subsets of getting ‘Good First Round Hits’.
- 36 Presentations into the Eye-Target line
- 36 Sight Acquisitions
- 36 Smooth enough trigger presses
- 36 Follow-throughs
- 33 repetitions of Forming the Grip quickly
- 36 repetitions of Racking the slide in a safe (muzzle downrange) manner.
- 3 Draws to Ready
- 3 ‘Draw but DON’T SHOOT YET’ Decisions
- 3 Safe Re-holsters
- 33 repetitions of Return to Ready
- 3 magazine exchanges
- 1 Reload with Retention
- 2 Tactical Reloads
- 36 Deliberate SHOOT Decisions
- 36 Shot Analyses (Read the Sights)
- 3 Spatial Analyses (6 feet is in the Close Phase of Social space, 10 feet is in the Far Phase of Social space, and 15 feet is in the Close Phase of Public space) https://en.wikipedia.org/wiki/Proxemics and how they affect your shooting.
The TRT (Tap-Rack-Training aid) mentioned is available on Amazon https://www.amazon.com/Pack-Safety-Training-Pistol-Magazine/dp/B07CNBDHSB Using it is much easier the making the UN (inert and doesn’t work) magazines that were its inspiration.
Image Based Decisional Drills https://www.imagebaseddecisionaldrills.com/ provided the face on the target. A face is available for download in the Downloadables section of their website.
Using a Qualification Course as the basis for a Dry Practice Session and Regimen is an effective way of maximizing the value of your effort. For those who plan to obtain a Weapons Carry License in a State that has a Qualification requirement, it is also useful as an introduction to the structure of pistol qualification, even if the Course used is not the same.
Today’s Patreon https://www.patreon.com/TacticalProfessor post will go into more detail about structuring Dry Practice for maximum effectiveness.
FTC note: I receive no compensation for the product links in this post.
Fundamentals of dry practice
Although dry practice (aka dry fire) is often recommended, many shooters are unclear about the specifics of dry practice. Here is a short video, first in a series, to get gunowners started.
This series will include a video about safety procedures and a few sessions. I hope it will be useful to my readers and clients.
If you enjoy my content, please consider supporting me on Patreon. I post more in-depth material there for serious students of Self-Defense and Personal Protection.
Your Best Defense: Staying Out of Trouble
I was able to spend some time talking with Michael Bane last week about ‘Staying Out of Trouble.’ That means emphasizing the ‘Avoid’ and ‘Escape’ steps in the Avoid, Escape, Confront, Resist paradigm.
We had a great conversation that will be of interest to new gunowners, those who have been at it as long as Michael and I, and everyone in between.
Tactical Professor books (all PDF)
- Serious Mistakes Gunowners Make http://seriousgunownermistakes.com
- Indoor Range Practice Sessions http://indoorrangepracticesessions.com
- Concealed Carry Skills and Drills http://concealedcarryskillsanddrills.com
- Advanced Pistol Practice http://bit.ly/advancedpistolpractice
- Shooting Your Black Rifle http://shootingyourblackrifle.com
- Package deal of Serious Mistakes, Indoor Sessions, Concealed Carry, and Shooting Your Black Rifle (20% off) https://store.payloadz.com/details/2644448-ebooks-sports-shooting-drills-package.html
Downrange drill target
My only question is whether you might have an alternate suggestion for target set up comparable to the one in this post and the one before. I shoot at two restrictive ranges without the ability to shoot targets spaced as indicated in your diagram.
Almost all indoor ranges are restrictive that way. There are still things you can do even if you can’t accomplish everything you’d like.
This is a target from my upcoming Dry Practice book you can print on letter size paper.

Downrange drill target
Tape it to the head of a silhouette target. It is anatomically sized correctly by using the ocular distance indicated by the line with arrows on the male mugshot of Dennis Rader, the notorious BTK Killer. https://www.biography.com/crime-figure/dennis-rader The dashed circle is sized to four inches in diameter. The pretty lady is a mug shot too, unfortunately, but she serves the purpose of occupying the place of a NO SHOOT.
Place the target at 10 feet, which is the mid-point of the far phase of Social Space in Proxemics. The object of the drill is to place one round in the circle as rapidly as you can. Do it five times in a row. If you hit the lady, you’ve shot a loved one; consider that in your evaluation of your abilities. As Dirty Harry said, “A man’s got to know his limitations.”
Even if you don’t have a lot of flexibility at your practice range, there are still things you can do to up your game.
Tactical Professor books (all PDF) (not Free)
- Real Shootouts of the LAPD http://realshootoutsofthelapd.com
- Serious Mistakes Gunowners Make http://seriousgunownermistakes.com
- Indoor Range Practice Sessions http://indoorrangepracticesessions.com
- Concealed Carry Skills and Drills http://concealedcarryskillsanddrills.com
- Advanced Pistol Practice http://bit.ly/advancedpistolpractice
- Shooting Your Black Rifle http://shootingyourblackrifle.com
- Package deal of Serious Mistakes, Indoor Sessions, Concealed Carry, and Shooting Your Black Rifle (20% off) https://store.payloadz.com/details/2644448-ebooks-sports-shooting-drills-package.html
Dry Practice Safety – Part II
#fridayfundamentals
The LAPD Categorical Use Of Force report about the UD of a snub revolver https://lapdonlinestrgeacc.blob.core.usgovcloudapi.net/lapdonlinemedia/2021/12/040-19-PR-NTUD.pdf generated a fair amount of interest. Here’s a follow-on idea.
These three Lessons To Be Learned From The Incident were mentioned last time.
- While we sometimes have to perform administrative functions with our guns, those administrative actions should mimic our actual handling and firing procedures, whenever possible. In this case, ejecting the rounds straight down as if getting ready to reload would be a better procedure.
- Count the rounds when they come out of the revolver. You should be aware how many chambers your revolver has. Five chambers but only four rounds indicates a problem. Note that a nickel plated single round in the cylinder of a stainless or anodized revolver is not necessarily immediately obvious. By counting the rounds and then carefully examining the cylinder, the chances of a round remaining in a chamber is mitigated.
- Dummy ammunition not only protects the firing pin, hammer nose, or striker of a handgun during dry practice, it also provides an additional layer of safety during the practice session. If a visually identifiable dummy is in the chamber(s), then a live round cannot be. This is also physics. Dummies are available from A-Zoom and ST Action Pro. They can be found on Amazon or better gun stores.
Keeping a speedloader filled with dummy rounds accessible allows you to accomplish all three of these tasks. You could do the same thing with a Speed Strip, pouch, or loops.
![]()
- Put your speedloader where you might carry it. If you don’t habitually carry a speedloader for your reload, just put it in your pocket.
- Eject the live rounds from your revolver on the ground.
- Reload with the dummies using the speedloader.
- Holster your revolver.
- Put the live rounds in the speedloader and secure it with your other live ammunition.
- Go to your dry practice area, which is a place where there is no live ammunition.
- When you have finished your dry practice, put your revolver away without reloading it.
- Do something else to remove dry practice from your thoughts.
- When dry practice is distant from your thoughts, reverse the reloading process and reload your revolver with the live ammunition. Replace the dummy rounds in the speedloader. This gives you a reminder that your revolver is now loaded with live ammunition.
- Put your revolver away or immediately exit your home to preclude the last repetition that makes a loud noise.
Using this procedure helps protect you, your gun, and gets in two good reloading repetitions.
Tactical Professor books are NOT FREE but if you would be interested in knowing how to better operate the firearms you own during the American Insurgency, they can be purchased from the menu at the top of the page.
Dry Practice Safety
#wheelgunwednesday
There are many valuable lessons to be learned from the LAPD Categorical Use Of Force reports. http://www.lapdonline.org/categorical_use_of_force Most of those lessons relate to the dynamics of Officer Involved Shootings. However, the reports also provide a detailed account for every Unintentional Discharge by a Los Angeles POlice Officer. This particular incident relates to the UD of a snub revolver.
http://www.lapdonline.org/assets/pdf/040-19%20PR%20(NTUD).pdf
Incident Summary
Officer A brought his/her back-up service revolver home with the intention to clean it.
With the muzzle of the revolver pointed toward the ground, Officer A held the revolver with his/her right hand and used his/her right thumb to push the cylinder release button, disengaging the cylinder from the revolver. Once the cylinder disengaged, Officer A placed his/her left hand under the open cylinder and used his/her left index finger to depress the ejector rod, releasing the live rounds into his/her left hand. Officer A did not count the live rounds and placed them on top of the kitchen counter directly behind him/her. Officer A then closed the cylinder.
Officer A held his/her revolver with two hands in a standing shooting position. He/she raised his/her revolver and pointed it in the direction of the vertical blinds covering a sliding glass doors, which led to an exterior patio. Officer A placed his/her finger on the trigger and pressed it to dry fire the revolver. Officer A conducted two dry fire presses of the trigger.
According to Officer A, he/she normally conducted dry trigger press exercises approximately three times per week, on his/her days off. However, Officer A stated that he/she usually practices with his/her semi-automatic service pistol, and this was the first time that he/she practiced with his/her revolver.
According to Officer A, believing his/her revolver was still unloaded, he/she placed his/her finger on the trigger and pressed it a third time, which caused the revolver to discharge a single round. No one was injured by the discharge.
Los Angeles Board of Police Commissioners’ Findings
The BOPC determined that Officer A’s actions violated the Department’s Basic Firearm Safety Rules and found Officer A’s Unintentional Discharge to be Negligent.
Lessons To Be Learned From The Incident
The value of reading about incidents like this is not to criticize or heap scorn but rather to learn hard lessons from someone else’s Negative Outcome.
- Revolvers have multiple chambers not just one like an autoloading pistol. Especially if the revolver is dirty, either from firing or carrying, it’s not uncommon for one or two rounds to remain in the cylinder when the rest eject. Two factors can contribute to this. One, the ejector rod of a snub is shorter than the cases so it doesn’t push the rounds completely out. Two, gravity has effect when loading or unloading a revolver. If the revolver is not held completely vertical when being unloaded, gravity causes the cases to drag on the bottom of the chambers. This is simply physics in action.
- “Officer A placed his/her left hand under the open cylinder and used his/her left index finger to depress the ejector rod, releasing the live rounds into his/her left hand.” This is pretty much impossible to do with the revolver held vertically. It is also a bad repetition of reloading procedure. While we sometimes have to perform administrative functions with our guns, those administrative actions should mimic our actual handling and firing procedures, whenever possible. In this case, ejecting the rounds straight down as if getting ready to reload would be a better procedure.
- Count the rounds when they come out of the revolver. You should be aware how many chambers your revolver has. Five chambers but only four rounds indicates a problem. Note that a nickel plated single round in the cylinder of a stainless or anodized revolver is not necessarily immediately obvious. By counting the rounds and then carefully examining the cylinder, the chances of a round remaining in a chamber is mitigated.
- Dummy ammunition not only protects the firing pin, hammer nose, or striker of a handgun during dry practice, it also provides an additional layer of safety during the practice session. If a visually identifiable dummy is in the chamber(s), then a live round cannot be. This is also physics. Dummies are available from A-Zoom and ST Action Pro. They can be found on Amazon or better gun stores.
- Dry practice should always be conducted at a specific target located on some kind of bullet resistant backstop. “[V]ertical blinds covering a sliding glass doors [sic] leading to an exterior patio” DO NOT fulfill this requirement.
Dry practice is a valuable way to build skill, especially with a wheelgun. Make sure that you are alert and focused on the task and observe safety procedures rigorously.
Tactical Professor books are NOT FREE but if you would be interested in knowing how to better operate the firearms you own during the American Insurgency, they can be purchased from the menu at the top of the page.

You must be logged in to post a comment.