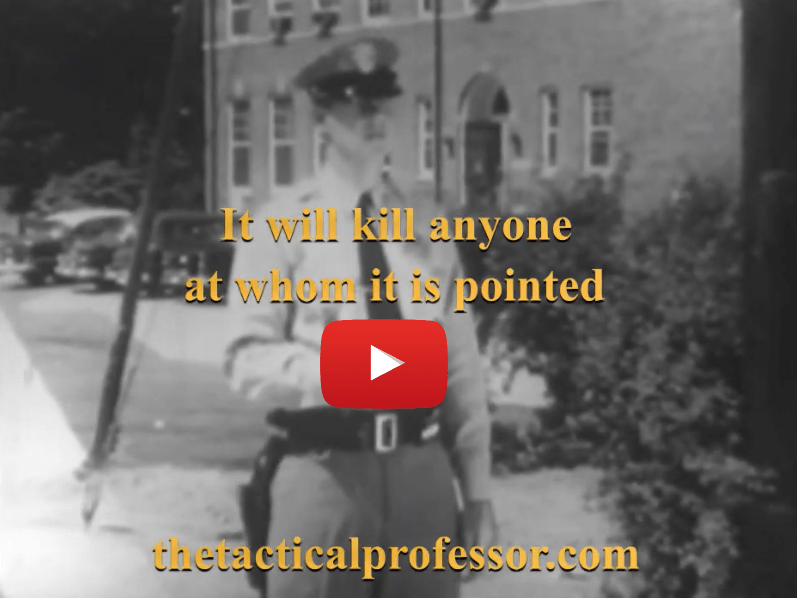
Historical Lessons – Gunpointing
Some lessons stand the test of time. Being prudent about whom guns are pointed at is one.
This is the first in a series of short videos that recall worthy lessons from historical films.
If you would like to purchase my ebook Real Shootouts of the LAPD, click on the image below.
ETA: This was posted on my Facebook page and it’s too good to not share.
Even more about Skill Development
‘three shots, three yards, three seconds,’ https://tacticalprofessor.wordpress.com/2021/02/19/skills-conversation-about-lapd-shootouts/ has generated some good discussion and questions, which makes me happy. Someone posted a question on the Facebook page for Growing Up Guns.
Nothing was said about whether this done from a low or compressed ready, or from concealment, as far as the par time. Being LE based info, I’m assuming this was done from a duty holster. Thoughts?
It’s a progression, just like the size of the target. When someone is first learning to shoot, do it from Low Ready, muzzle below the feet of the target, finger off the trigger. Once a shooter achieves some degree of proficiency, which I would personally define as being able to consistently hit the quarter sheet, then branching can begin. Others might be satisfied with hitting the full sheet consistently as a standard.
There are numerous possible branching variations.
- From the midpoint of the drawstroke.
- From the holster. Take your pick of open, concealed, or Level III Security.
- Primary Hand Only from Low Ready
- Support Hand Only from Low Ready
- Etc.
I use the term ‘midpoint of the drawstroke’ rather than ‘compressed ready’ because I’m not a fan of muzzling suspects prior to making the SHOOT decision. If the bore is parallel to the ground, there’s almost no way to avoid muzzling others. From that perspective, the idea of having the bore parallel to the ground as a ready position is purely “square range” thinking.
For those who are feeling exceptionally froggy, try stacking all three targets on a single silhouette. Shoot all three targets as one string using three round magazines and reloading between targets. Obviously, your time will be more than three seconds. Keep in mind that the second most missed shot is the first shot after a Stoppage Clearance. Reloading is a Stoppage Clearance so you’ll have two opportunities to maintain your focus.
The end outcome, consistent hits on a variable sized target, is the focal point of the drill. There are numerous tasks that can achieve it, most of which have value.
Click on the image below to order Real Shootouts of the LAPD.

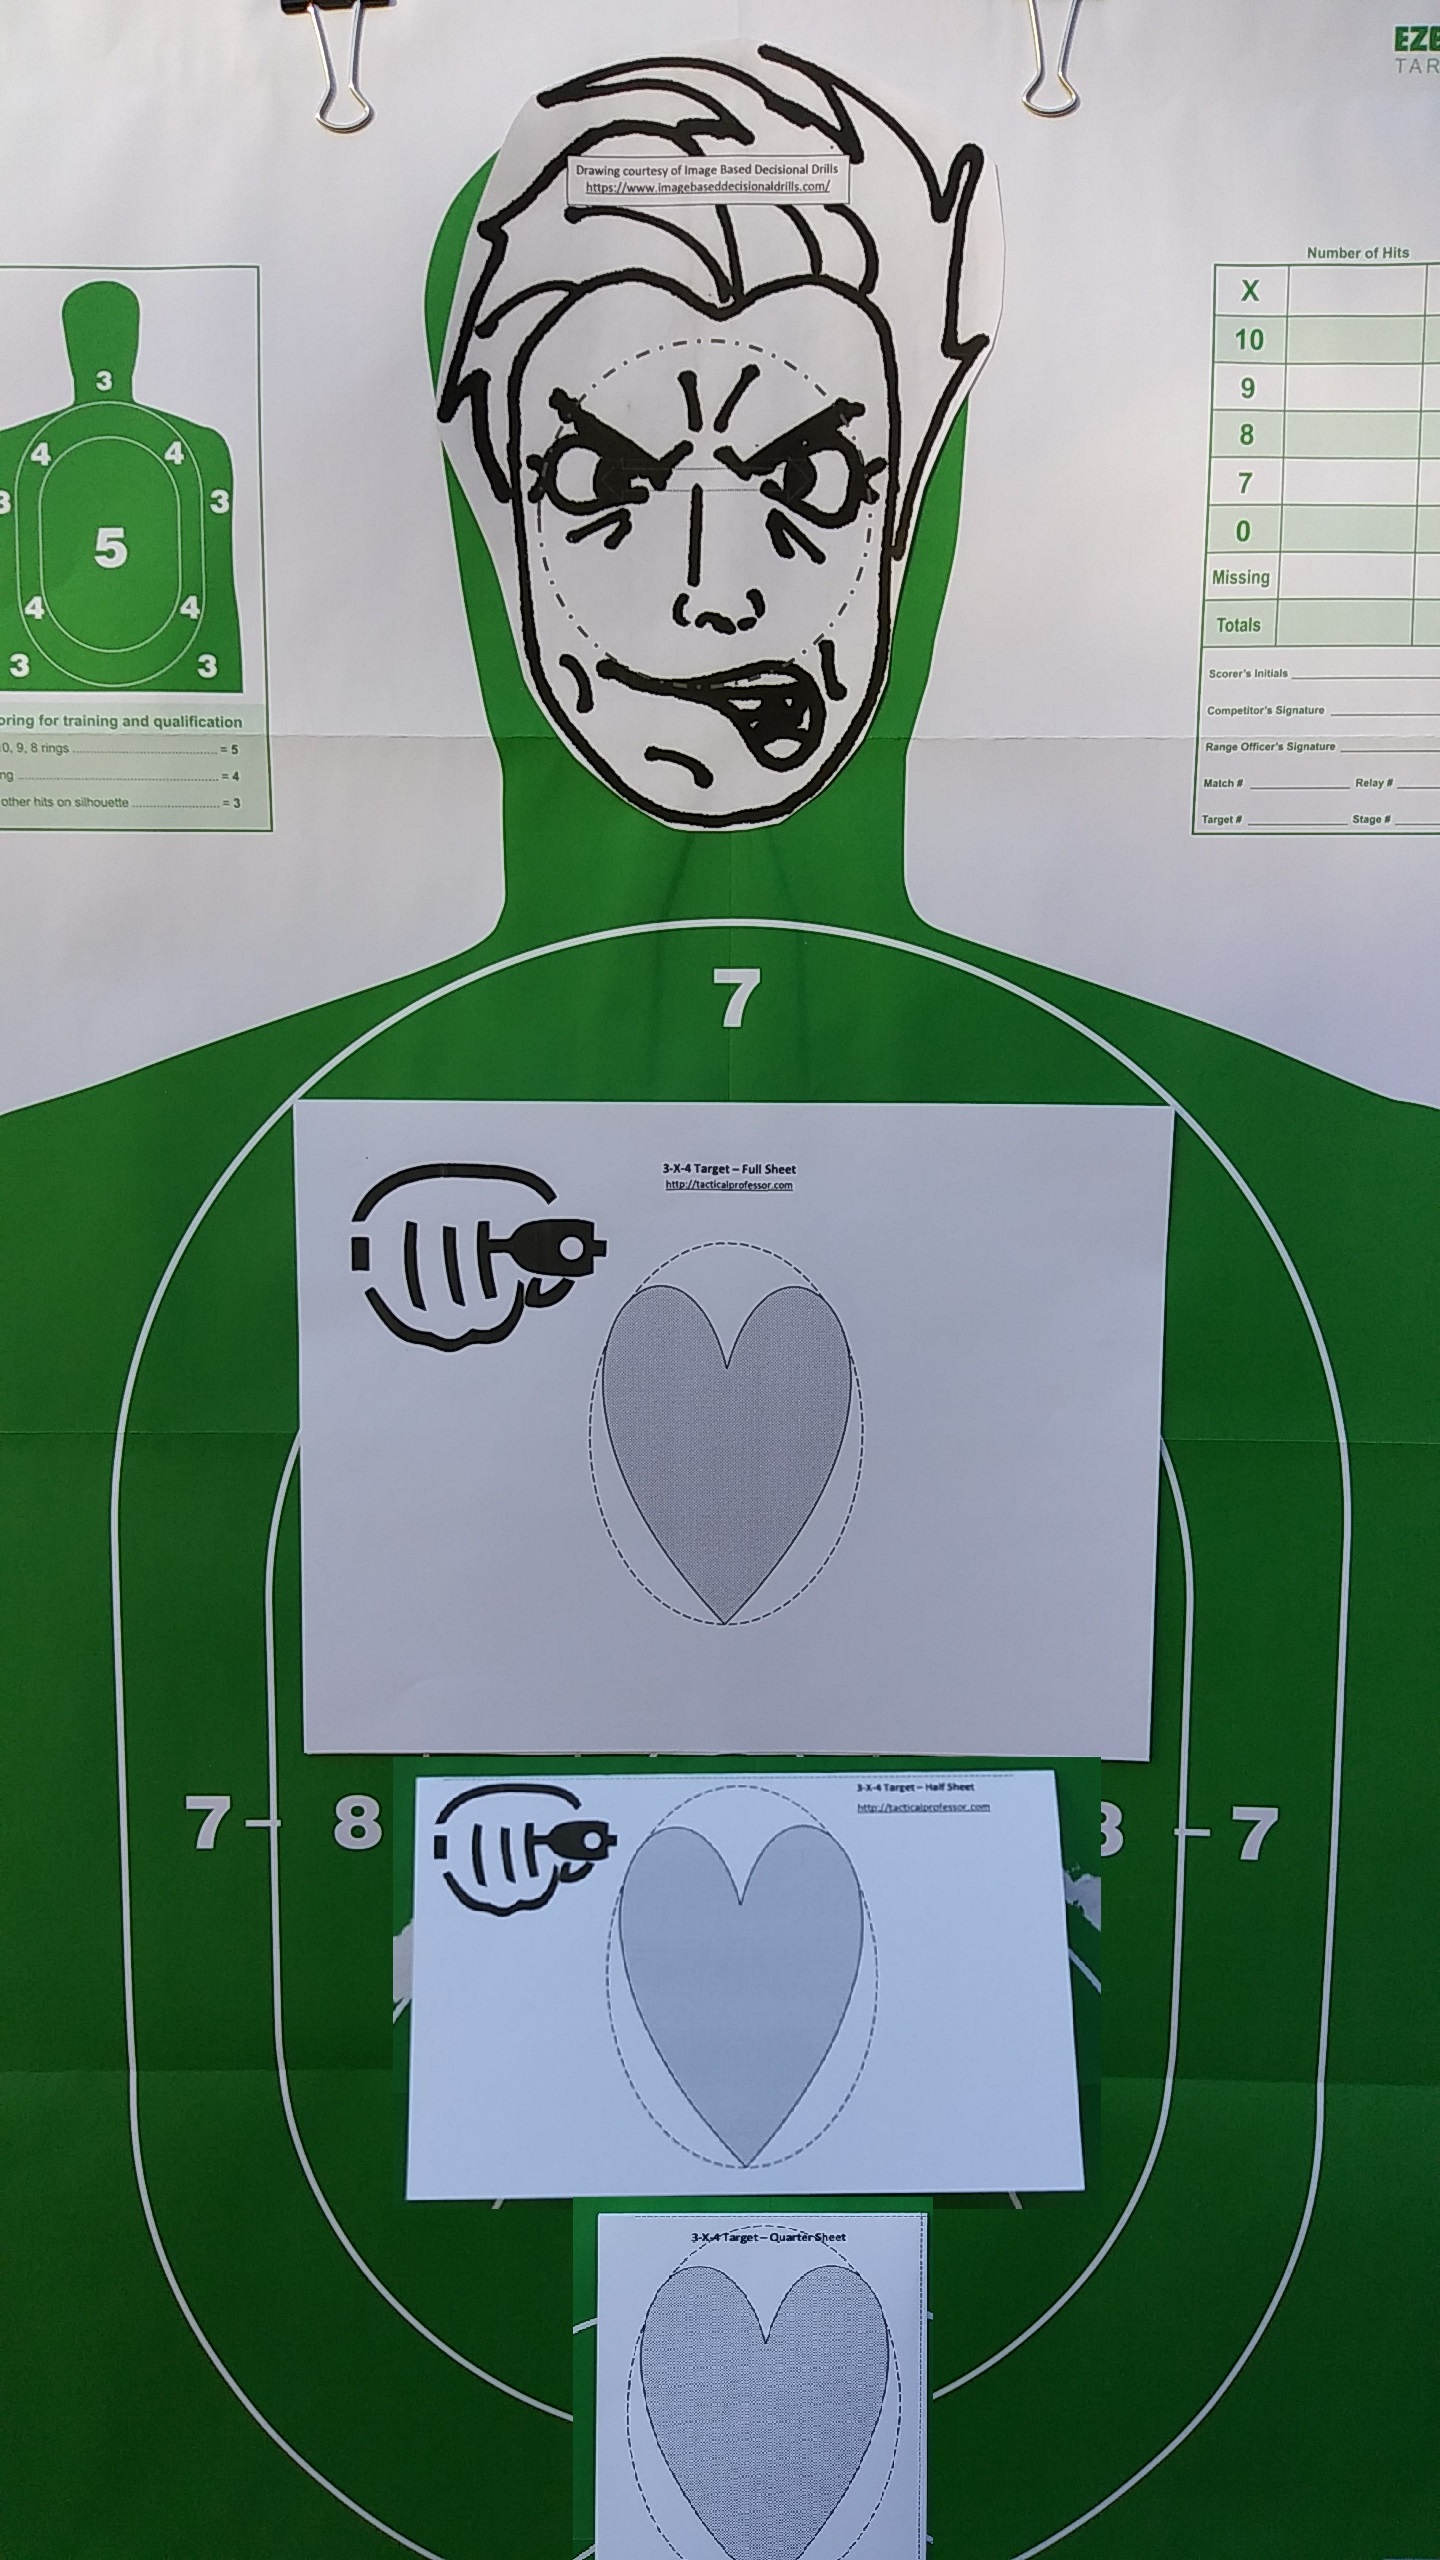
Downrange drill target
My only question is whether you might have an alternate suggestion for target set up comparable to the one in this post and the one before. I shoot at two restrictive ranges without the ability to shoot targets spaced as indicated in your diagram.
Almost all indoor ranges are restrictive that way. There are still things you can do even if you can’t accomplish everything you’d like.
This is a target from my upcoming Dry Practice book you can print on letter size paper.

Downrange drill target
Tape it to the head of a silhouette target. It is anatomically sized correctly by using the ocular distance indicated by the line with arrows on the male mugshot of Dennis Rader, the notorious BTK Killer. https://www.biography.com/crime-figure/dennis-rader The dashed circle is sized to four inches in diameter. The pretty lady is a mug shot too, unfortunately, but she serves the purpose of occupying the place of a NO SHOOT.
Place the target at 10 feet, which is the mid-point of the far phase of Social Space in Proxemics. The object of the drill is to place one round in the circle as rapidly as you can. Do it five times in a row. If you hit the lady, you’ve shot a loved one; consider that in your evaluation of your abilities. As Dirty Harry said, “A man’s got to know his limitations.”
Even if you don’t have a lot of flexibility at your practice range, there are still things you can do to up your game.
Tactical Professor books (all PDF) (not Free)
- Real Shootouts of the LAPD http://realshootoutsofthelapd.com
- Serious Mistakes Gunowners Make http://seriousgunownermistakes.com
- Indoor Range Practice Sessions http://indoorrangepracticesessions.com
- Concealed Carry Skills and Drills http://concealedcarryskillsanddrills.com
- Advanced Pistol Practice http://bit.ly/advancedpistolpractice
- Shooting Your Black Rifle http://shootingyourblackrifle.com
- Package deal of Serious Mistakes, Indoor Sessions, Concealed Carry, and Shooting Your Black Rifle (20% off) https://store.payloadz.com/details/2644448-ebooks-sports-shooting-drills-package.html
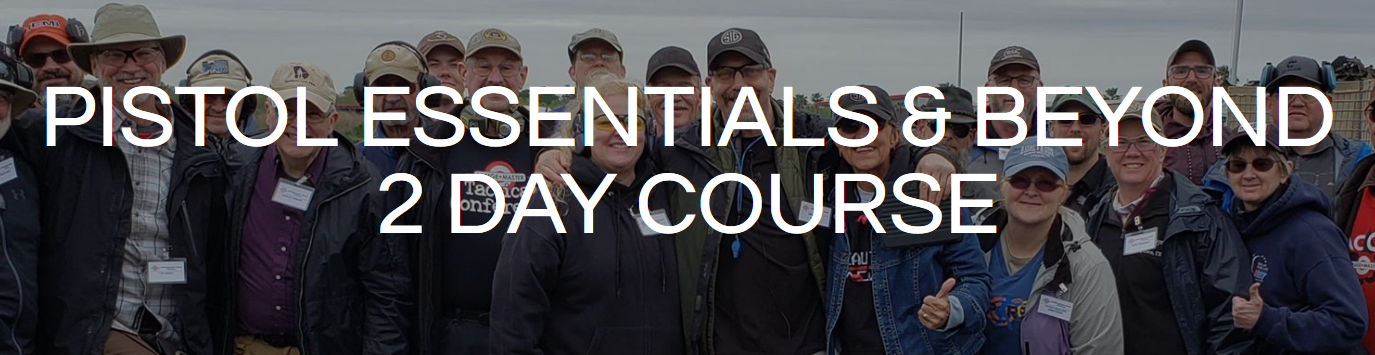
Training Opportunity
Brian Hill of The Complete Combatant will be conducting Pistol Essentials and Beyond in Raymond MS on Saturday, October 26 & Sunday, October 27, 2019. Raymond is just west of Jackson, MS.
As a Rangemaster Certified Instructor, Brian is one of the up and coming trainers in the firearms community. His block of instruction at the 2019 Rangemaster Tactical Conference was well received by all 20 clients who took it. He is a very thorough and patient trainer; a teacher of my own style.
More information about the format and goals of the class is available here. Note that this particular class is in Raymond MS not in Dahlonega GA.
Registration information is available here. https://www.eventbrite.com/e/boondocks-october-26-27-2019-pistol-essentials-beyond-in-raymond-ms-tickets-59855488377
For those interested in moving to the next level in your skill development, I highly recommend this class.
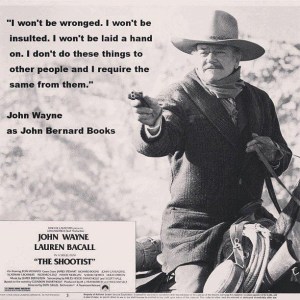
Standards (Part III – Who Sets the Standards?)
I won’t be wronged, I won’t be insulted, I won’t be laid a hand on. I don’t do these things to other people and I require the same from them.
–J.B. Books
When discussing Standards, we should keep in mind that Standards come from several sources.
- Ourselves (personal standards)
- Private Sector (social values and employment criteria)
- Public Sector (legal requirements)
Of those, the standards we set for ourselves are the most important. For instance, I don’t drink if I’m driving. I enjoy having a cocktail but I either have one at home or in the company of a designated driver. That’s my personal standard. In most cases, I could probably ‘get away with’ driving home after I’ve had a drink. However, even if I wasn’t close to the legal limit of intoxication, alcohol consumption reduces the margin of safety I consider acceptable for operating a two ton potential manslaughter machine. Not only is my personal safety at stake but the safety of others. It’s the same reason we accept not handling firearms after consuming alcohol as personal and community standards; to maintain an acceptable margin of safety.
What are some other personal standards that might apply to aspects of personal protection and shooting? A few come to mind immediately:
- Know the rules (law) of where we live and places we travel to.
- Shoot only at positively identified threats.
- Shoot only in a manner we can make 100 percent hits on a threat, thus not endangering innocents downrange. Factors affecting this include:
- Personal skill
- Distance
- Cadence (rate) of fire
- Relationship of the weapon to the eye-target line
My presentation at the Rangemaster Tactical Conference last week was titled Strategies, Tactics, and Options for Personal Protection (STOPP). Since many of us were not from Arkansas, I asked the audience how many of them from out of state had researched the Arkansas statutes about the Use of Force and Deadly Force. Not everyone had. Researching this piece of information took me less than 30 seconds on my phone before I entered the State. Was it a prudent decision to do so? I think so.
Arkansas Code Title 5. Criminal Offenses § 5-2-607. Use of deadly physical force in defense of a person
I’ve harped quite a bit about Identifying Friend or Foe already so, for the moment, Point 2 requires no further elaboration . Please remember that the Flashlight Practice Session of Indoor Range Practice Sessions is available as a free download.
Let’s consider point 3. My colleague Darryl Bolke’s presentation at the Conference included an important tidbit about the rate of shooting. The LAPD SWAT Team, one of the most highly trained and experienced shooting units in the world, practices to shoot at .5 (½) seconds per shot, no faster. They do this regardless of whether they are on the square range, in the shoothouse, or in actual confrontations with criminals. Why? Because that’s the rate they can identify threats and make decisions about using or continuing to use (follow up shots) deadly force.
The Force Science Institute has found that it takes about .3 seconds or more for the ‘stop shooting’ decision. That’s considerably longer than the splits we consider important in the world of competition shooting. There is a tension inherent between those two situations.
We all like to consider ourselves to be responsible gunowners. Is it prudent for us to practice shooting faster than we can guarantee a hit and whether it’s necessary to shoot at all? That’s an open question in my mind. I shot the Match at the Conference very deliberately and relatively slowly. I’m okay with that. All my hits were exactly where I wanted them to be and nowhere else. In the measured environment, that’s now become my personal standard.
Claude, I’m haunted by that last shot because I don’t know where it went.
–A friend who is both an Expert competitive shooter and a practitioner of personal protection.
Going to public sector standards, a fear is periodically raised that the standard will be set too high for gunowners to meet. The State of Illinois was the last State in our Nation to allow concealed carry because its political elite has a pathological fear of firearms (hoplophobia) in the hands of private citizens. Consequently, that State makes an interesting case study regarding Standards for private citizens. Let’s compare the standards Ill-Annoy has established for police officers v. private citizens.
| Tested Criterion | Police | Citizen |
| Rounds | 30 | 30 |
| Strings of fire | 12 | 3 |
| Furthest distance | 15 yards | 10 yards |
| Time Limits | 6 – 10 seconds | None |
| Target | 8.5″ x 14″ (119 sq. in.) | Entire B-27 (~700 sq. in.) |
| Starting Position | Holster | Ready |
| Hit Requirement | 23/30 (77%) | 21/30 (70%) |
Strings of fire is a useful criterion to include because less skilled shooters tend to ‘walk’ their rounds into the center of the target during a longer string. Having more strings reduces the effectiveness of this technique and makes a given course of fire more difficult for an equal number of rounds fired.
The qualification requirements of some States are so low that a reasonably skilled shooter can literally pass them blindfolded. For instance, the State of Michigan requirement is to hit an 11×25 inch target (three sheets of paper) at four yards with five rounds, two times out of three tries, starting from a ready position. It should be noted that although this seems like a large target, it has roughly the same area as the FBI ‘Q’ target; 281 square inches v. 275 square inches, respectively. The fear of established marksmanship criteria being excessively high seems unfounded in reality.
It should also be noted that reflexively firing a number of rounds can be a legal liability. In the Mike Kimball case in Maine, the first shot was deemed by the medical examiner to be deadly. The two additional rounds fired by Kimball were raised as an issue by the Judge in his trial. Kimball was ultimately convicted of murder and will most likely spend the rest of his life in prison. There were additional factors in his conviction, but the number of shots was definitely a question.
A lawyer friend pointed out recently an aspect of the California jury instructions regarding self-defense cases. The wording can be interpreted to mean that shots fired after the threat has ceased could be viewed as excessive force and no longer reasonable self-defense. Whether we like it or not, the rules are the rules. We need to be cautious about parroting and then internalizing memes such as ‘shoot him to the ground.’
When you start [and continue] shooting at someone, you have to assume you’re going to kill them. That’s why we call it ‘deadly force.’ Doing so needs to be a decision not a reflex.
–The Tactical Professor
Should we settle for having mediocre personal standards and being able to only do the bare minimum? It’s true that ‘getting better is not for everyone.’ Especially if that is the case, having an objective benchmark of how we can and cannot perform is worthwhile information. That’s the main reason there is a benchmark test included in Indoor Range Practice Sessions. link to purchase all 24 Sessions
Friday Fundamentals – Performance Standards
Without testing, there has been no training
Shooting a pistol is an athletic activity. Like any athletic endeavor, we need to have some performance measurement standards. Measurement is the operative word here. We need to measure our downrange performance, i.e., how well we can hit the target, if we want to become better at shooting. There are numerous variables that can be called into play for measurement.
As an example of athletic measurement, the current US Army standard for my age cohort is a minimum of 27 sit-ups in one minute. More sit-ups means more points scored. The Army Physical Fitness Test has to be taken twice a year.
In weight training, we might simply measure how many repetitions of lifting a given amount of weight we can do until we can’t lift anymore. Over time, our objective is to be able to lift more weight and/or perform more repetitions.
Police officers have to undergo periodic testing of their shooting ability. The period might be anywhere from once a year (mandated by every state I am aware of) to four times a year (LAPD and FBI).
What might be a set of reasonable standards for the average gun owner? I’ll offer the following as a progression that a gunowner could use to see where their skills stand on a periodic basis. It’s less than 100 rounds, so there is some room for remediation, if necessary. Because firearms skills are perishable, I’m more in favor of the LAPD/FBI approach of doing an evaluation four times a year rather than just once.
1) LAPD Retired Officer Course
Shoot 10 shots at a silhouette at 7 yards with no time limit. The LAPD standard is simply that 7 of the ten have to hit. Our standard should be to have, at a minimum, all 10 rounds hit within the 7 ring of a B-27 or an equivalent.
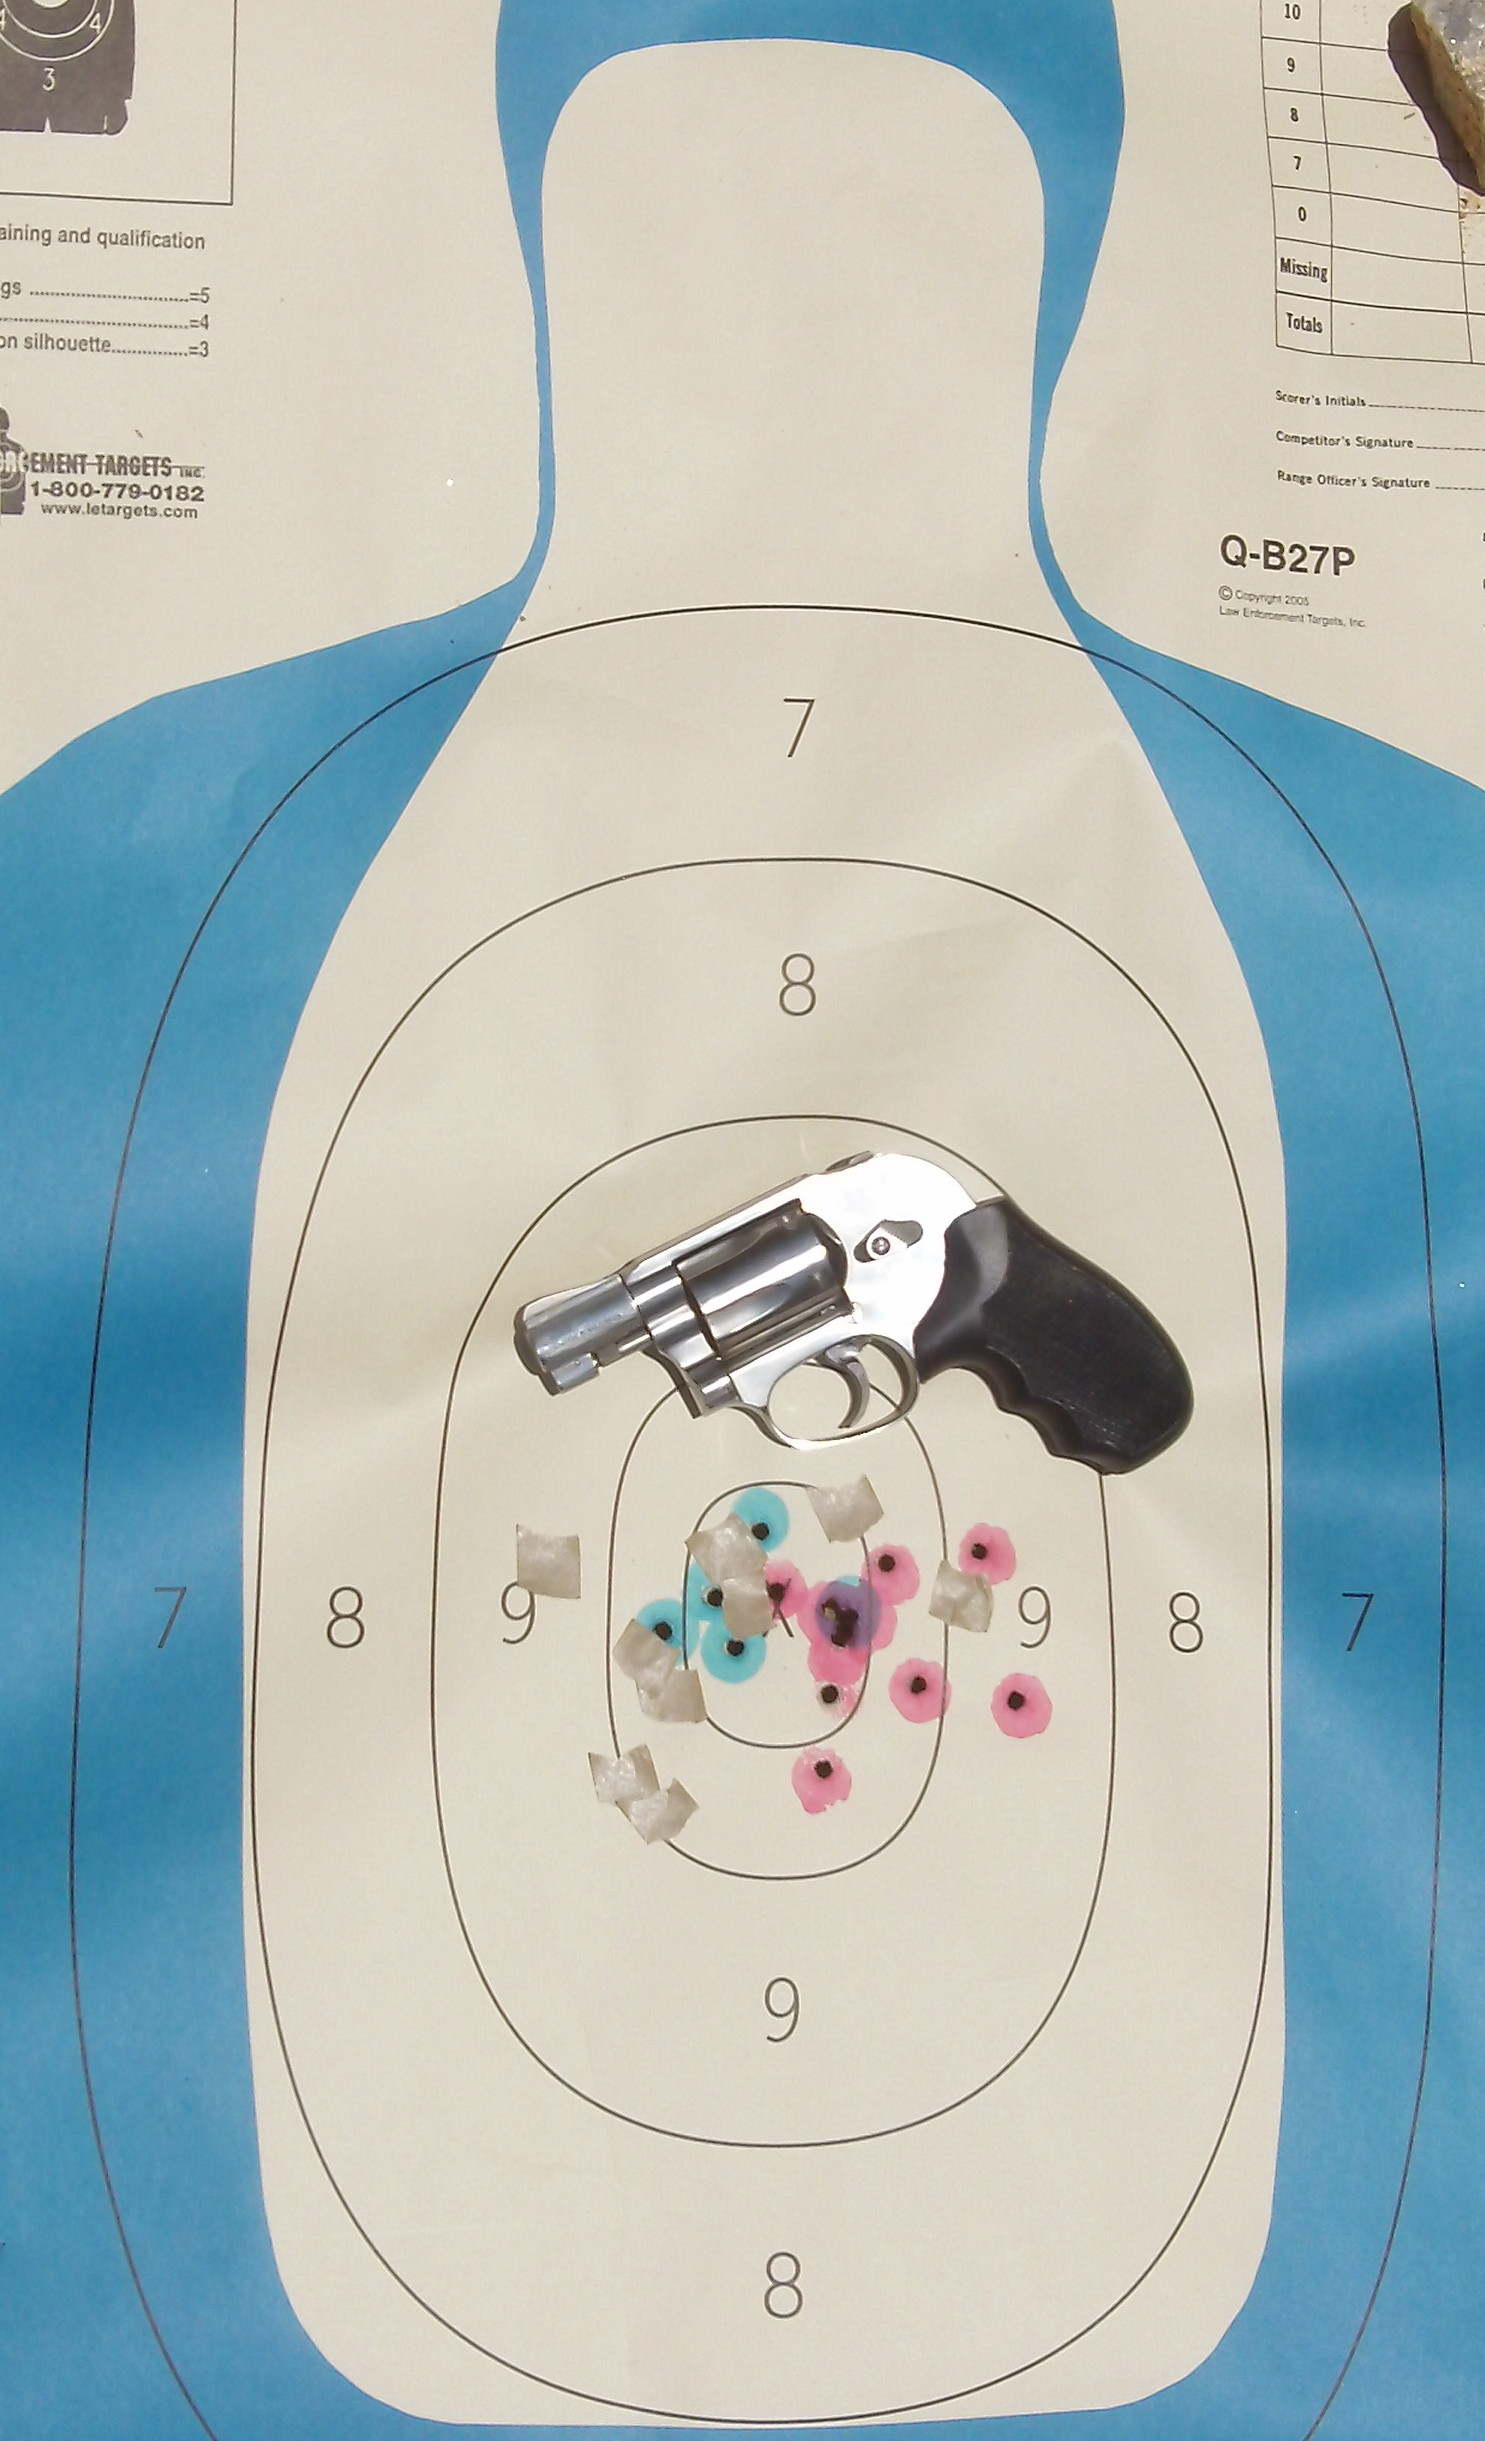 The point of this is to learn how fast we can shoot and still make our hits. Even the LAPD SWAT has learned and trained the cadence they can make consistent hits on a target. It’s not by shooting as fast as they possibly can, it’s by paying attention to what they’re doing while they’re shooting. I got that from Darryl Bolke.
If you meet the standard, then move on to the next component. If not, work on getting your fundamentals in better shape.
2) NRA Basic Pistol
Shoot a five-shot group within a 9-inch diameter circle (paper plate) at 15 feet with no time limit. Repeat twice for a total of three times. All the shots have to hit the plate. My colleague Chuck Haggard commented to me:
I wonder how many people never shoot anything but a full value target [i.e., complete silhouette] at 3-5 yards and call it gtg [Good To Go].
I agree with him completely; assuming that we’ll always have a full body presentation to shoot at in a defensive encounter is a mistake. If you can’t hit a paper plate consistently at five yards, you should work on being able to do that. See the sights and press the trigger smoothly. If you can make the standard, then move on to the next.
3) NRA Defensive Pistol I – Pro-Marksman
Shoot a five-shot group within a 12-inch diameter circle at 21 feet in fifteen seconds. Repeat until you’ve done it four times. The four times don’t have to be consecutive, however the standard of every shot having to be in the circle is. This drill is a lot more difficult than most people think because of the 100 percent hit requirement. Even though 15 seconds is a very generous time standard, knowing you’re on the clock makes it more difficult. Once you’ve made it four times, move on to the next component.
 4) 5^5
Shoot five shots into a five inch circle at five yards in five seconds. Do it five times in a row. This is a very difficult drill for most people. Only do it once to get an idea of how well you can shoot it. It’s a good practice drill for other times you shoot. After shooting it once, move on to the final component.
 5) NRA Off-Duty Pistol Course – Stage 3
Shot at 15 yards on a B-27 silhouette target. Load with six rounds only; you will need another magazine or speedloader loaded with six rounds also. Start double action if your pistol is so equipped. Fire six shots, reload, and fire another six shots for a total of 12 shots from a standing position, no support from bench or wall allowed. The time limit is 20 seconds, including the reload for the second 6 shot string. Score it based on the number value of the rings. The maximum point value for the string is 120.
Although many people think that a Private Citizen cannot legally justify shooting past seven yards, that is absolutely not true. I have a number of incidents in my database where Private Citizens shot at longer distances and it was completely justified. If a gang banger is shooting at you and your children at 23 yards, you are legally justified in shooting back. That assumes you have the skill and are cognizant of the background.
If you don’t need to do any remedial work during the session, you will fire 82 rounds total. That gives you a little left over to play around with as you please. Using a progression of drills that increase in difficulty gives you the opportunity to evaluate where you need to work on your skills to improve. Keep a record of how you did on each drill. Having a record is key to knowing what you need to work on in your practice sessions.
If it all seems easy, you can do the drills one handed; either dominant hand only or support hand only.
Friday Fundamentals 01 – Establishing Your Baseline
My friend Mark Luell, the author of Growing Up Guns suggested I provide a ‘Friday Fundamentals’ post weekly. We got the idea from my colleague Cecil Burch who wrote a blog post about Fundamentals. It’s a great idea to stay in touch with the basics.
The first installment is Session 01 of my Pistol Practice Program – Establishing Your Baseline. As in any journey, you have to know where you’re starting from before you can get to where you want to go.
The objective of this drill is to determine what distance you can make 100 percent hits on the vital area of a silhouette target. My feeling is that we need to work on achieving 100 percent accuracy because errant rounds in our homes or neighborhoods could be a major problem. Since I also think the first shot is the most important, I structured the session with a lot of first shots but also included multi-shot strings. A lot of people ‘walk their rounds’ into the target even with handguns. This is a huge problem and liability.
 We don’t count hits on the head in this drill because they are actually misses if you are aiming at the body. The head is more than a foot away from the center of the body, if you hit the head when you’re aiming at the body, it’s just a lucky shot and doesn’t count in terms of performance measurement.
Required equipment:
Any silhouette target; B-27, B-21, Q, IDPA, IPSC, etc.
Masking tape (preferred) or magic marker to mark the target.
Pistol, 50 rounds of ammunition
Eye and ear protection
Overview
This drill consists of five (5) Sequences of 10 shots each. The Sequences are untimed.
Setup:
Place target at three (3) yards
Start loaded with five (5) rounds only.
Procedure:
The starting position is Low Ready. This means the pistol is aimed at the floor below the target. For double action pistols, you will decock after each Step.
Sequence 1 (10 rounds)
1) Start with handgun held in both hands, aimed at the floor below the target. Spare magazine loaded with 5 rounds or speedloader with 5 rounds or 5 loose rounds on the bench.
2) Bring the pistol up on target and fire 1 shot at the center of target. Followthrough for one second, then return to low ready. Decock, if appropriate.
3) Bring the pistol up on target and fire 2 shots at the center of target. Followthrough for one second, then return to low ready. Decock.
4) Bring the pistol up on target and fire 3 shots at the center of target. After two shots, the pistol will be out of ammunition. Reload it and fire the third shot. Followthrough for one second, then return to low ready. Decock.
5) Bring the pistol up on target and fire 4 shots at the center of target. After the shots, the pistol will be out of ammunition. Hopefully, the slide has locked back if it’s an autoloader.
6) Place your pistol down on the bench.
7) Bring your target back and mark all the hits, preferably with tape but a marker will do.
8) Write on the target how many hits you made in the body scoring area. I prefer to not count the outer scoring area as I mentioned in Why I hate the -3 zone. Use this format, (3) X/10, X being the number of hits. For this drill, do not count any hits in the head, they are actually misses.
Sequence 2 (10 rounds)
1) Send the target out to 5 yards.
2) Repeat Sequence 1 but with the target at 5 yards instead of 3 yards.
3) When you write on the target how many hits you made in the scoring area, it will be (5) X/10. The number in parenthesis is the distance in yards.
Sequence 3 (10 rounds)
1) Send the target out to 7 yards.
2) Repeat Sequence 1 with the target at 7 yards.
3) Write on the target how many hits you made at 7 yards. (7) X/10
Sequence 4 (10 rounds)
1) Send the target out to 10 yards.
2) Repeat Sequence 1 with the target at 10 yards.
3) Write on the target how many hits you made at 10 yards. (10) X/10
Sequence 5 (10 rounds)
4) Send the target out to 15 yards.
5) Repeat Sequence 1 with the target at 15 yards.
6) Write on the target how many hits you made at 15 yards. (15) X/10
When you finish the drill, record your score for each yardage. Make this a part of your practice record. Shooting this exercise will give you a good idea of what your current proficiency level is. That’s an important starting point.
The Tactical Professor’s Pistol Practice Program
Why a Practice Program and not a training program?
I created the Pistol Practice Program (PPP) to fill a need for many gunowners. Most gunowners are self-taught and generally are not familiar with a structured approach to skill development. There is a great deal of information available now on how to shoot a pistol. However, there is much less information available on how to practice firearms skills over a period of time to achieve greater confidence and proficiency. As Aristotle said:
We are what we repeatedly do. Excellence, then, is not an act, but a habit.
My goal was to create a program that would get gunowners into the habit of shooting well. I created a step by step approach tailored to the needs of the casual shooter but challenging enough to satisfy the enthusiast. Designed as a series of range sessions, you can practice at your own pace as your schedule permits.
In the case of those who have attended training, your instructor probably said that a firearms class only provides a foundation of skills. To maintain those skills and improve, people who own pistols need to practice after training. Having a program also makes shooting more fun because the shooter develops a sense of accomplishment from the practice. This program is not concerned with what particular technique the shooter uses. Over time and by working the PPP, shooters will determine what works best for them.
The vast majority of gunowners only have access to indoor or public ranges where the type of practice they can do is rather restricted. The PPP takes that constraint into account and presents drills that are indoor range friendly and yet relevant to skill development. The livefire range sessions are then supplemented by dryfire sessions that can be done safely at home. Doing so allows you to develop skills that usually cannot be practiced at an indoor range. How to practice at home safely is thoroughly explained.
The PPP is available on CD. Its contents are mobile device friendly so you can copy the drills to your smartphone or tablet. If your device can access a PDF reader, you can easily take the exact drills to the range with you without having to lug along a book or write down the contents of a DVD. You can also put the dryfire audio sessions on your device for maximum convenience.
Those who are teaching a friend or loved one how to shoot a pistol will find the PPP provides a solid structure for their time at the range. For those who have attended a training class, the PPP provides a way to maintain and build the skills they learned in class. Law enforcement officers can use the PPP to keep your shooting skills tuned up in between qualifications and make qualifications less stressful. Put whatever practice ammo you receive from the department to good use instead of frustrating yourself by shooting the qual course over and over.
Contents of the PPP
- A Program Guide to get you started
- A Log Sheet to keep track of your progress
- 12 Primary Livefire Sessions (50 rounds and Indoor range friendly)
- 12 Secondary Livefire Sessions (50 rounds) for those who want more practice activity each time at the range
- 12 Structured scenarios designed to emphasize and train the interactive aspects of personal protection
- 6 audio guided Dryfire sessions (less than five minutes each)
- Tip sheets on firearms safety, interacting with law enforcement, common mistakes, etc.
I have drawn on a wide range of training experience, from teaching NRA Basic Pistol classes to my time as the Chief Instructor of the elite Rogers Shooting School, to create this Program. There is no doubt in my mind that shooters at all levels of skill and experience can benefit from it.
The PPP CD is available on my webstore. At $19.95, it’s about the cost of one box of centerfire ammo. Bonus: the first 100 orders will receive a Rogers Tap-Rack-Training aid, a $5.00 value, at no charge.
The Importance of Target Identification
Deputies found a 32-year-old man who said that he and his wife were sleeping when they heard a noise in the kitchen.
The husband took his handgun and walked in the kitchen area, where he shot the victim.
After the shooting the husband recognized the victim as his younger teenage brother.
Man shoots, kills brother thinking he was burglarizing home
Yet another tragic example of why I stress target identification so much. These situations are absolutely preventable. As I’ve said before, if you live with anyone else, my analysis is that there is a 97 percent probability that the ‘bump in the night’ is a member of your own household. With those kinds of numbers, gunowners cannot take the risk of shooting someone at home without establishing a positive ID.
This kind of situation is a further example of why I say we have to be very cautious of what we take of from our training, and even more so, what we read. Much of the good training available is conducted by former law enforcement or military personnel. Just as much as any of us, they are subject to unconscious biases resulting from their experiences and training. Since most reading now is done on the Internet, you have to assume everything you read is wrong because most of it IS wrong.
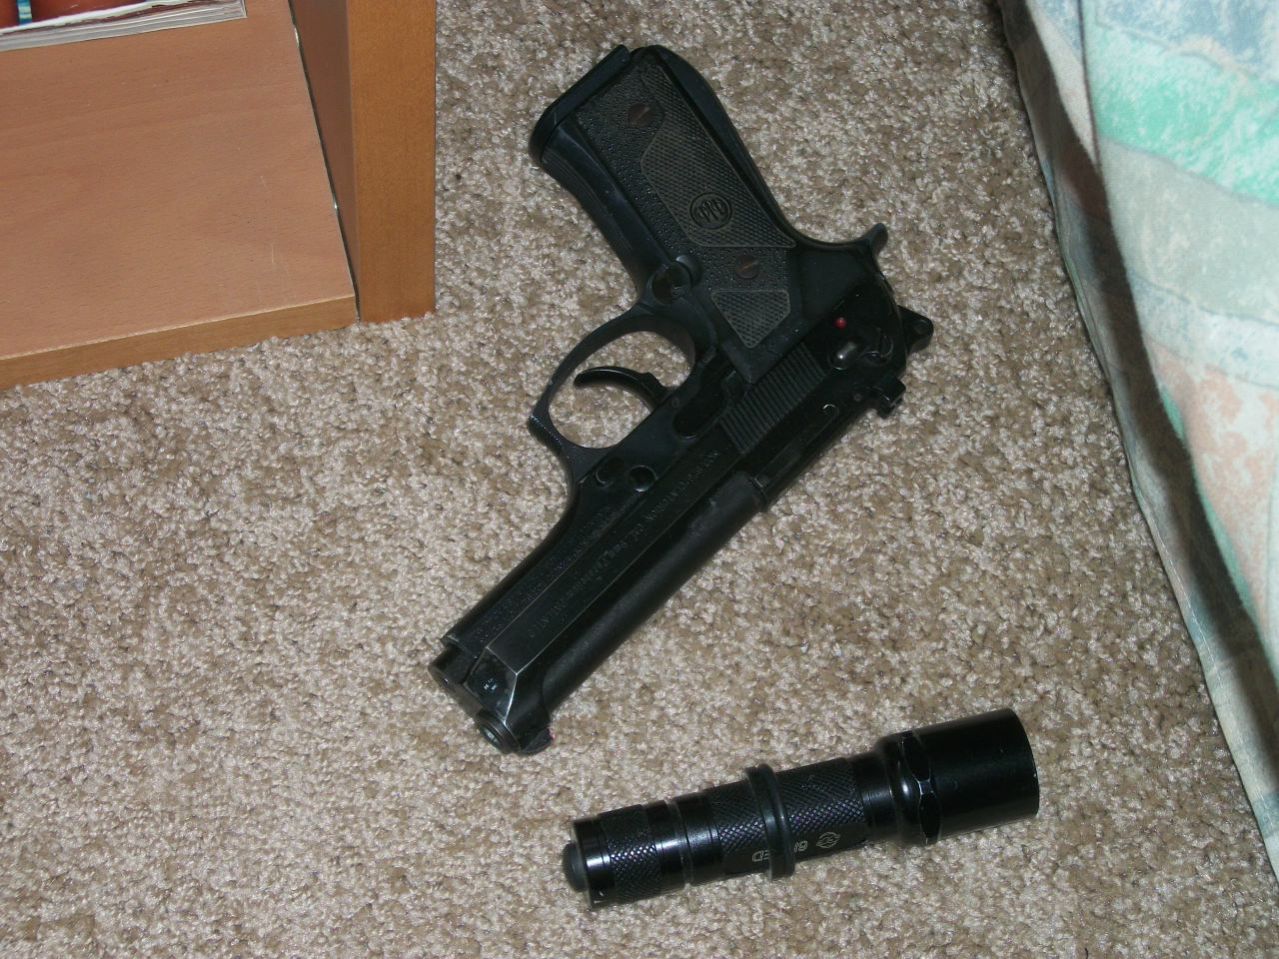
Responding with a firearm to a noise at night in the home absolutely requires that you visually verify your target before shooting. You probably will need a flashlight for that. And stealth is not your friend, it is your enemy. Therein lies a major divergence from the law enforcement officer or soldier, to whom stealth is an ally. The notions that ‘the light draws fire’ or that criminals will wait in ambush for you if they hear you coming are nonsensical. Those are bad paradigms for us to insert in our thinking. If your background is such that having assassins waiting in ambush for you in your own home is a concern, you need to work on some serious hardening of access points to your home.
If you keep a gun at home, put a flashlight next to your gun; no ifs, ands, or buts about it.
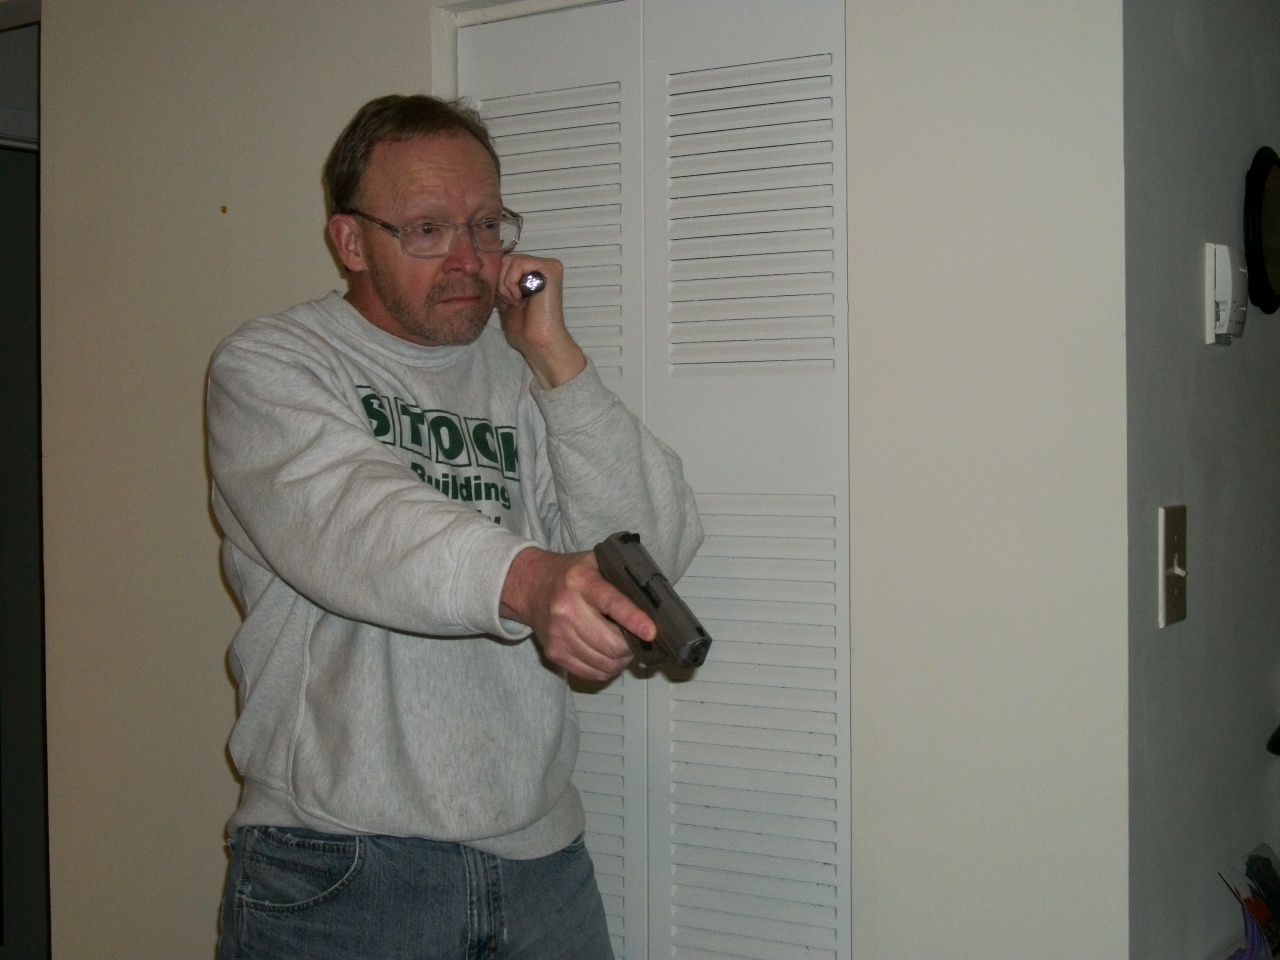
Next time you go to the range, take the flashlight with you. Instead of just blasting 50 holes in a silhouette, shoot two shots at the silhouette 25 times. Sequence is very important in how you do this.
- Have your gun in your shooting hand and your flashlight in your support hand. The gun is not pointing at the target and the light is off.
- Before each two shot string, say out loud “Who’s there?”
- Wait to listen for an answer. If you go to the range with someone, have them stand behind you and sometimes respond with “it’s me, Daddy” or something similar.
- If they say that, immediately put your gun down on the bench and abort that sequence.
- Then illuminate the target without pointing the gun at it.
- Finally, bring the gun up and fire the two shots.
One of the things you will find when using this sequence is that the worthwhile two handed shooting techniques don’t work well for it. Harries is both clumsy and dangerous to assume when you already have the light on the target and are keeping it illuminated while presenting the pistol. The Rogers/Surefire technique takes some time and manipulation skill to assume. What you will discover is that only the Cheek Technique or the FBI Technique work well in this context.
That means you have to learn to:
- Speak while holding your gun.
- Abort the shooting sequence if there is not a threat.
- Do a dissimilar task with the other hand, i.e., orient the flashlight and work the switch, while keeping your gun off target and your finger off the trigger.
- Shoot with one hand only while continuing to perform the dissimilar task.
- Manipulate the safety or decocker of your weapon with one hand while holding something in the other.
For the final 5 repetitions (10 rounds), put up a clean silhouette target and shoot the LAPD Retired Officer Course (10 rounds at seven yards). Measure how well you do. You’re going to find it’s a lot harder than you think.
That sequence is obviously rather involved; practice it before you have to do it for real or you’ll forget to do it or get it wrong. Forgetting to do it is what leads to tragedies.
Sight misalignment, speed, and accuracy
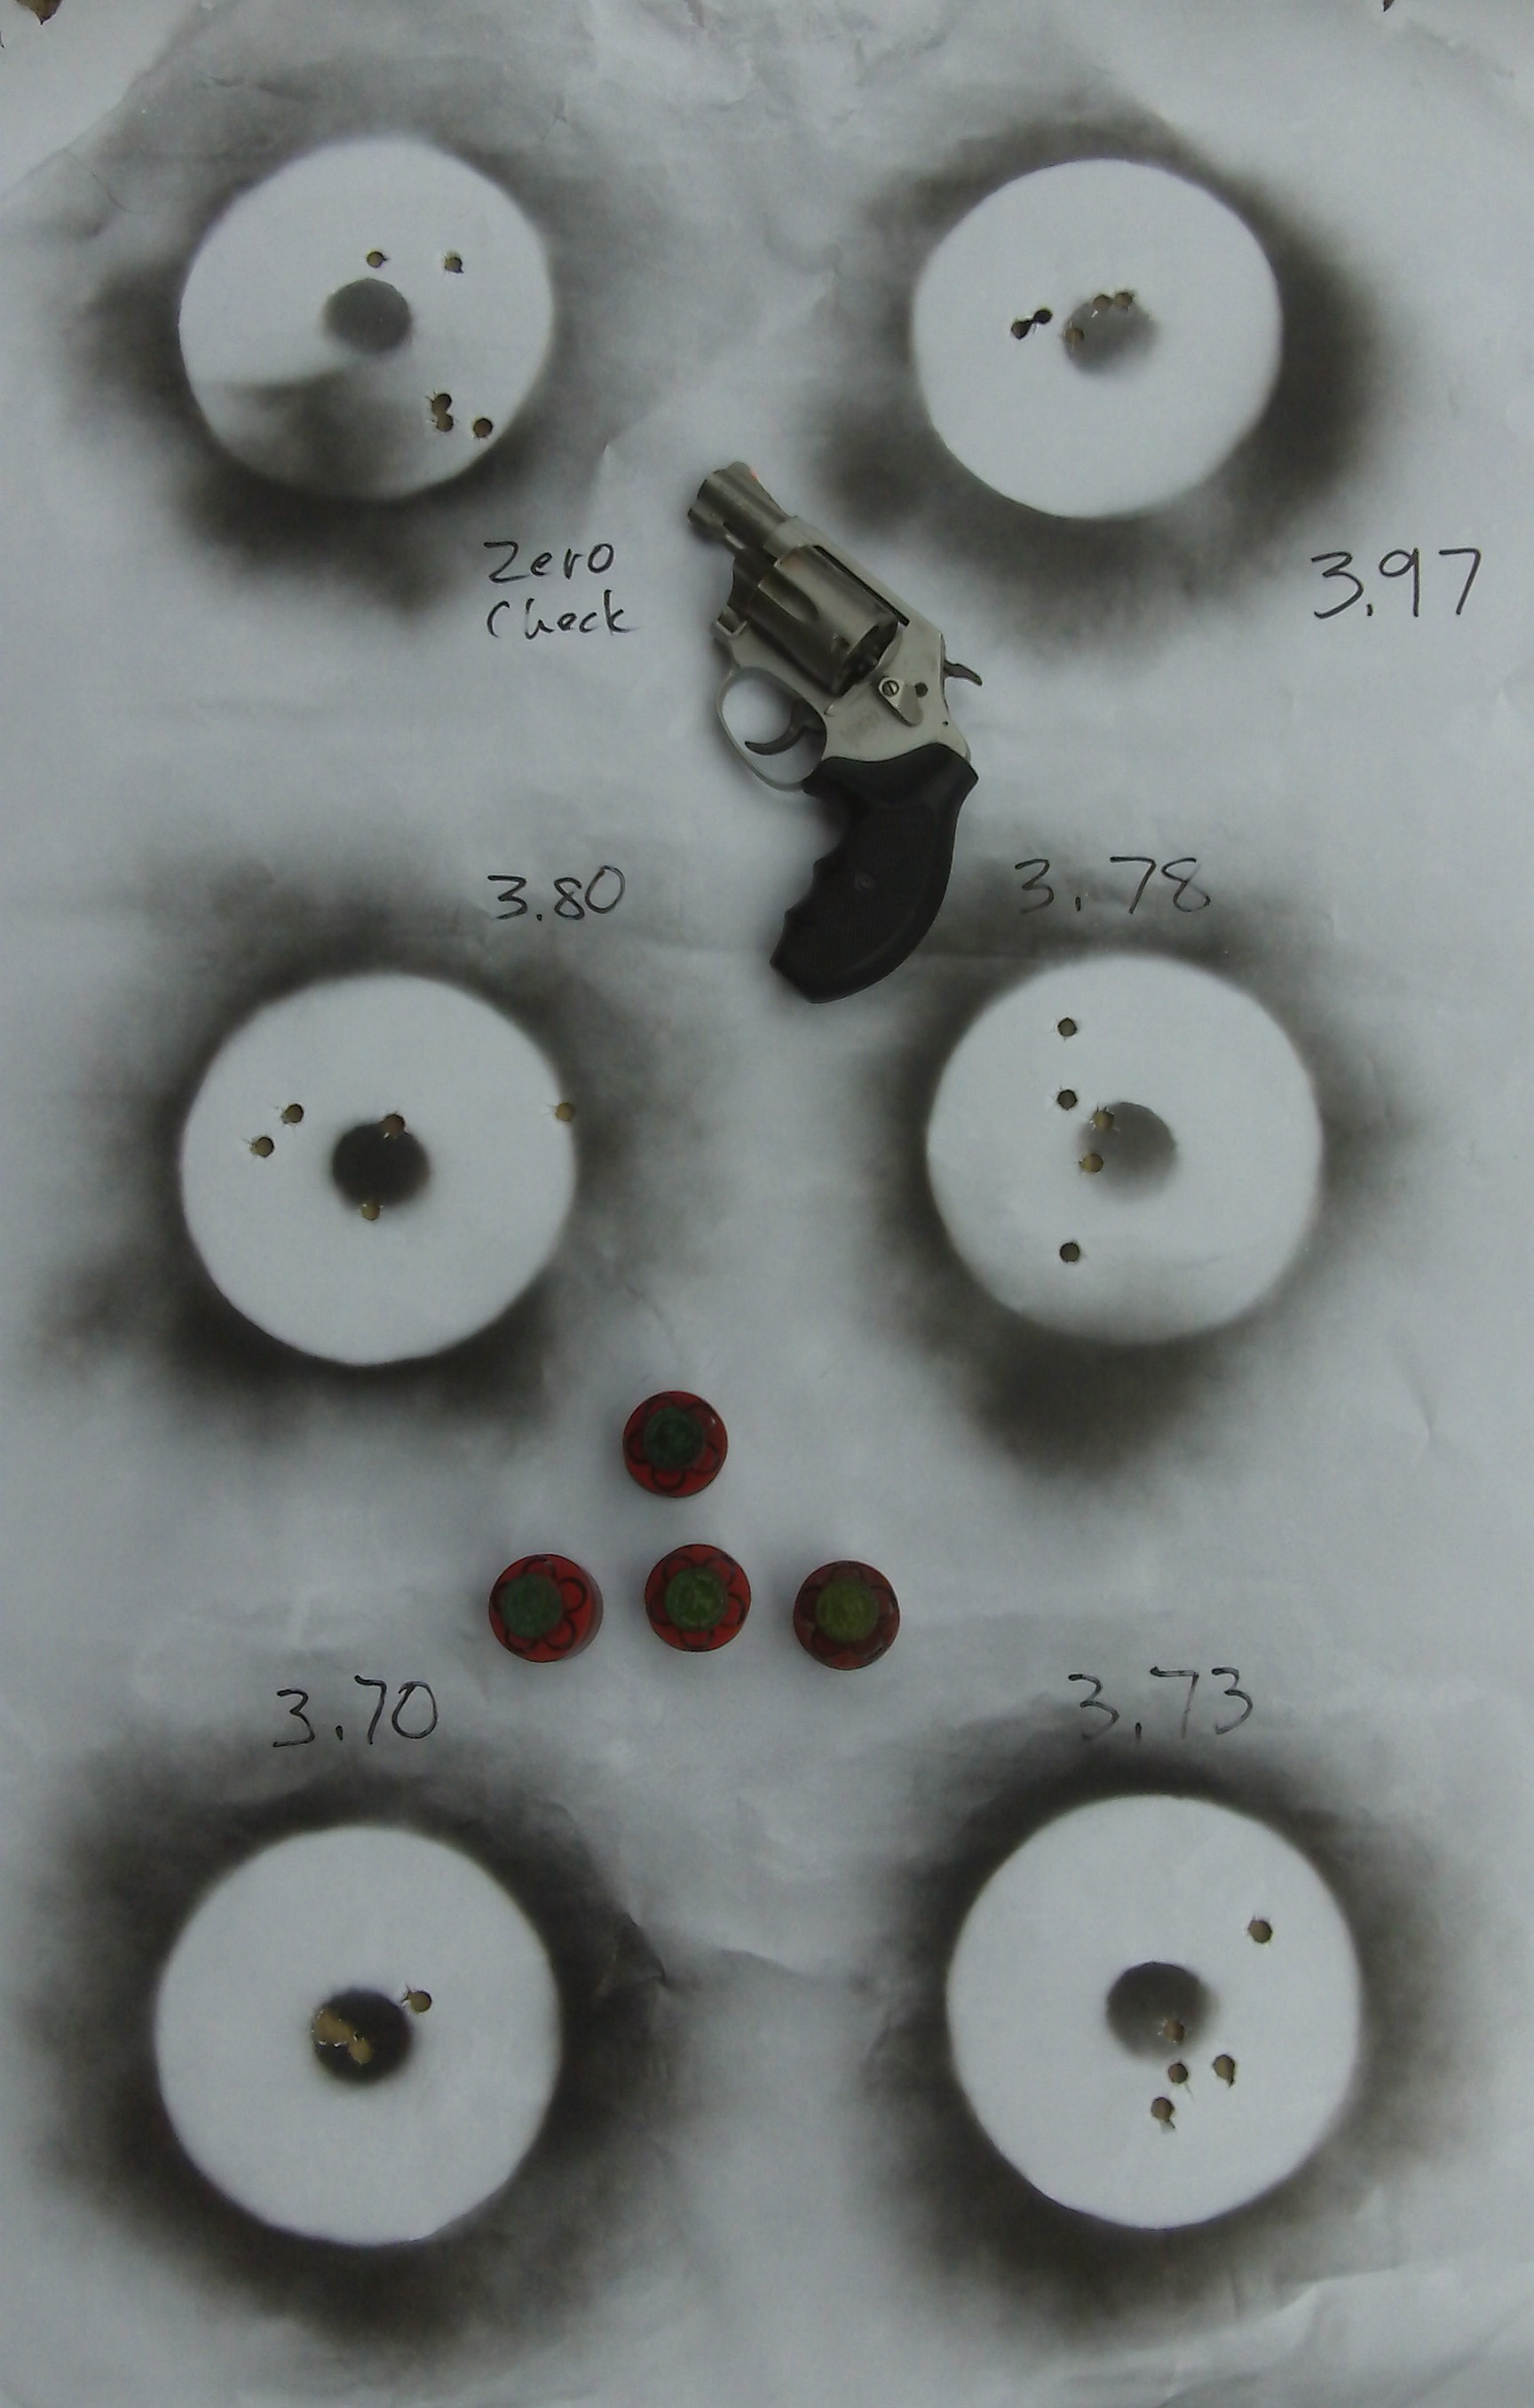
While I was teaching a private lesson last week, my student was struggling with improving his times, while maintaining an acceptable degree of accuracy. I could tell by the size of his groups, which were quite small, relative to the speed he was going, there was a fundamental that he didn’t understand. The front sight does not have to be perfectly aligned in the notch to produce good hits. So, I had him do a drill to demonstrate the acceptable degree of sight misalignment that will still result in hits on target.
The drill is to fire the pistol with the front sight on the target but with the rear notch deliberately misaligned. It is conducted in four parts consisting of two shots each.
- Front sight half way above the top of the rear notch,
- Front sight lowered so that its top edge is half way down in the rear notch,
- Front sight pushed to the right so that its right edge is touching the side of the rear notch, and
- Front sight pushed to the left so that its right edge is touching the side of the rear notch
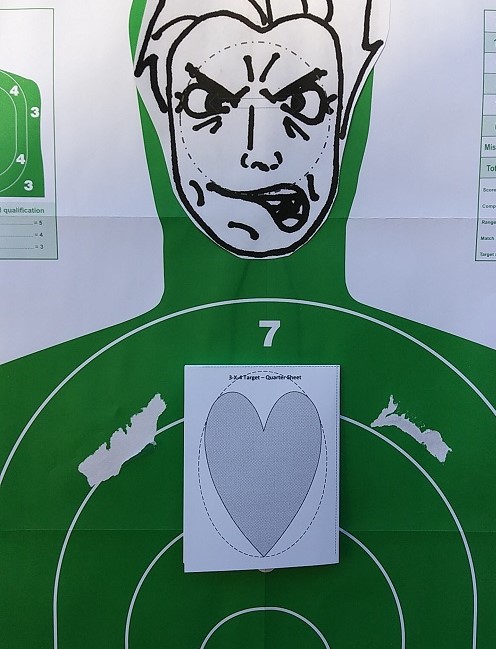
This is the diagram I drew to show him what it should look like.
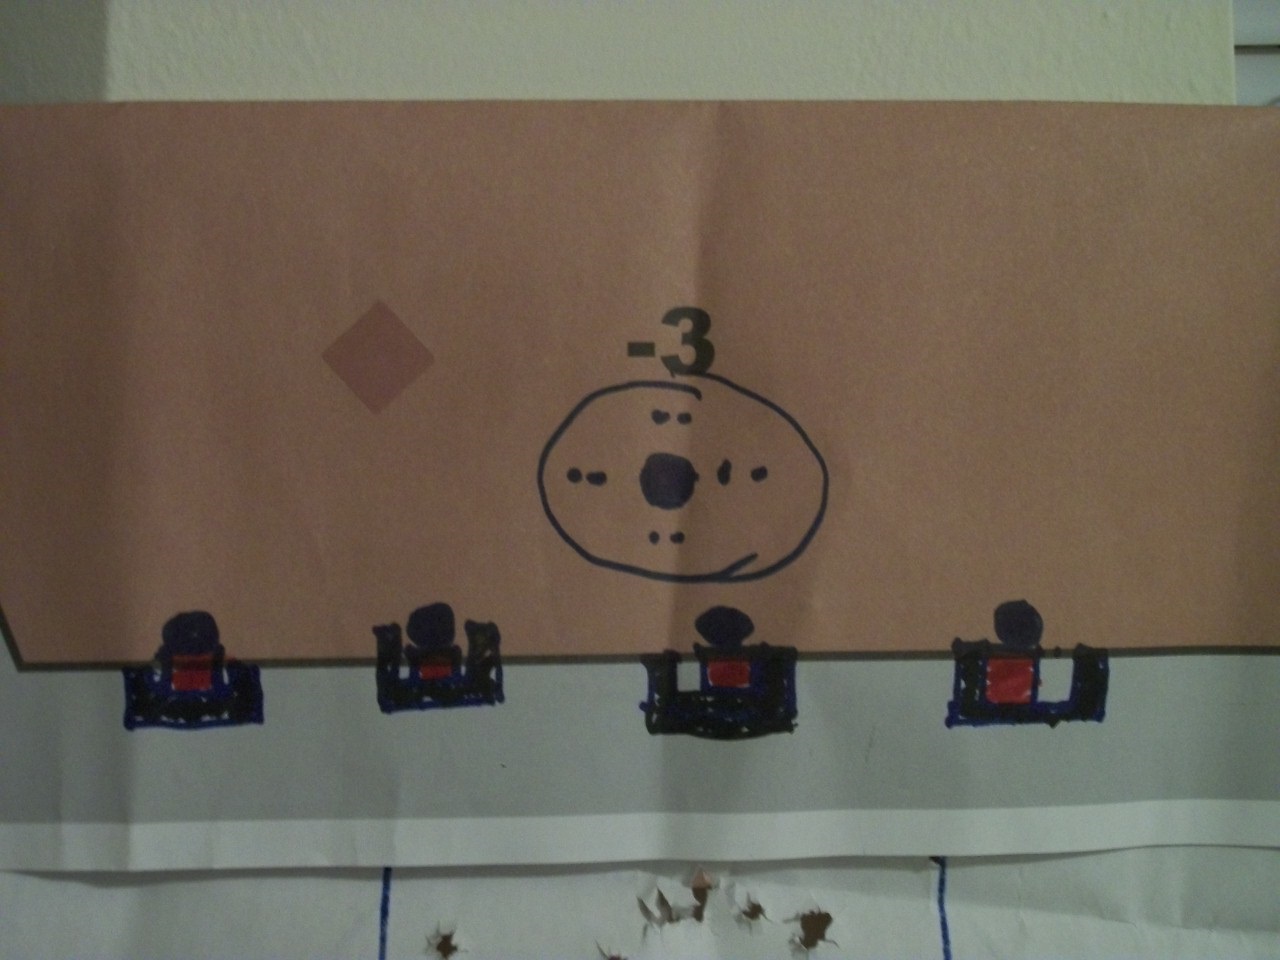
The front sight is aligned correctly on the target with the misalignment done to the rear sight. I prefer to use a dot as the target to get the most graphic result. In this case, I used a 1 ¾ dot. There’s no magic to that number; it just happens to be the size of the template I had.
I had him shoot the drill at seven yards. This was the result. His group measured about four inches at that distance. For many people, trigger manipulation issues will have a greater effect on their accuracy than will sight alignment.
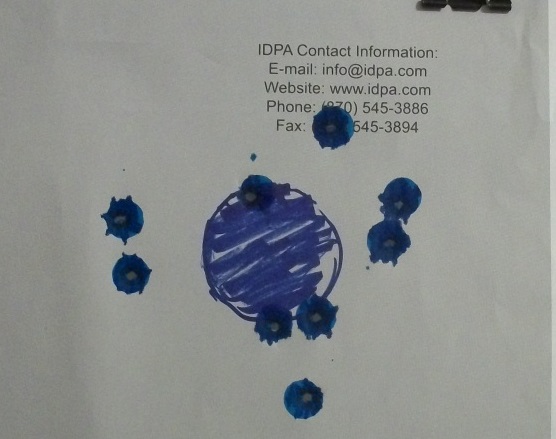
Once he understood that he didn’t need a perfect sight picture, the speed of his shooting picked up and his accuracy remained well within acceptable limits. As long as the front sight is close to the center of the target, a certain degree of misalignment will still produce a good hit. Not worrying about getting a perfect sight picture will result in a noticeable increase in speed.
Incidentally, this drill is a part of the NRA Personal Protection In The Home Course. Experienced shooters like my student usually think they have nothing to learn from NRA Courses. Often, this is a misconception on their part. [Thanks to those who pointed out that I had misremembered the NRA Course the drill is part of.]

You must be logged in to post a comment.