While I was teaching a private lesson last week, my student was struggling with improving his times, while maintaining an acceptable degree of accuracy. I could tell by the size of his groups, which were quite small, relative to the speed he was going, there was a fundamental that he didn’t understand. The front sight does not have to be perfectly aligned in the notch to produce good hits. So, I had him do a drill to demonstrate the acceptable degree of sight misalignment that will still result in hits on target.
The drill is to fire the pistol with the front sight on the target but with the rear notch deliberately misaligned. It is conducted in four parts consisting of two shots each.
- Front sight half way above the top of the rear notch,
- Front sight lowered so that its top edge is half way down in the rear notch,
- Front sight pushed to the right so that its right edge is touching the side of the rear notch, and
- Front sight pushed to the left so that its right edge is touching the side of the rear notch
This is the diagram I drew to show him what it should look like.
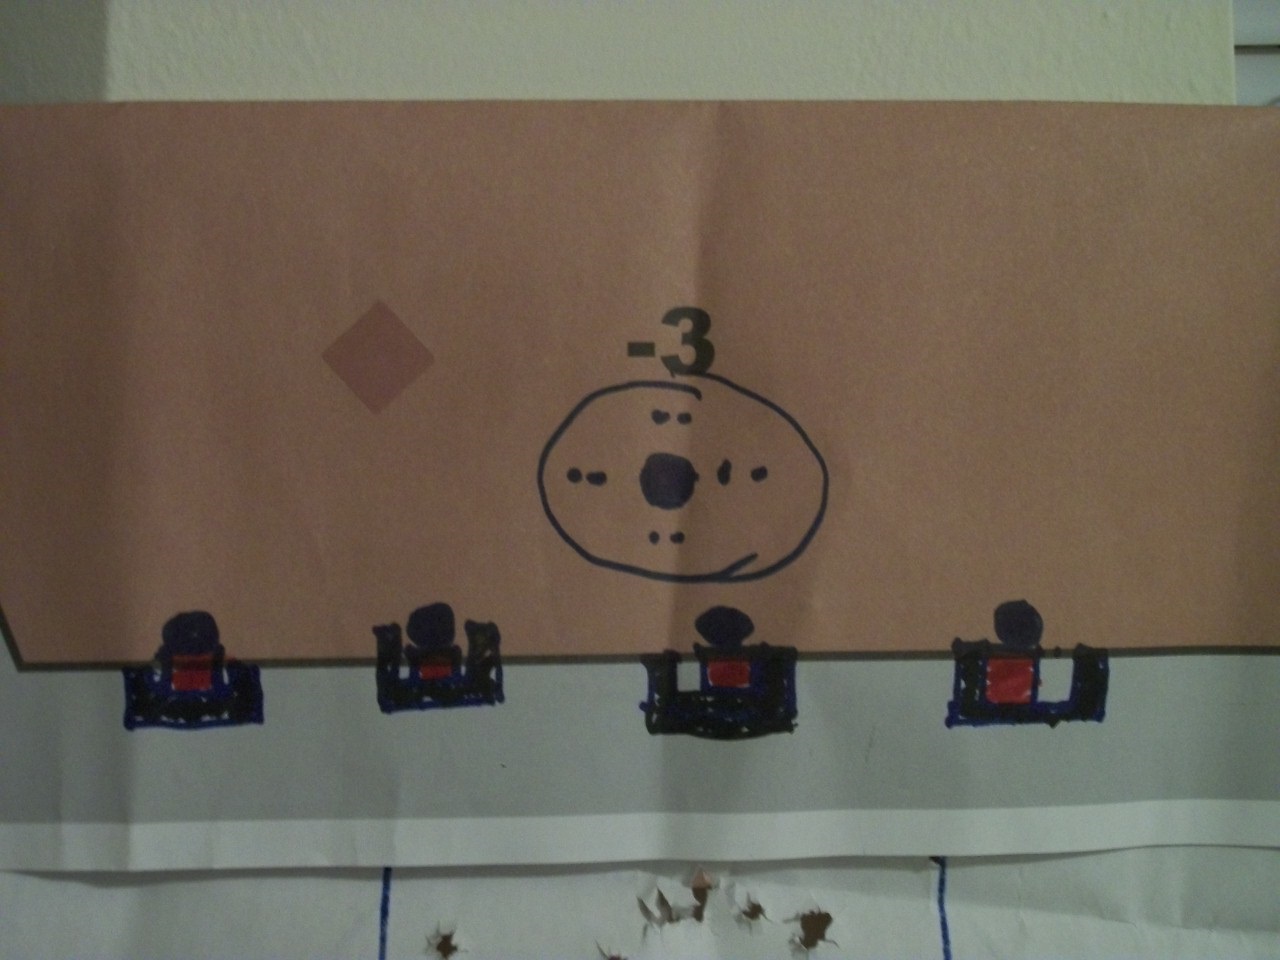
The front sight is aligned correctly on the target with the misalignment done to the rear sight. I prefer to use a dot as the target to get the most graphic result. In this case, I used a 1 ¾ dot. There’s no magic to that number; it just happens to be the size of the template I had.
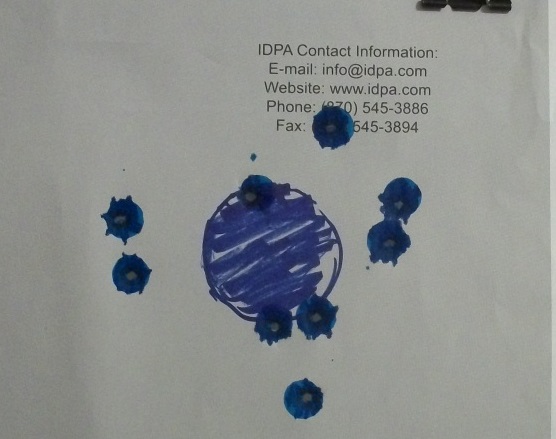
I had him shoot the drill at seven yards. This was the result. His group measured about four inches at that distance. For many people, trigger manipulation issues will have a greater effect on their accuracy than will sight alignment.
Once he understood that he didn’t need a perfect sight picture, the speed of his shooting picked up and his accuracy remained well within acceptable limits. As long as the front sight is close to the center of the target, a certain degree of misalignment will still produce a good hit. Not worrying about getting a perfect sight picture will result in a noticeable increase in speed.
Incidentally, this drill is a part of the NRA Personal Protection In The Home Course. Experienced shooters like my student usually think they have nothing to learn from NRA Courses. Often, this is a misconception on their part. [Thanks to those who pointed out that I had misremembered the NRA Course the drill is part of.]

My problem is with targets with no aiming point. If I have a “dot”(or a button or shirt pocket) to aim at I am fine, but tombstone style targets give me fits. At closer ranges I can see the bullet holes and compensate but at longer ranges I haven’t been able to figure out how to do it. Too many Charlie’s and Delta’s.
Steve, you are absolutely right. Spot shooting is an important concept for personal protection practice. That’s why I prefer to use photo targets and point out possible aiming points to my students. Note the main photo of my blog.
An excellent drill to get the point across. I’ve used that one as well in the past.
I’ve had this demonstrated in classes with Ken Hackathorn and Frank Proctor.
Well done lesson. Quick and to the point. (<–slight pun, though should not be taken as point shooting in any way, shape or form. 🙂 )
Whats the effectiveness of this when the target starts to move? It seems like you can judge your last night and make slight adjustments easily when the target is stationary.
Reblogged this on disturbeddeputy and commented:
Always go back to the basic fundamentals. Why do you think NFL players have tackling practice?
Reblogged this on Growing Up Guns and commented:
This has been one of limiting factors in the speed of my shooting for a while now. “See what you need to see” always lacked enough detail for it to be useful to me. This puts it in more defined terms.
[…] continuing on with the series of ‘Friday Fundamentals’. I’ve written about Sight misalignment, speed, and accuracy before. It’s a key fundamental to increasing your speed while still maintaining an acceptable […]