Downrange drill target
My only question is whether you might have an alternate suggestion for target set up comparable to the one in this post and the one before. I shoot at two restrictive ranges without the ability to shoot targets spaced as indicated in your diagram.
Almost all indoor ranges are restrictive that way. There are still things you can do even if you can’t accomplish everything you’d like.
This is a target from my upcoming Dry Practice book you can print on letter size paper.

Downrange drill target
Tape it to the head of a silhouette target. It is anatomically sized correctly by using the ocular distance indicated by the line with arrows on the male mugshot of Dennis Rader, the notorious BTK Killer. https://www.biography.com/crime-figure/dennis-rader The dashed circle is sized to four inches in diameter. The pretty lady is a mug shot too, unfortunately, but she serves the purpose of occupying the place of a NO SHOOT.
Place the target at 10 feet, which is the mid-point of the far phase of Social Space in Proxemics. The object of the drill is to place one round in the circle as rapidly as you can. Do it five times in a row. If you hit the lady, you’ve shot a loved one; consider that in your evaluation of your abilities. As Dirty Harry said, “A man’s got to know his limitations.”
Even if you don’t have a lot of flexibility at your practice range, there are still things you can do to up your game.
Tactical Professor books (all PDF) (not Free)
- Real Shootouts of the LAPD http://realshootoutsofthelapd.com
- Serious Mistakes Gunowners Make http://seriousgunownermistakes.com
- Indoor Range Practice Sessions http://indoorrangepracticesessions.com
- Concealed Carry Skills and Drills http://concealedcarryskillsanddrills.com
- Advanced Pistol Practice http://bit.ly/advancedpistolpractice
- Shooting Your Black Rifle http://shootingyourblackrifle.com
- Package deal of Serious Mistakes, Indoor Sessions, Concealed Carry, and Shooting Your Black Rifle (20% off) https://store.payloadz.com/details/2644448-ebooks-sports-shooting-drills-package.html
Evaluating handguns for YOU
Before you buy a gun, you should go to a range that rents guns and try different ones out to see which one is best for you.
What does “try them out” mean? How do we measure “which one is best for you?” Here is a list of worthwhile items to evaluate for you to make an informed decision about an autoloading pistol. For those who are helping a prospective purchaser, demonstrate the technique but then place the pistol in a sterile (unloaded with slide forward) condition and let them do their own evaluation without comment or coaching. You won’t be there to coach them if they need to use the pistol for real; that’s part of the evaluation.
- Load the pistol. This has two components.
- Load a magazine to full capacity.
- Load the fully charged magazine into the pistol and chamber a round.
- Manipulate the controls of the pistol.
- If the pistol has a decocker, decock the pistol after loading it.
- If the pistol has a safety, engage it, and then disengage it.
- Remove the loaded magazine from the pistol.
- Engage the slide stop while safely ejecting the round from the chamber. The muzzle must remain pointed downrange during the unload sequence.
- Inspect the chamber visually and physically (with a finger) to be sure it is unloaded.
- Let the slide go forward.
- Shoot the pistol.
- For new shooters or prospective purchasers, use a standard silhouette target.
- Experienced shooters should use a more meaningful target.
- An 8 inch circle at 3 yards.
- A sheet of paper in landscape orientation at 5 yards.
- Two sheets of paper stacked one above the other in landscape orientation at 7 yards and 10 yards.
- A suitable target can be downloaded here. Printable Silhouette drawn face
- Fire six shots at each of four distances (Stages); 3 yards, 5 yards, 7 yards, and 10 yards. This will replicate the difficulty level of most States’ Carry License Qualification Courses of Fire. A Carry License Qualification is the most likely shooting task the average purchaser will use their handgun for so you may as well evaluate the ability to pass it. This shooting evaluation consists of 24 rounds so two different pistols could be evaluated with one fifty round box of ammo.
- The six shots for each Stage should be fired in three Strings of Fire. The magazine should be loaded with six rounds only except when evaluating stoppage clearance.
- Fire One shot
- Fire Two shots
- Fire Three shots
- If the pistol has a decocker, decock the pistol after each string and then disengage the decocker.
- If the pistol has a safety, start each string with the safety engaged.
- After shooting at each distance, czech to make sure the pistol is unloaded, let the slide go forward, and decock, if the pistol has a decocker.
- Record how many hits were made on the target and then cover them with masking tape. You should bring a roll of masking tape with you to the range.
- Start the next distance’s shooting by loading the pistol from a sterile condition.
- The 3 yard string should be fired with the Primary Hand Only, i.e., One Handed.
- The six shots for each Stage should be fired in three Strings of Fire. The magazine should be loaded with six rounds only except when evaluating stoppage clearance.
- Evaluate your ability to reduce stoppages of the pistol.
- When shooting the 5 yard Stage, start with the chamber empty and a six round magazine inserted. Attempt to fire the first shot on an empty chamber. After the click, tap the base of the magazine, cycle the slide, and then fire one shot (Tap-Rack-Bang). This is a simulation of clearing a bad round or a partially unseated magazine.
- When shooting the 7 yard Stage, start with the slide locked open and a six round magazine in the pistol. Eject the magazine onto the table, pick it up, insert it into the pistol, release the slide, and then fire three shots. This is a simulation of an Emergency Reload because most rental pistols will only come with one magazine. After the three shot sequence, fire the two shot String and then the one shot String.
- When shooting the 10 yard Stage, start with the chamber empty and a six round magazine inserted. Attempt to fire the first shot on an empty chamber. After the click, remove the magazine, cycle the slide three times, re-insert the magazine, and then fire three shots. This simulates clearing a double feed. After the three shot sequence, fire the two shot String and then the one shot String.
This evaluation procedure will give you a good idea of two different aspects of how well the gun works for you or a prospective purchaser. The ability to shoot the gun to pass a possible standard for obtaining a Carry License and also manipulation tasks that are frequently overlooked.
Here is a downloadable checklist you can take to the range with you. Autoloading Pistol Suitability Checklist
Friday Fundamentals – Performance Standards
Without testing, there has been no training
Shooting a pistol is an athletic activity. Like any athletic endeavor, we need to have some performance measurement standards. Measurement is the operative word here. We need to measure our downrange performance, i.e., how well we can hit the target, if we want to become better at shooting. There are numerous variables that can be called into play for measurement.
As an example of athletic measurement, the current US Army standard for my age cohort is a minimum of 27 sit-ups in one minute. More sit-ups means more points scored. The Army Physical Fitness Test has to be taken twice a year.
In weight training, we might simply measure how many repetitions of lifting a given amount of weight we can do until we can’t lift anymore. Over time, our objective is to be able to lift more weight and/or perform more repetitions.
Police officers have to undergo periodic testing of their shooting ability. The period might be anywhere from once a year (mandated by every state I am aware of) to four times a year (LAPD and FBI).
What might be a set of reasonable standards for the average gun owner? I’ll offer the following as a progression that a gunowner could use to see where their skills stand on a periodic basis. It’s less than 100 rounds, so there is some room for remediation, if necessary. Because firearms skills are perishable, I’m more in favor of the LAPD/FBI approach of doing an evaluation four times a year rather than just once.
1) LAPD Retired Officer Course
Shoot 10 shots at a silhouette at 7 yards with no time limit. The LAPD standard is simply that 7 of the ten have to hit. Our standard should be to have, at a minimum, all 10 rounds hit within the 7 ring of a B-27 or an equivalent.
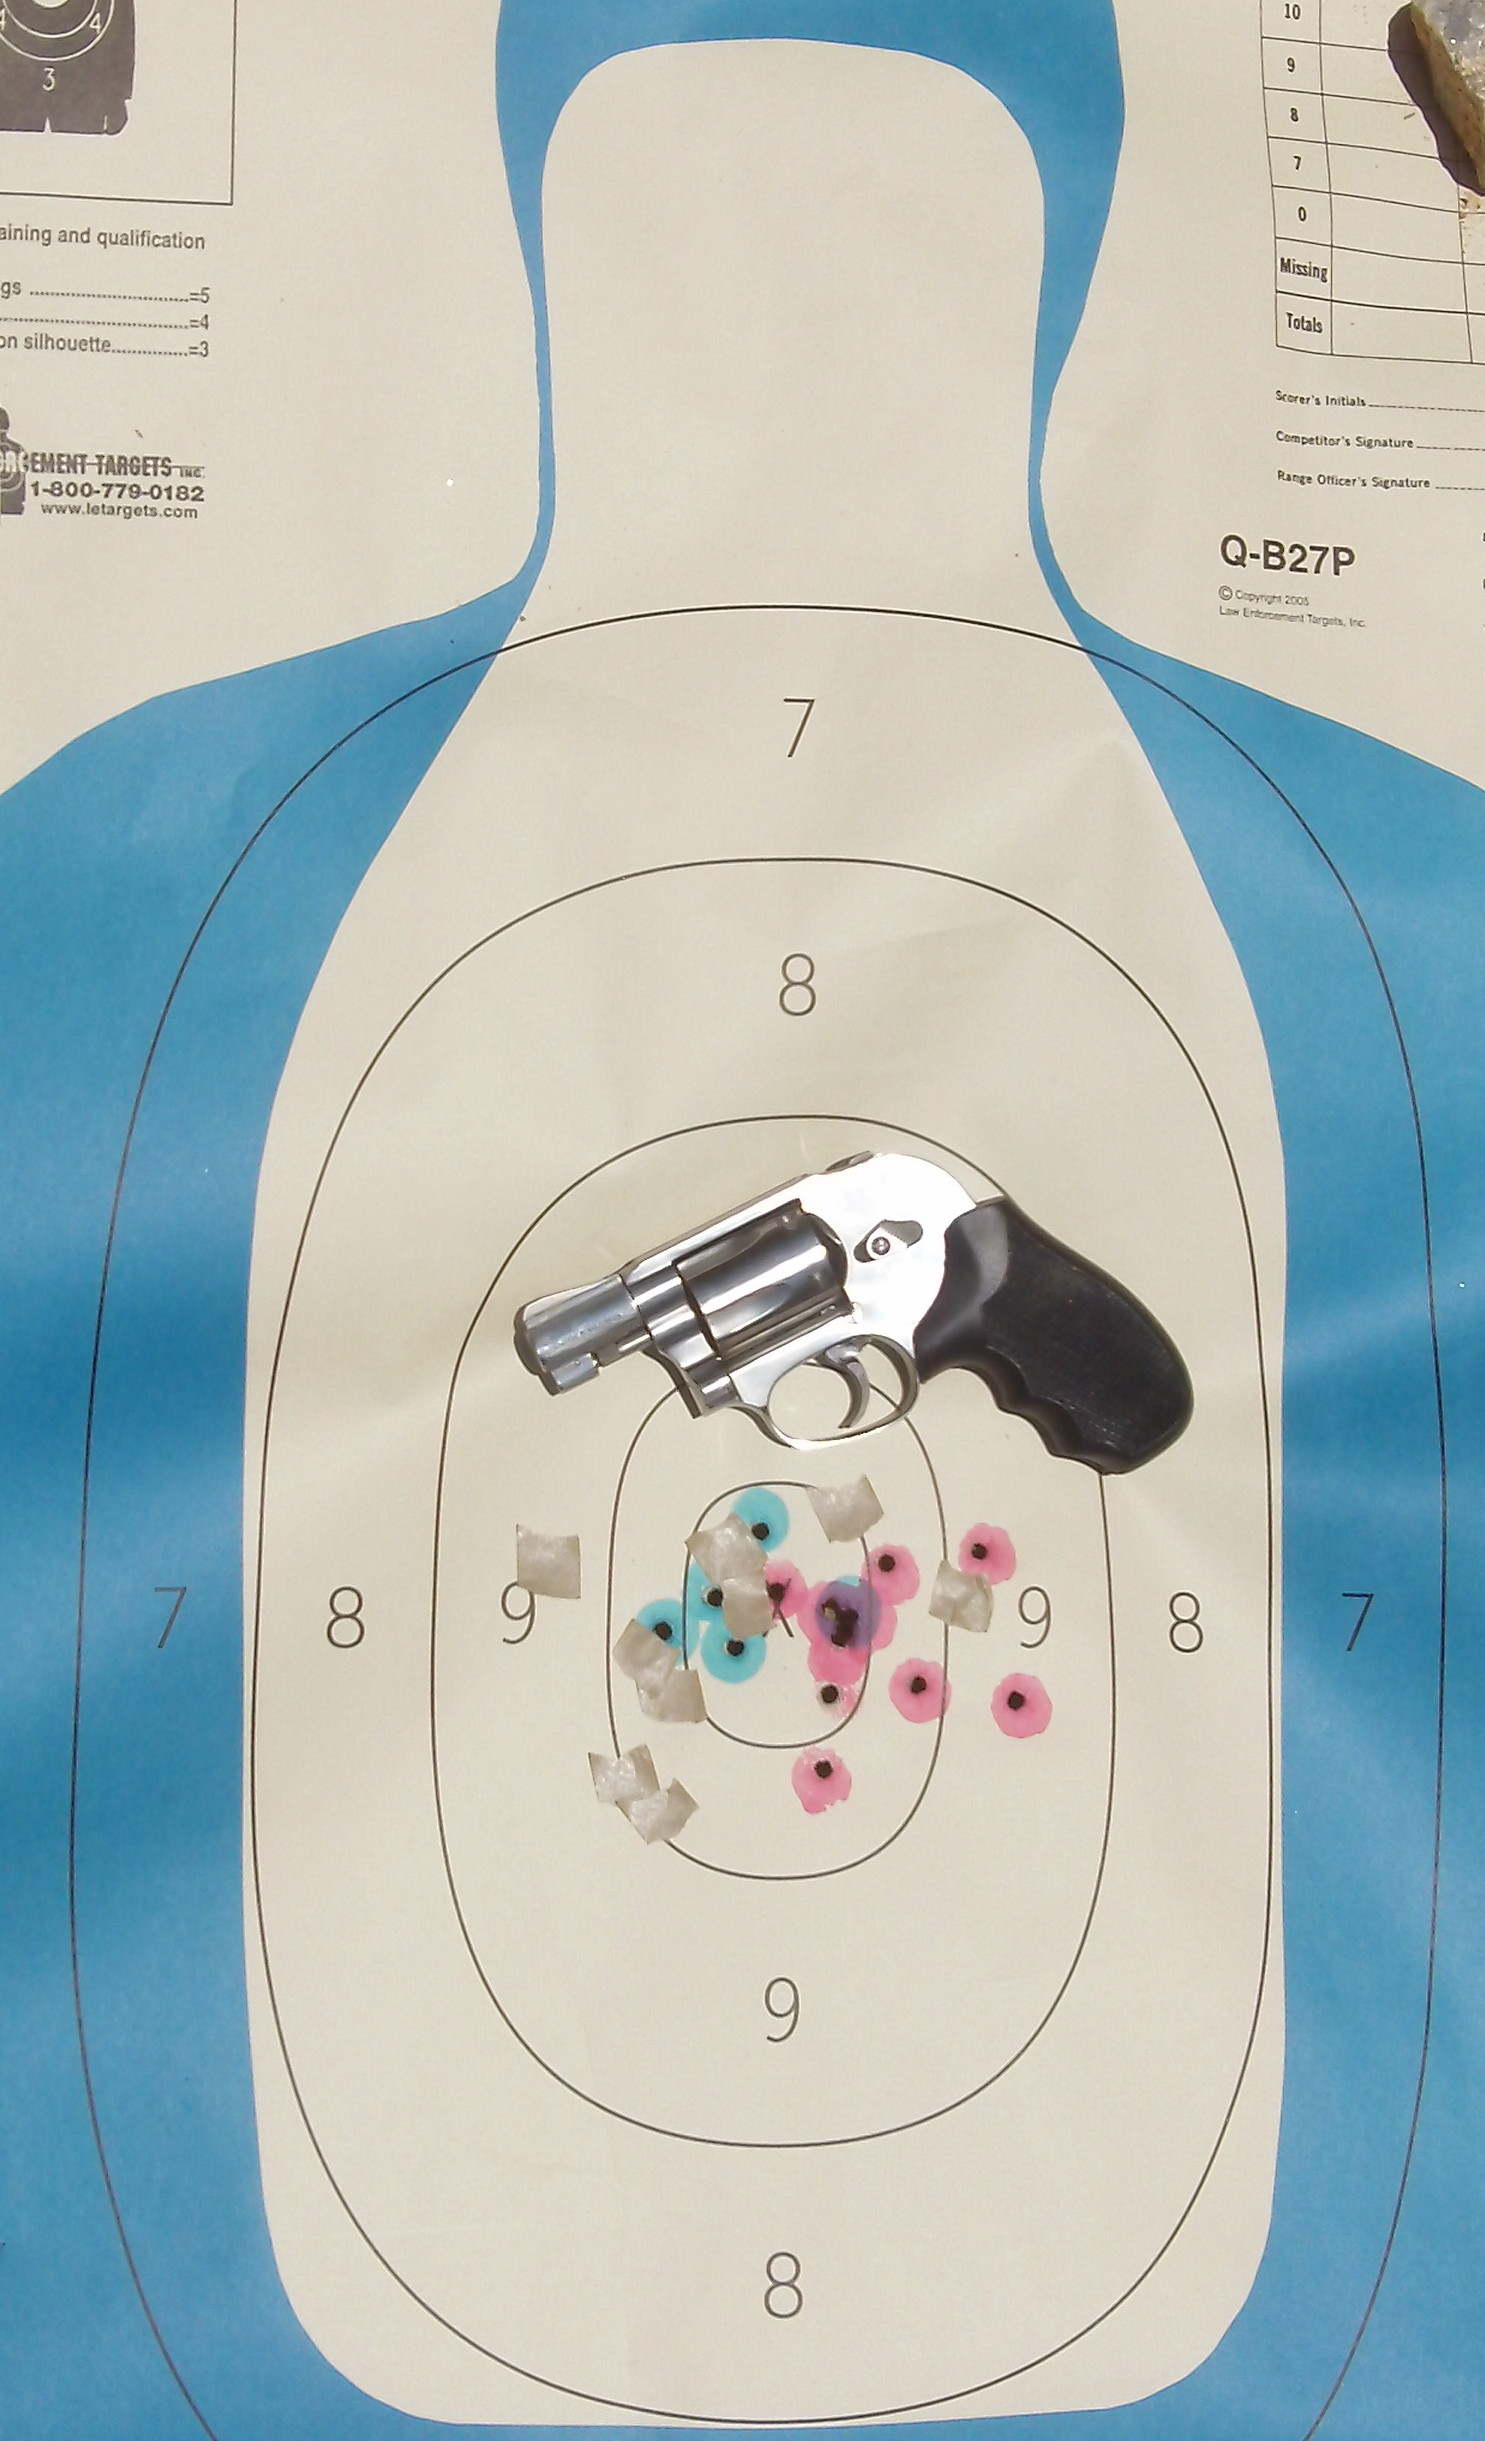 The point of this is to learn how fast we can shoot and still make our hits. Even the LAPD SWAT has learned and trained the cadence they can make consistent hits on a target. It’s not by shooting as fast as they possibly can, it’s by paying attention to what they’re doing while they’re shooting. I got that from Darryl Bolke.
If you meet the standard, then move on to the next component. If not, work on getting your fundamentals in better shape.
2) NRA Basic Pistol
Shoot a five-shot group within a 9-inch diameter circle (paper plate) at 15 feet with no time limit. Repeat twice for a total of three times. All the shots have to hit the plate. My colleague Chuck Haggard commented to me:
I wonder how many people never shoot anything but a full value target [i.e., complete silhouette] at 3-5 yards and call it gtg [Good To Go].
I agree with him completely; assuming that we’ll always have a full body presentation to shoot at in a defensive encounter is a mistake. If you can’t hit a paper plate consistently at five yards, you should work on being able to do that. See the sights and press the trigger smoothly. If you can make the standard, then move on to the next.
3) NRA Defensive Pistol I – Pro-Marksman
Shoot a five-shot group within a 12-inch diameter circle at 21 feet in fifteen seconds. Repeat until you’ve done it four times. The four times don’t have to be consecutive, however the standard of every shot having to be in the circle is. This drill is a lot more difficult than most people think because of the 100 percent hit requirement. Even though 15 seconds is a very generous time standard, knowing you’re on the clock makes it more difficult. Once you’ve made it four times, move on to the next component.
 4) 5^5
Shoot five shots into a five inch circle at five yards in five seconds. Do it five times in a row. This is a very difficult drill for most people. Only do it once to get an idea of how well you can shoot it. It’s a good practice drill for other times you shoot. After shooting it once, move on to the final component.
 5) NRA Off-Duty Pistol Course – Stage 3
Shot at 15 yards on a B-27 silhouette target. Load with six rounds only; you will need another magazine or speedloader loaded with six rounds also. Start double action if your pistol is so equipped. Fire six shots, reload, and fire another six shots for a total of 12 shots from a standing position, no support from bench or wall allowed. The time limit is 20 seconds, including the reload for the second 6 shot string. Score it based on the number value of the rings. The maximum point value for the string is 120.
Although many people think that a Private Citizen cannot legally justify shooting past seven yards, that is absolutely not true. I have a number of incidents in my database where Private Citizens shot at longer distances and it was completely justified. If a gang banger is shooting at you and your children at 23 yards, you are legally justified in shooting back. That assumes you have the skill and are cognizant of the background.
If you don’t need to do any remedial work during the session, you will fire 82 rounds total. That gives you a little left over to play around with as you please. Using a progression of drills that increase in difficulty gives you the opportunity to evaluate where you need to work on your skills to improve. Keep a record of how you did on each drill. Having a record is key to knowing what you need to work on in your practice sessions.
If it all seems easy, you can do the drills one handed; either dominant hand only or support hand only.

You must be logged in to post a comment.