Dry Practice on the Road
#safetysunday
When traveling, we can still do our dry practice. In fact, it may be more important when traveling than any other time. We’re more vulnerable and lack the underlying knowledge of our surroundings that we have during our usual activities in our home area.
Since we’re not at home, some of our usual safety protocols may not be available to us. For instance, our usual safe practice area is no longer available to us. Also, if our home practice regimen involves using a target that is generally concealed unless we are practicing, that will not be an option.
These limitations mean we have to use alternate safety protocols for our dry practice. Having an Unintentional Discharge in a motel room or in the home of a friend or relative will certainly lead to a Negative Outcome. Anyone who has run a major firearms training facility has stories of clients who had UDs in their motel rooms and the consequences. At the very least, the POlice will become involved to some extent. At worst, someone is killed and the consequences are grave. Having a UD in a friend or relative’s home may not result in POlice involvement but is unlikely to have a positive effect on the relationship.
Some of our home protocols can be modified but still used to some extent. The most important thing to remember is that safety protocols have the same importance when we are on the road as when we are at home.
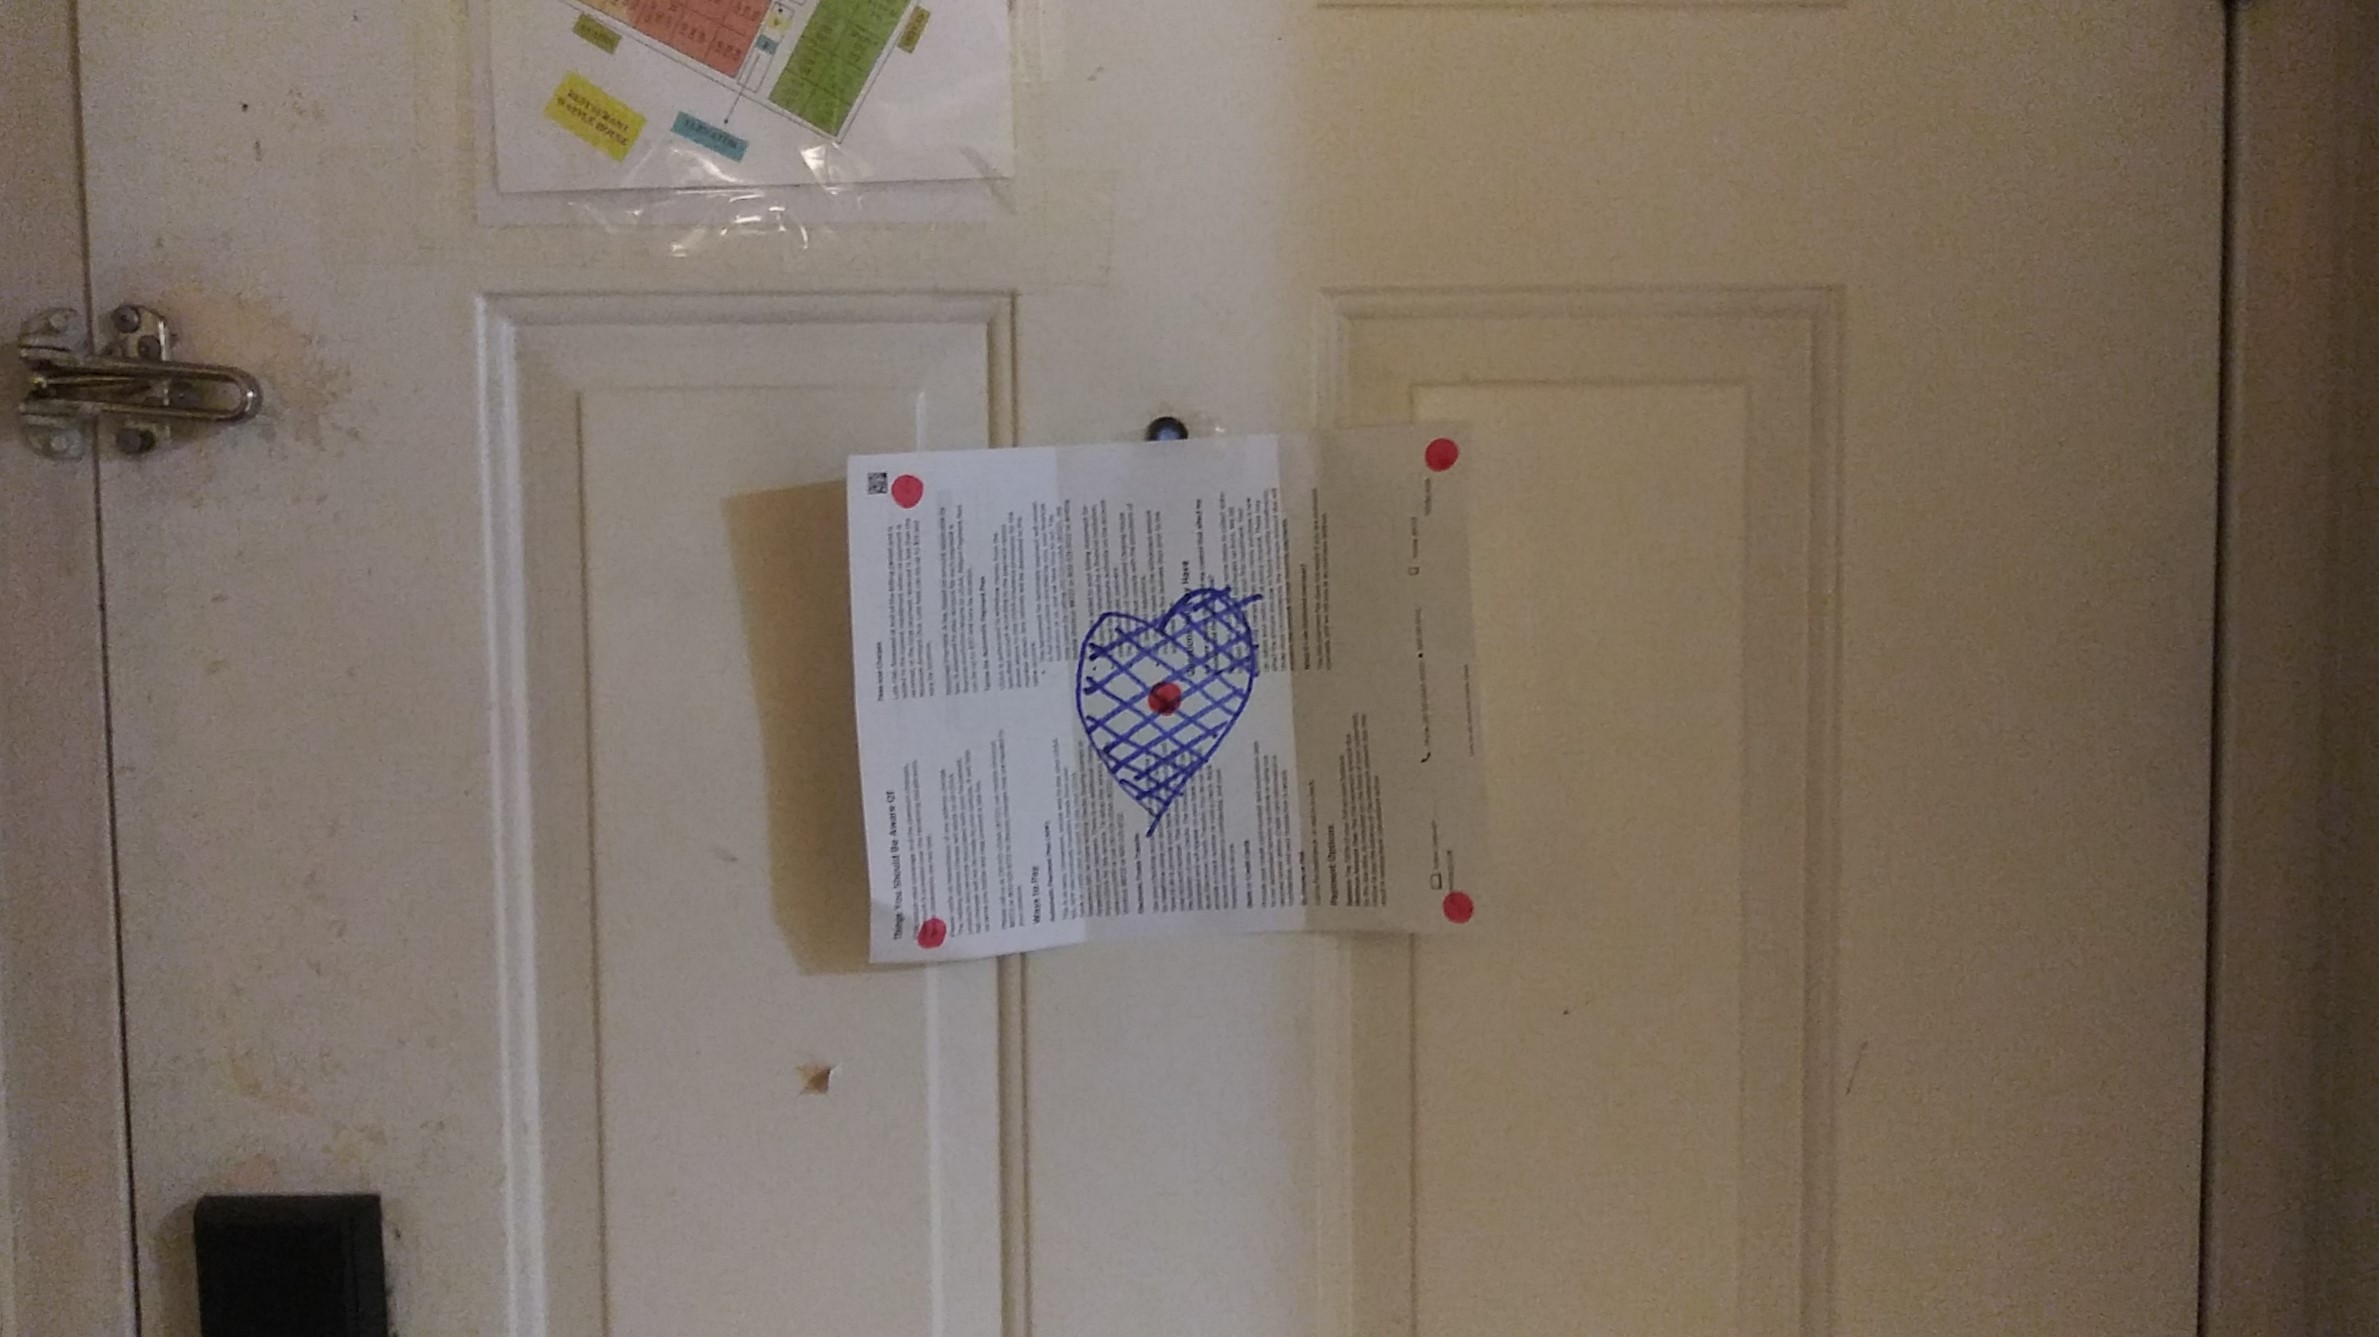
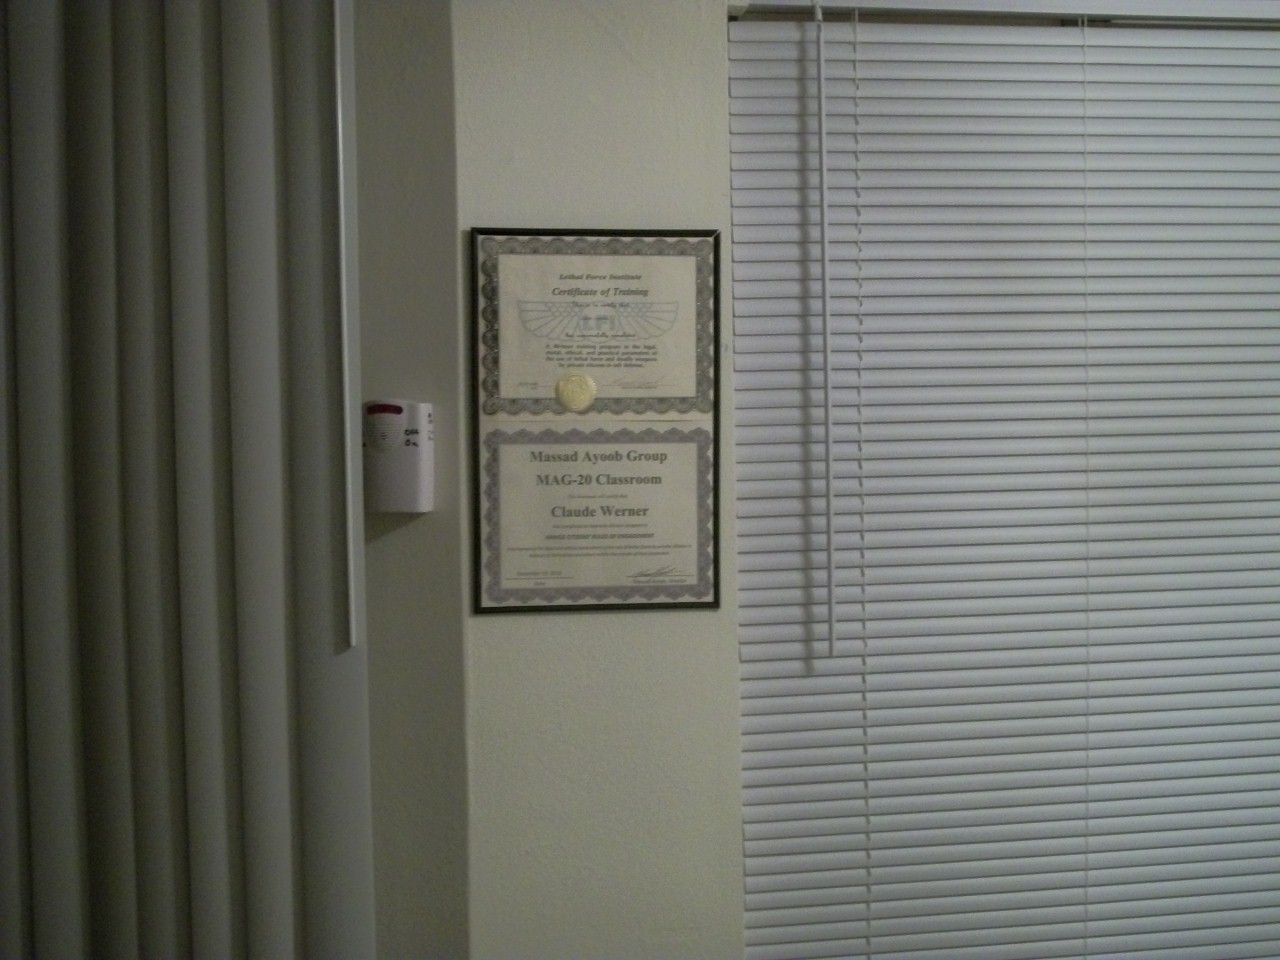
In terms of the practice area, we want to choose the least dangerous direction for our practice. Depending on the nature of the building’s construction, a bullet resistant wall simply may not be available. In that case, we must choose the direction that is least likely to result in a casualty if a round is fired. A bullet hole in a door that opens out to a brick wall has less consequences than a bullet hole in a guest in an adjoining room. Consider carefully where an errant bullet might go before choosing your practice direction.
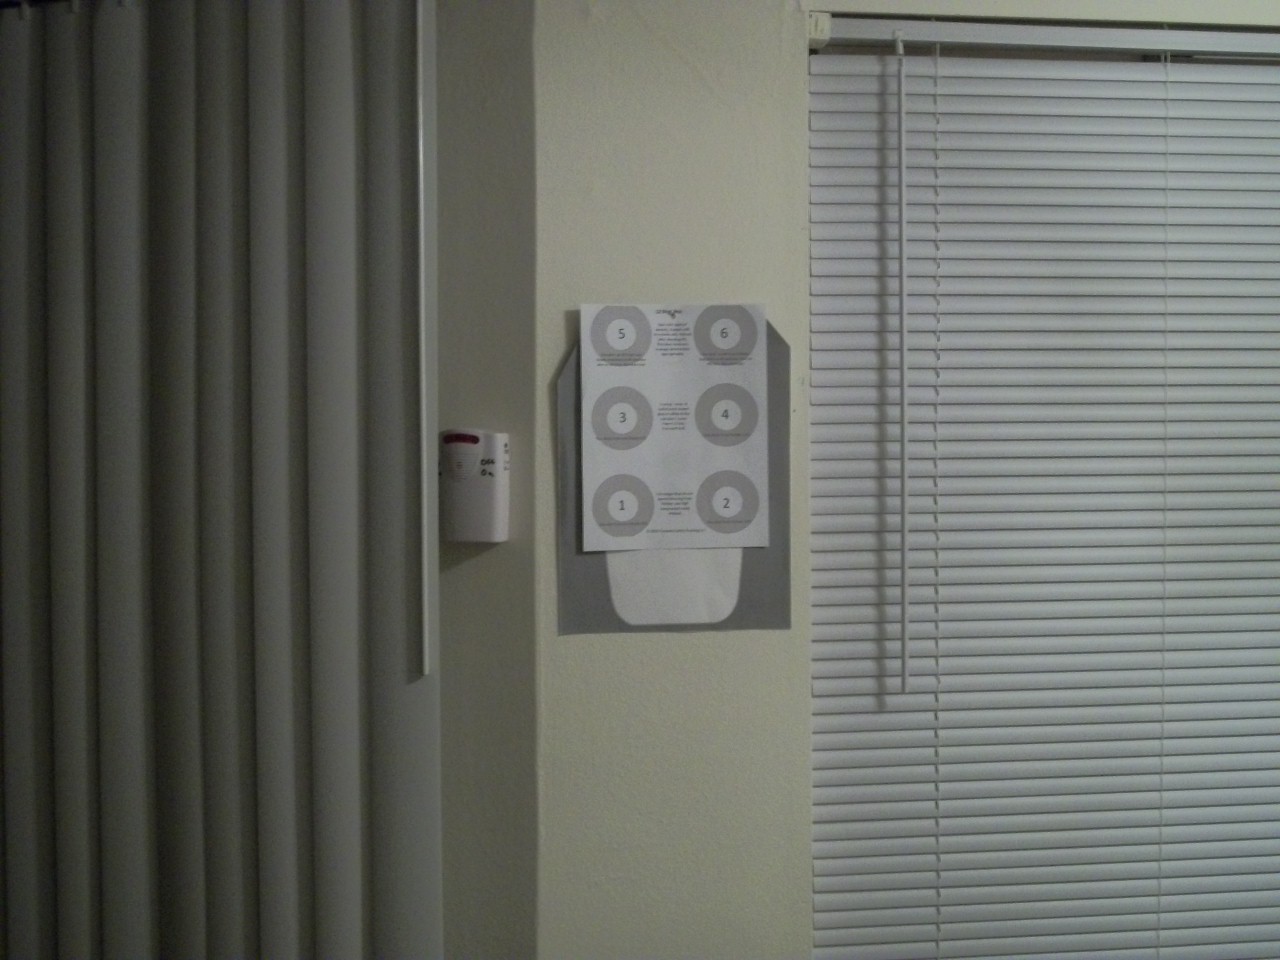
Next, use a target. A sheet of paper with a heart drawn on it is a good target for a ‘3 shots in 3 seconds at 3 yards’ Even more about Skill Development practice regimen. Putting a few small spots on it provides targets for precision aiming and trigger practice work.
A few easily carried training aids are useful for ensuring safe practice with a revolver. The first is inert ammunition. Three different types of inert ammunition are easily carried in an 18 round MTM Ammo case. The Ammo Case is itself a part of the safety protocols.
The first training aid is snap caps. Different varieties are available. If the primer pocket isn’t filled, such as with the ST-Action Pro inert ammo, you can fill the pockets in with a hot melt glue gun and trim the excess off. This will protect the firing pin or hammer nose of your revolver. Good snap caps are easily identifiable by their color. A-Zoom has recently started making their snap caps in orange, which are more identifiable when loaded in a blue steel gun than the darker A-Zoom offering. The spring loaded primer type of snap caps have a limited service life and are not recommended for serious practice.
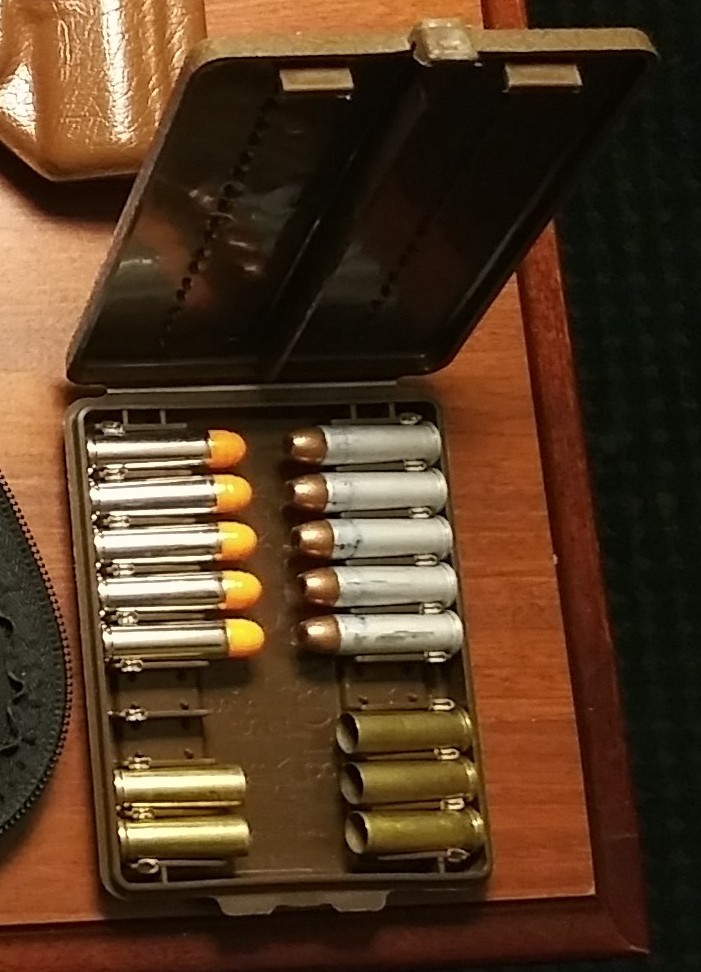
After unloading the revolver, replace the live ammunition with snap caps. Since two objects cannot fit in the same place at the same time, this precludes leaving one live round in the cylinder, which is not an unknown occurrence, as gunowners sometimes discover. After the snap caps have been loaded into the revolver, put the live ammunition in the Ammo Case and count the number of rounds. If the rounds you place in the case are less in number than the capacity of your revolver, the FBI calls that ‘a clue.’
A second training aid is full weight dummies for reloading practice. Snap caps are a good safety aid and for protecting the revolver, however, they usually lack the weight necessary for effective reloading practice. Dummy ammo should be easily identifiable, which is often a problem with homemade dummies. The dummies in the picture were made from Blazer Aluminum cases scrounged from a local indoor range. The bullet noses and cartridge base are colored blue with a Magic Marker for additional visual identification.
The third training aid is fired cases. Reload practice with revolvers should always include getting the empty cases out in addition to reloading with fresh ammo/dummies. A new speedloader manufacturer that was displaying at the SHOT Show years ago failed to consider this in their demonstration. When asked how the empty cases were to be ejected while holding the revolver in one hand and the speedloader in the other, a blank stare was the only answer.
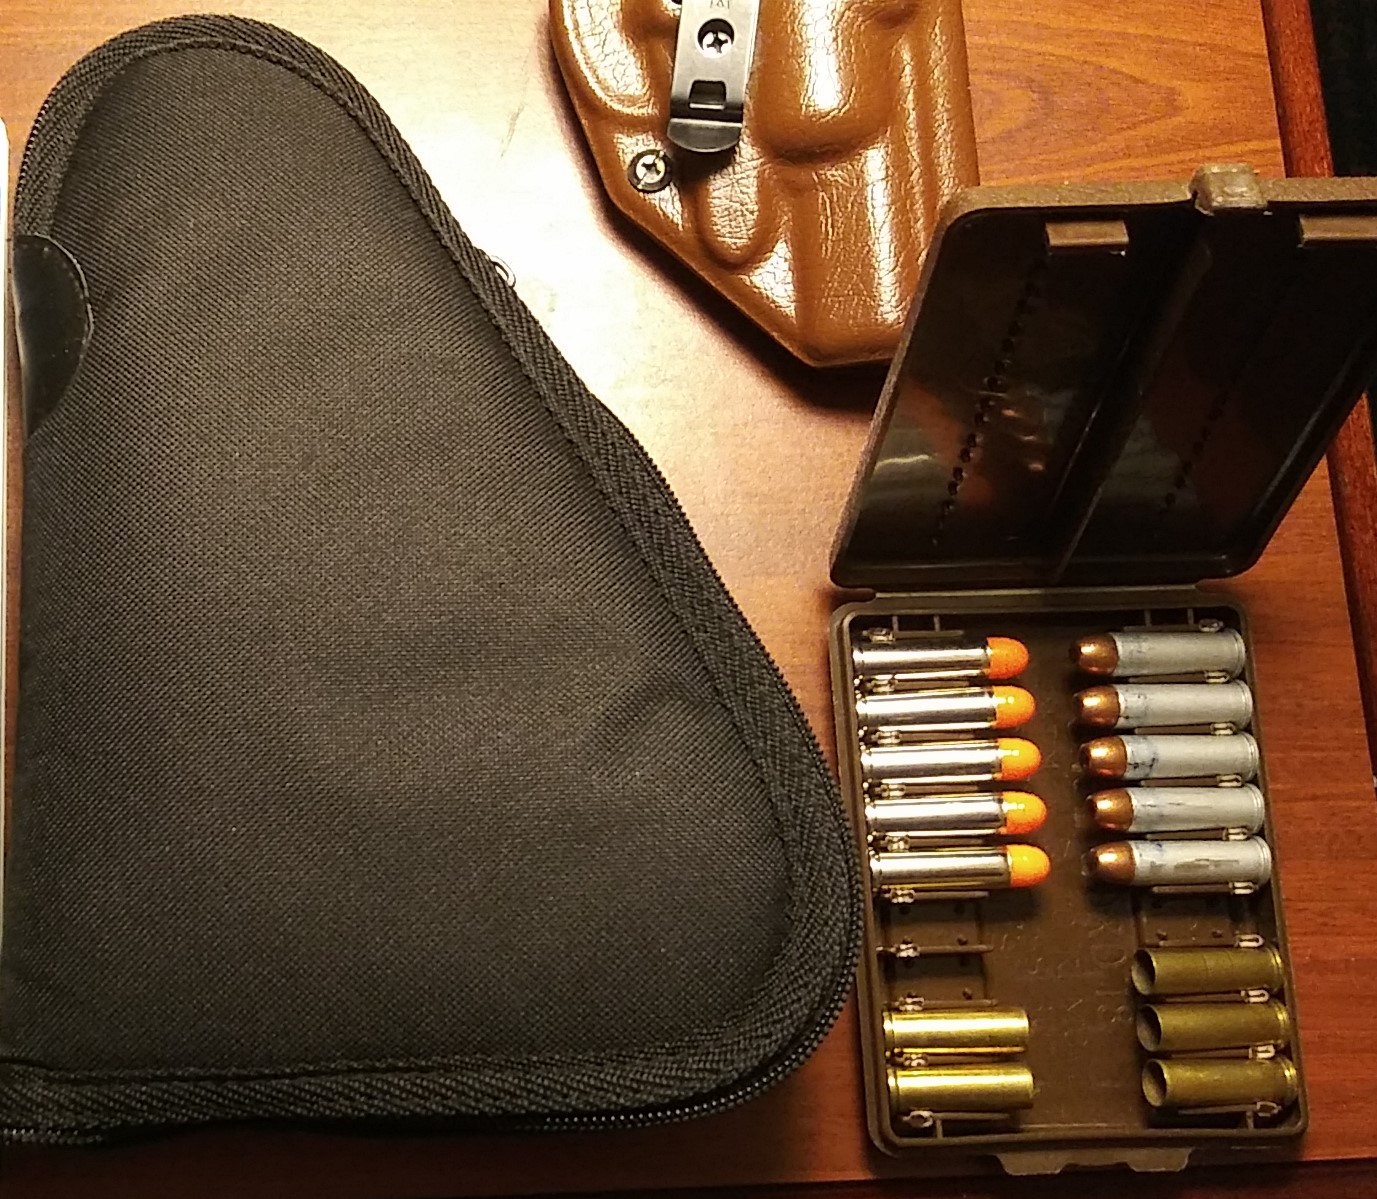
A pistol case is another training aid for practice on the road. The pistol case is for placing the pistol in after the practice session has been finished and the gun reloaded.
The sequence for finishing the session is:
- Declare out loud “This session is finished.”
- Take the target down.
- Remove whatever snap caps/dummies/fired cases are in the gun.
- Set the gun down completely empty.
- Again, declare out loud “This session is finished.”
- Load the pistol with live ammunition.
- Place the loaded pistol in the pistol case. The case does not have to be complete zipped but should be at least partially. This is a visual and situational indicator that the gun is loaded and not available for practice.
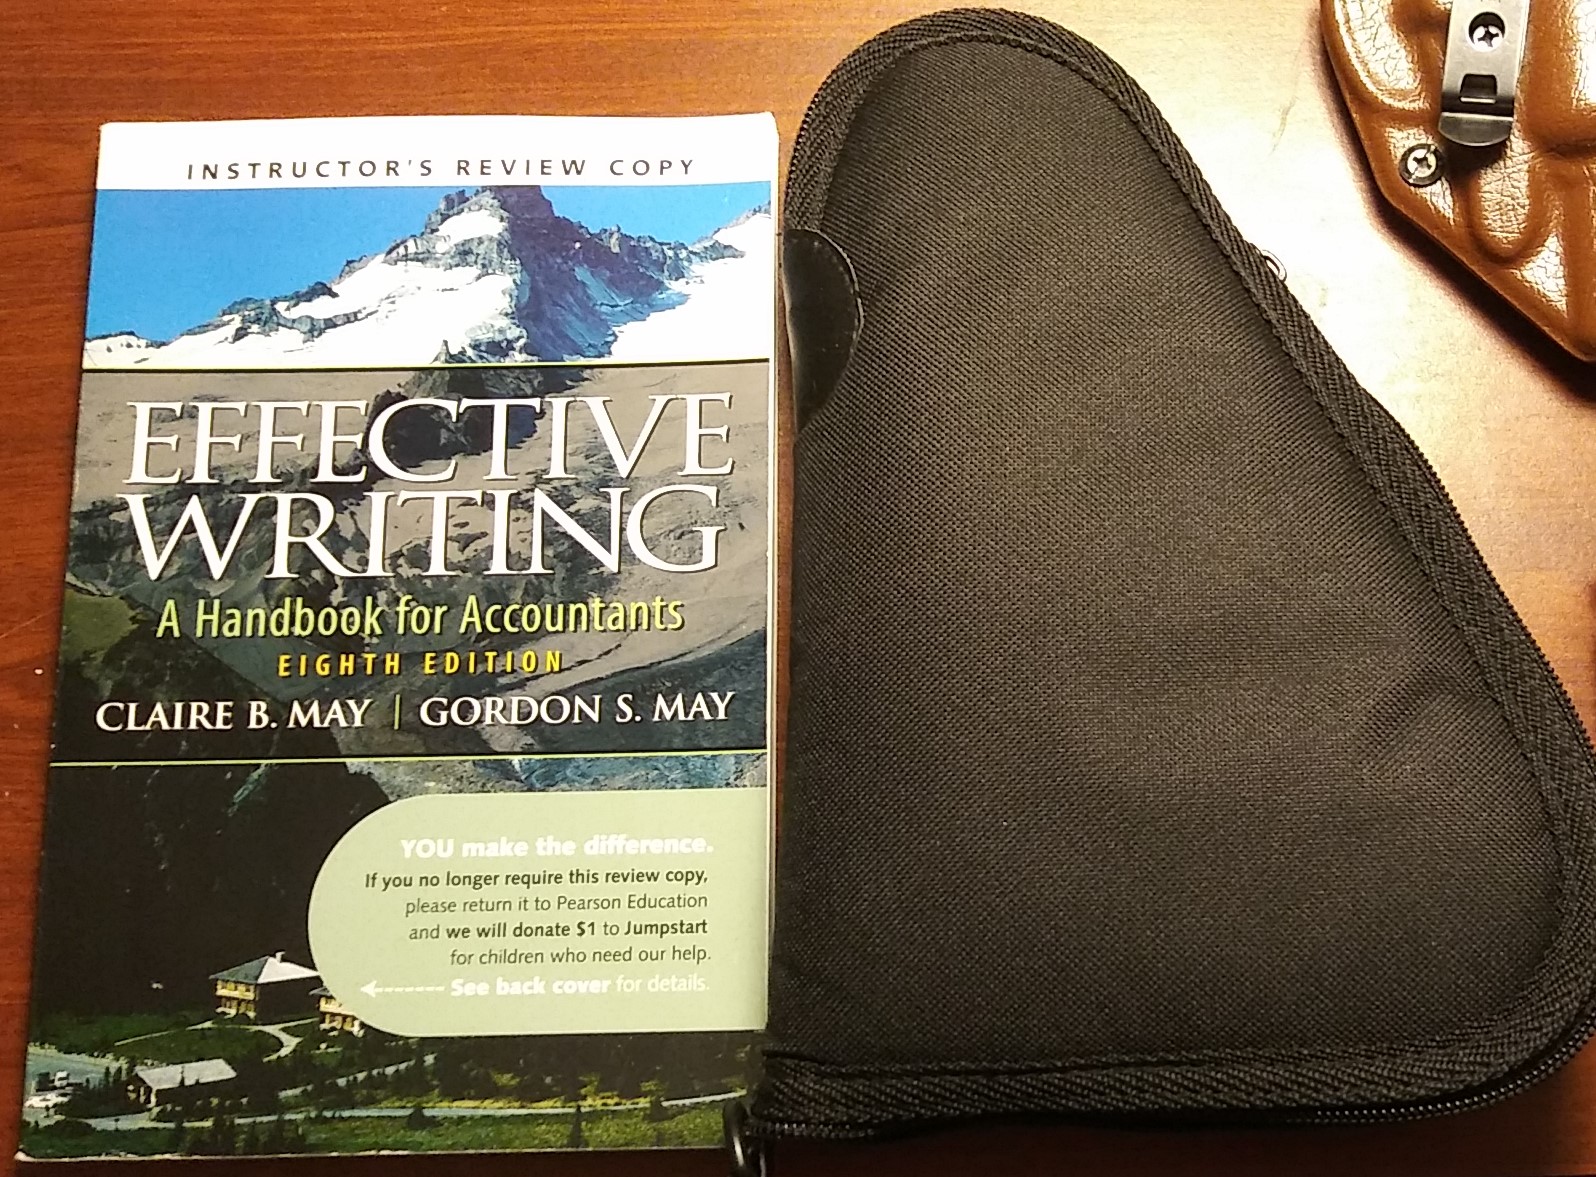
- Do something else to remove dry practice from your thoughts.
Reading something dry and difficult is a good way to remove dry practice from your thoughts.
Keeping an awareness of safety in mind allows us to maintain our proficiency on the road without menacing innocent people around us.
The circumstances of Unintentional Discharges at home are covered as the third Section of Real Shootouts of the LAPD. Off-duty Officer Involved Shootings and Officer Involved Animal Shootings are the first two. If you would like to purchase the book, click on the cover below.
Fundamentals of dry practice
Although dry practice (aka dry fire) is often recommended, many shooters are unclear about the specifics of dry practice. Here is a short video, first in a series, to get gunowners started.
This series will include a video about safety procedures and a few sessions. I hope it will be useful to my readers and clients.
If you enjoy my content, please consider supporting me on Patreon. I post more in-depth material there for serious students of Self-Defense and Personal Protection.
Dry Practice Safety Procedures
The influx of new firearms owners in the past few weeks has generated considerable interest in dry practice. For both new and long time owners, a primer on dry practice is in order.
Dry practice is the process of practicing with a firearm without using ammunition. Generally, this is done at home but can also be done at the range in conjunction with live fire practice. The purpose of dry practice is to become more familiar with the operation of a firearm without the distractions of recoil and the Overpressure Event aka muzzle blast. In times of limited or no availability of ammunition and range resources, dry practice may be the only practice method available to us.
There are very specific safety precautions that should be used to make dry practice as safe as possible. A one page sheet listing safety precautions is available here. dry practice safety procedures Note that no usage of any potentially life-threatening device, such as firearms, automobiles, chain saws, or electric outlets can be considered completely safe.
Using a chamber safety device is highly recommended when dry practicing. A number of commercially available devices are available and they work well. A field expedient device is a pipe cleaner aka ‘craft fuzzy stick’ through the bore and bent over in the ejection port.
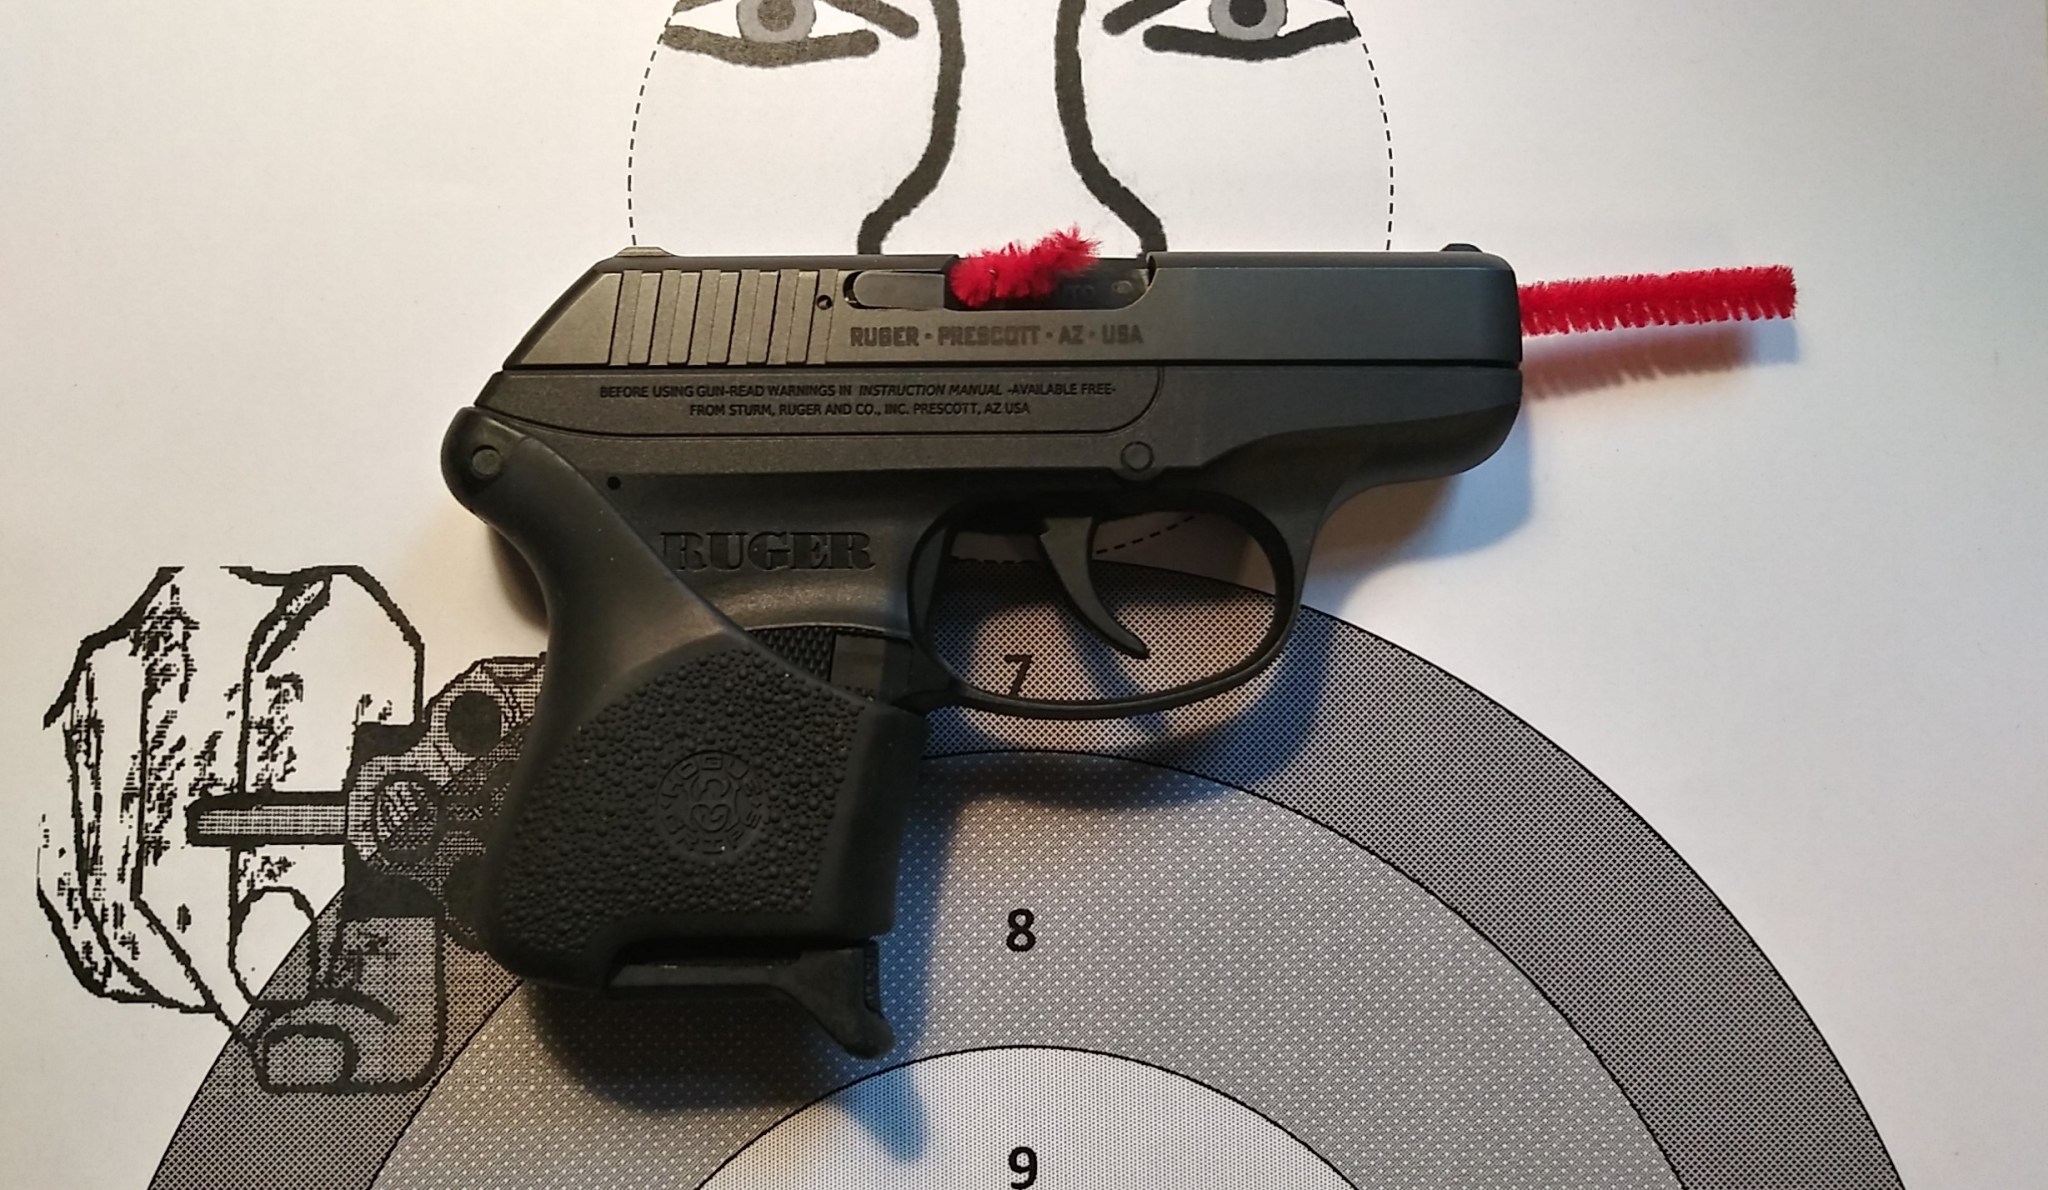 These can be purchased at Wal-Mart for less than one dollar for a large package of them.
Previous articles about dry practice, nee dryfire, can be found by clicking the ‘dryfire’ Category in the right column menu.
Practice and practice safely.
1000 Days of Practice (Part II)
An implied task, the first time of the 1,000 days, was simply devising a way of getting through it. To avoid boredom and make the process efficient, I recorded cassette tapes of several different regimens. The regimens were all based on my needs at the time, which mostly consisted of improving my competitive performance in IDPA and other shooting sports. I limited them to 10 minutes duration so I had compact practice blocks. When I wanted more practice, I could do more than one in a day, sometimes consecutively and sometimes one in the morning and one in the evening.
Having a specific structure for my practice also helped avoid ‘grabasstic gunclicking,’ which as a friend said, is what dryfire often devolves to. I didn’t realize it at the time, but I had inadvertently incorporated one of fundamentals of tactical decision-making; have a plan ahead of time. My decision-making research of the past few years made the value of having several practice regimens available quite obvious to me. John Boyd’s Aerial Attack Study was instrumental in providing me with this moment of clarity.
My regimens of the second 1,000 Days are considerably different than those of the first. Several of the regimens are based on higher level police qualification courses, such as the Federal Air Marshal Tactical Pistol Course (pre 9/11) and the LAPD Bonus Course. While most police qualification courses are easily cleaned by a competent marksman, a few are much more demanding and I prefer that.
In other cases, I took police quals that had a good basic structure but mediocre standards and enhanced them. My favorite is the State of Illinois Police Qualification Couse. For the armed private citizen, the distances and round allocations are good but the standards are so low that some of my friends in Ill‑Annoy can literally pass it with their eyes closed. The enhancements I made were to make the target smaller, cut the times in half, and do parts of it Primary Hand Only and Support Hand Only.
Being a fan of the NRA Markmanship Qualification Program, I developed dryfire versions of both Defensive Pistol I and Defensive Pistol II. The time limits set for these courses are quite generous but they have an accuracy standard of 100 percent. Since we’re accountable for every round we fire, I like the idea of a strong accuracy standard, in general.
In a defensive encounter, every bullet you fire that doesn’t hit its intended target is headed straight for a bus full of nuns and orphans being followed by a limousine of personal injury lawyers on a conference call with the District Attorney.
There are also some improvisations I like to make. My research into Serious Mistakes and Negative Outcomes made me a believer in the absolute necessity of verbalizing and being able to use a flashlight in conjunctions with a handgun. I usually dryfire something like Defensive Pistol I using a flashlight at least once a week.
One of the concepts I retained from my first 1,000 Days was making a good hit with the first shot. There’s too much emphasis placed on shooting fast in the community and not enough on making sure the first shot counts. Based on the incidents in my databases, I came to the conclusion that making a solid first hit above the diaphragm is the way to gain the initiative in an armed encounter.
Then I told myself, ‘Hey, I need to slow down and aim better.’
What if your situation or job precludes you from having access to a firearm every day? Some thoughts about that in Part III.
The Tactical Professor’s Pistol Practice Program
Why a Practice Program and not a training program?
I created the Pistol Practice Program (PPP) to fill a need for many gunowners. Most gunowners are self-taught and generally are not familiar with a structured approach to skill development. There is a great deal of information available now on how to shoot a pistol. However, there is much less information available on how to practice firearms skills over a period of time to achieve greater confidence and proficiency. As Aristotle said:
We are what we repeatedly do. Excellence, then, is not an act, but a habit.
My goal was to create a program that would get gunowners into the habit of shooting well. I created a step by step approach tailored to the needs of the casual shooter but challenging enough to satisfy the enthusiast. Designed as a series of range sessions, you can practice at your own pace as your schedule permits.
In the case of those who have attended training, your instructor probably said that a firearms class only provides a foundation of skills. To maintain those skills and improve, people who own pistols need to practice after training. Having a program also makes shooting more fun because the shooter develops a sense of accomplishment from the practice. This program is not concerned with what particular technique the shooter uses. Over time and by working the PPP, shooters will determine what works best for them.
The vast majority of gunowners only have access to indoor or public ranges where the type of practice they can do is rather restricted. The PPP takes that constraint into account and presents drills that are indoor range friendly and yet relevant to skill development. The livefire range sessions are then supplemented by dryfire sessions that can be done safely at home. Doing so allows you to develop skills that usually cannot be practiced at an indoor range. How to practice at home safely is thoroughly explained.
The PPP is available on CD. Its contents are mobile device friendly so you can copy the drills to your smartphone or tablet. If your device can access a PDF reader, you can easily take the exact drills to the range with you without having to lug along a book or write down the contents of a DVD. You can also put the dryfire audio sessions on your device for maximum convenience.
Those who are teaching a friend or loved one how to shoot a pistol will find the PPP provides a solid structure for their time at the range. For those who have attended a training class, the PPP provides a way to maintain and build the skills they learned in class. Law enforcement officers can use the PPP to keep your shooting skills tuned up in between qualifications and make qualifications less stressful. Put whatever practice ammo you receive from the department to good use instead of frustrating yourself by shooting the qual course over and over.
Contents of the PPP
- A Program Guide to get you started
- A Log Sheet to keep track of your progress
- 12 Primary Livefire Sessions (50 rounds and Indoor range friendly)
- 12 Secondary Livefire Sessions (50 rounds) for those who want more practice activity each time at the range
- 12 Structured scenarios designed to emphasize and train the interactive aspects of personal protection
- 6 audio guided Dryfire sessions (less than five minutes each)
- Tip sheets on firearms safety, interacting with law enforcement, common mistakes, etc.
I have drawn on a wide range of training experience, from teaching NRA Basic Pistol classes to my time as the Chief Instructor of the elite Rogers Shooting School, to create this Program. There is no doubt in my mind that shooters at all levels of skill and experience can benefit from it.
The PPP CD is available on my webstore. At $19.95, it’s about the cost of one box of centerfire ammo. Bonus: the first 100 orders will receive a Rogers Tap-Rack-Training aid, a $5.00 value, at no charge.
Structured practice (Part II)
Part I of this series focused on Dryfire Practice. Now let’s focus on livefire practice, especially for those who are new to pistol shooting. To learn, maintain, and improve physical skills, we have to practice them regularly. We also need a plan for how we are going to practice. In that regard, shooting a gun is no different from learning to throw or hit a ball.
The problem many people have is that when they go to the range to practice, they have no plan and use no structure. At least a motivated police officer has the course required for periodic qualification as a structure for practice. Competitive shooters have courses of fire, either for Classification purposes or something that was appealing in a match. Few Private Citizens have either of these, which is why the most common ‘practice’ is blasting 50 holes in a silhouette at 5 yards. Shooting a bunch of holes in a silhouette gives familiarity with recoil and muzzle blast but not much else. Something further is needed to develop skill.
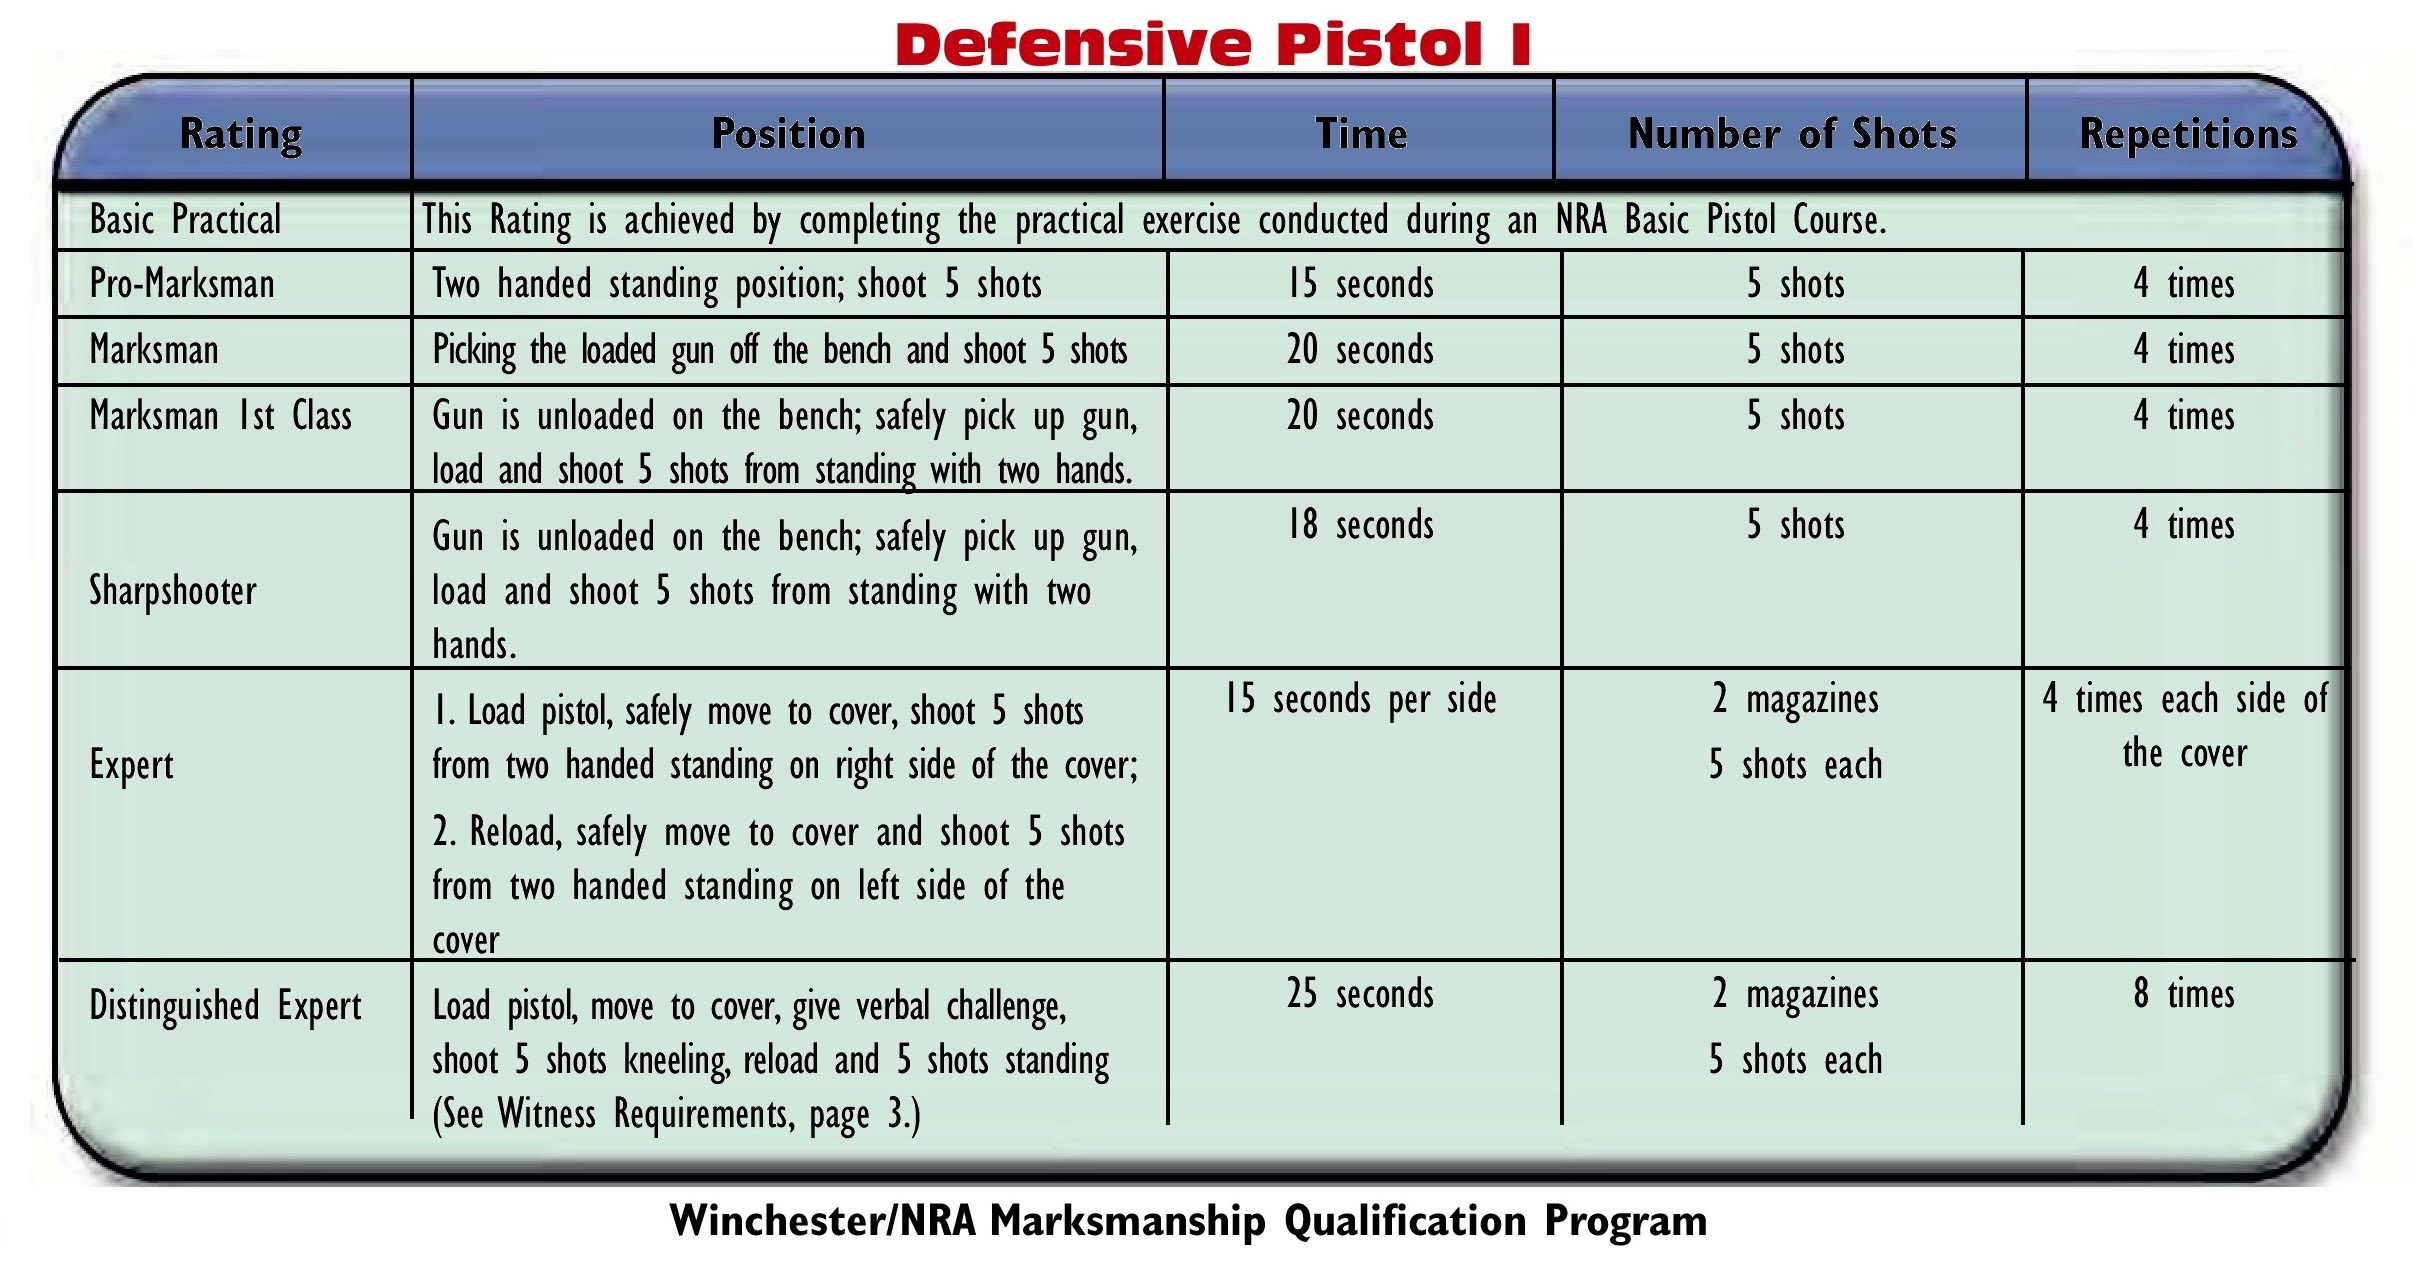
A very good starting point for new shooters is the NRA’s Marksmanship Qualification Program, which is really a marksmanship development program. This is a self-paced and self-administered program that the NRA has made available for decades. There are a number of different courses of fire available within the Program. The one I recommend for those who have just purchased a pistol for personal protection is Defensive Pistol I. DPI is designed to improve skills that contribute to a successful home defense.
Defensive Pistol I includes tasks such as:
- Hit a target to an accuracy standard
- Shoot within time limits
- Pick the loaded gun up from a bench and then engage the target
- Pick up and load an unloaded gun
- Move to a position of cover
- Shoot from behind cover
- Issue a verbal challenge
- Reload
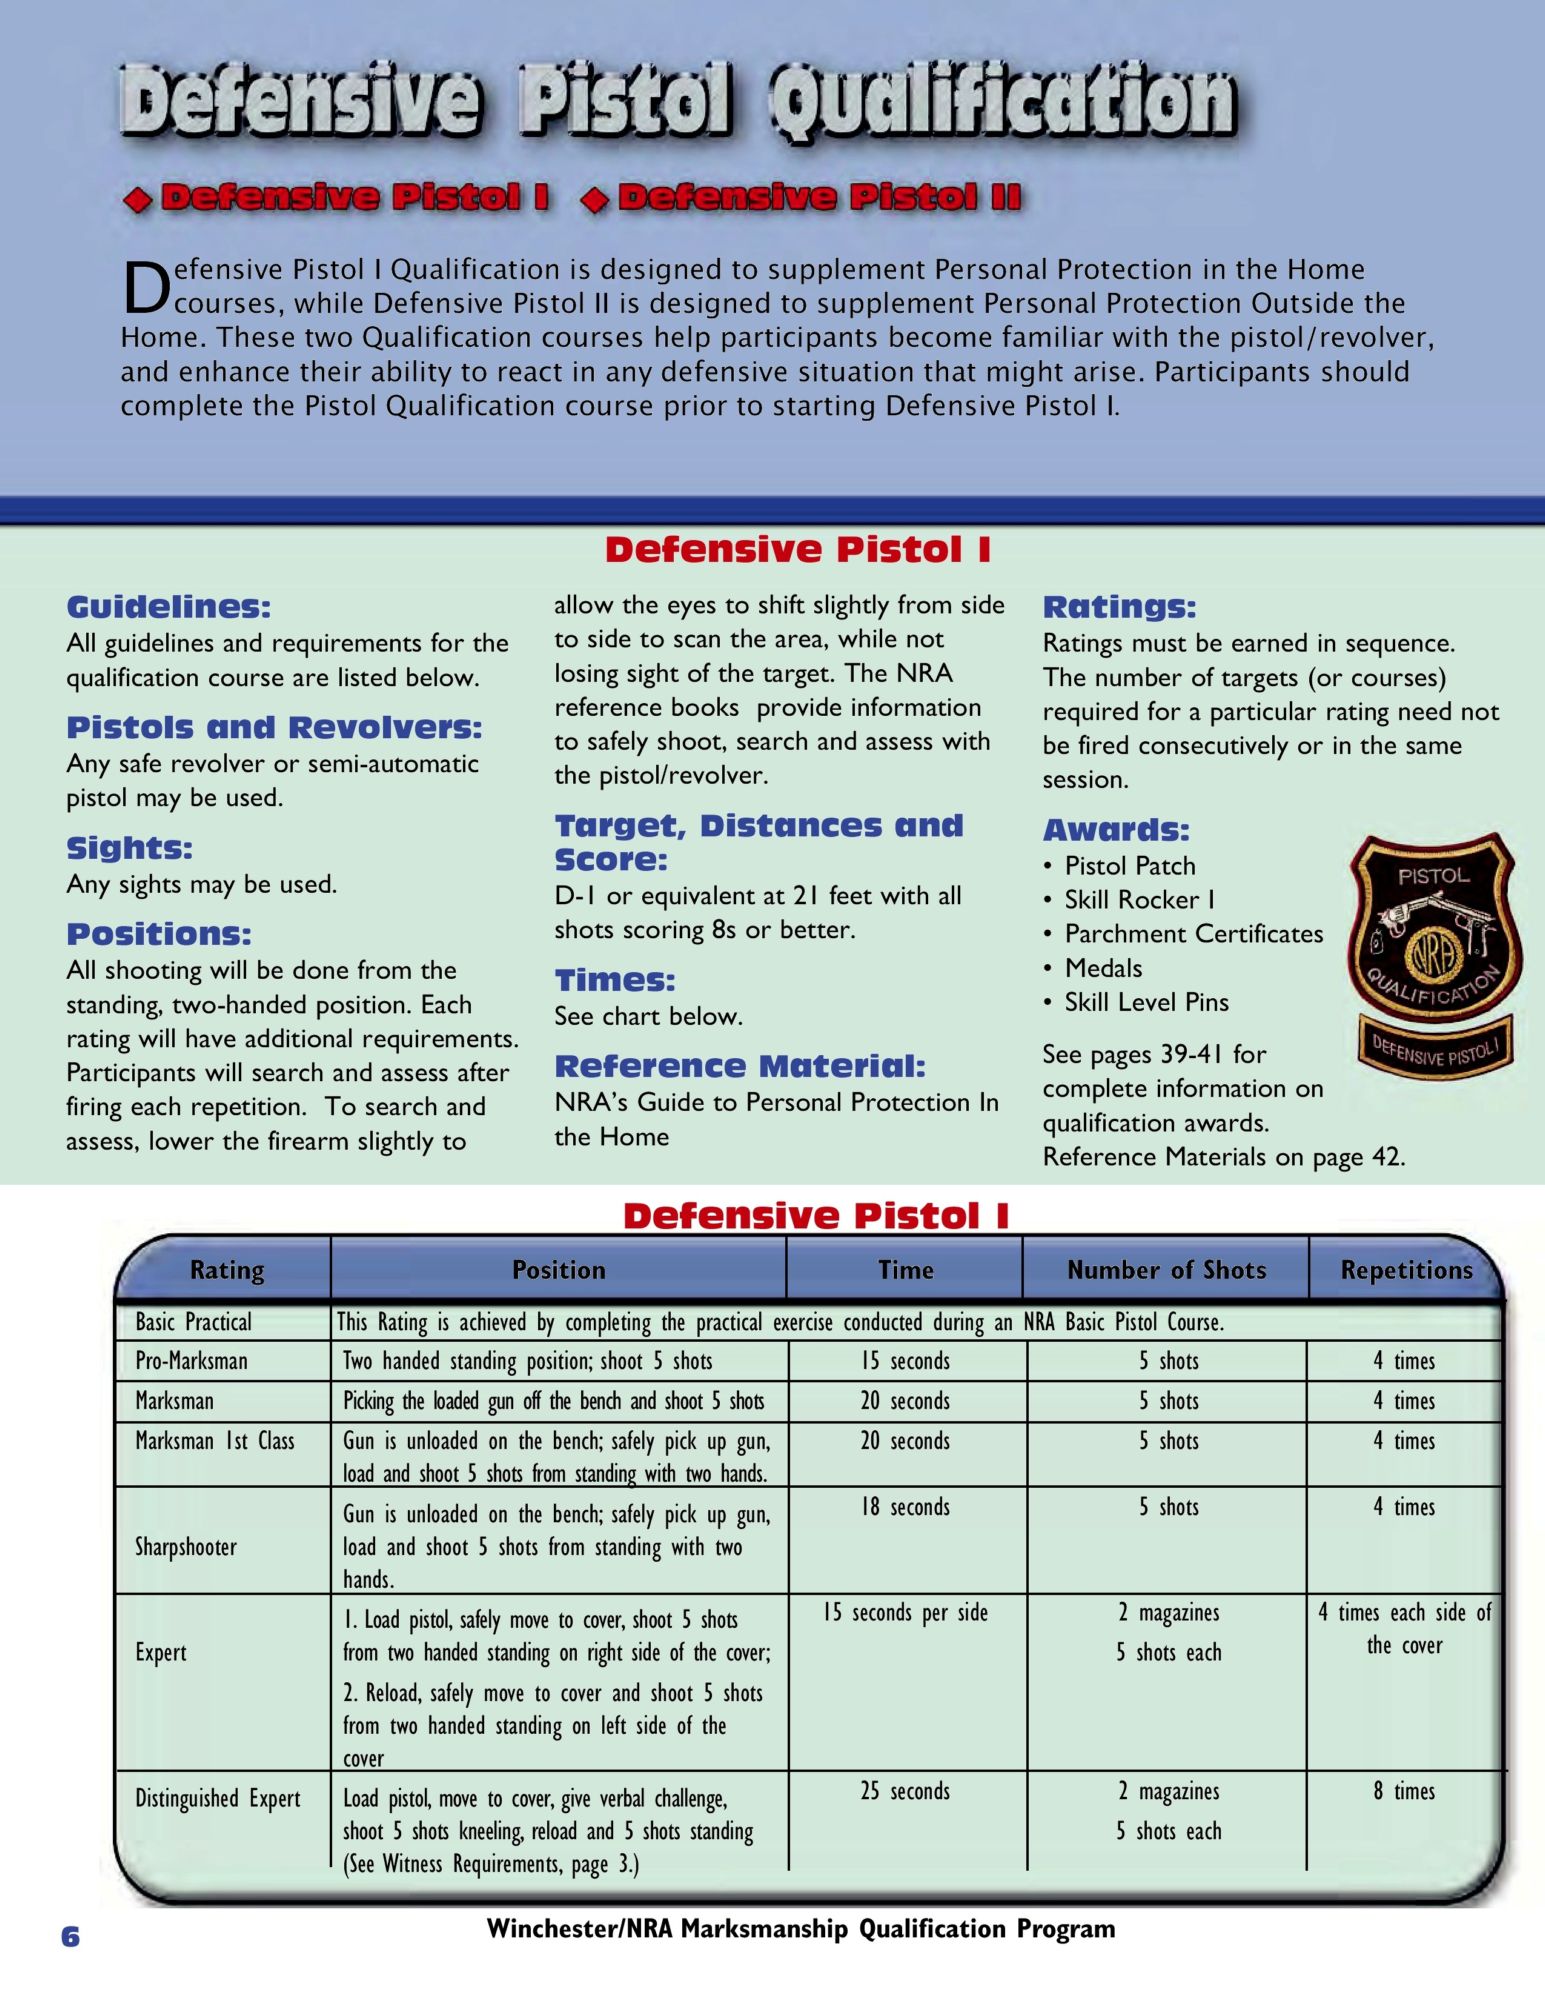
Courtesy of NRA Training Division
Something I really like about Defensive Pistol I and II is that the accuracy standard is 100%, not a fraction thereof. The allowable area and time limits are generous but you have to make every shot count. As I mention periodically, every bullet you fire in an urban area that doesn’t hit your target is heading for a busload of nuns and orphans being followed by a limousine full of personal injury lawyers on a conference call with the District Attorney. We have to get used to the idea that the only safe backstop for our bullets is the criminal’s body, period.
The target area specified for the NRA program is the 8 ring of the NRA D-1 (Bianchi Tombstone) or equivalent. The 8 ring of the D-1 is 12 inches in diameter. The shooter must place five shots in the 12 inch circle at 7 yards within a time limit of 15 seconds. Many shooters I talk to think this is a very simple marksmanship task. The reality is that because of the 100% standard it’s not as easy as people think. In order to meet the standard for the first level (Pro-Marksman) of the program, the task has to be done four times. Therein lies the rub. I have run over 100 people through the program and only about 10% have passed on the first attempt. What happens is that on one or two runs, one shot will not hit the 12 inch circle. Sorry, you didn’t make it.
The good news is that the four runs don’t have to be done consecutively. If you mess up a run, just shoot another until you have four that meet the standard. My experience has been that 10 percent of shooters can do it in four runs, another 40% will make it in five runs, another 40% will make it in six runs, and the final 10% need a lot of coaching to get through it.
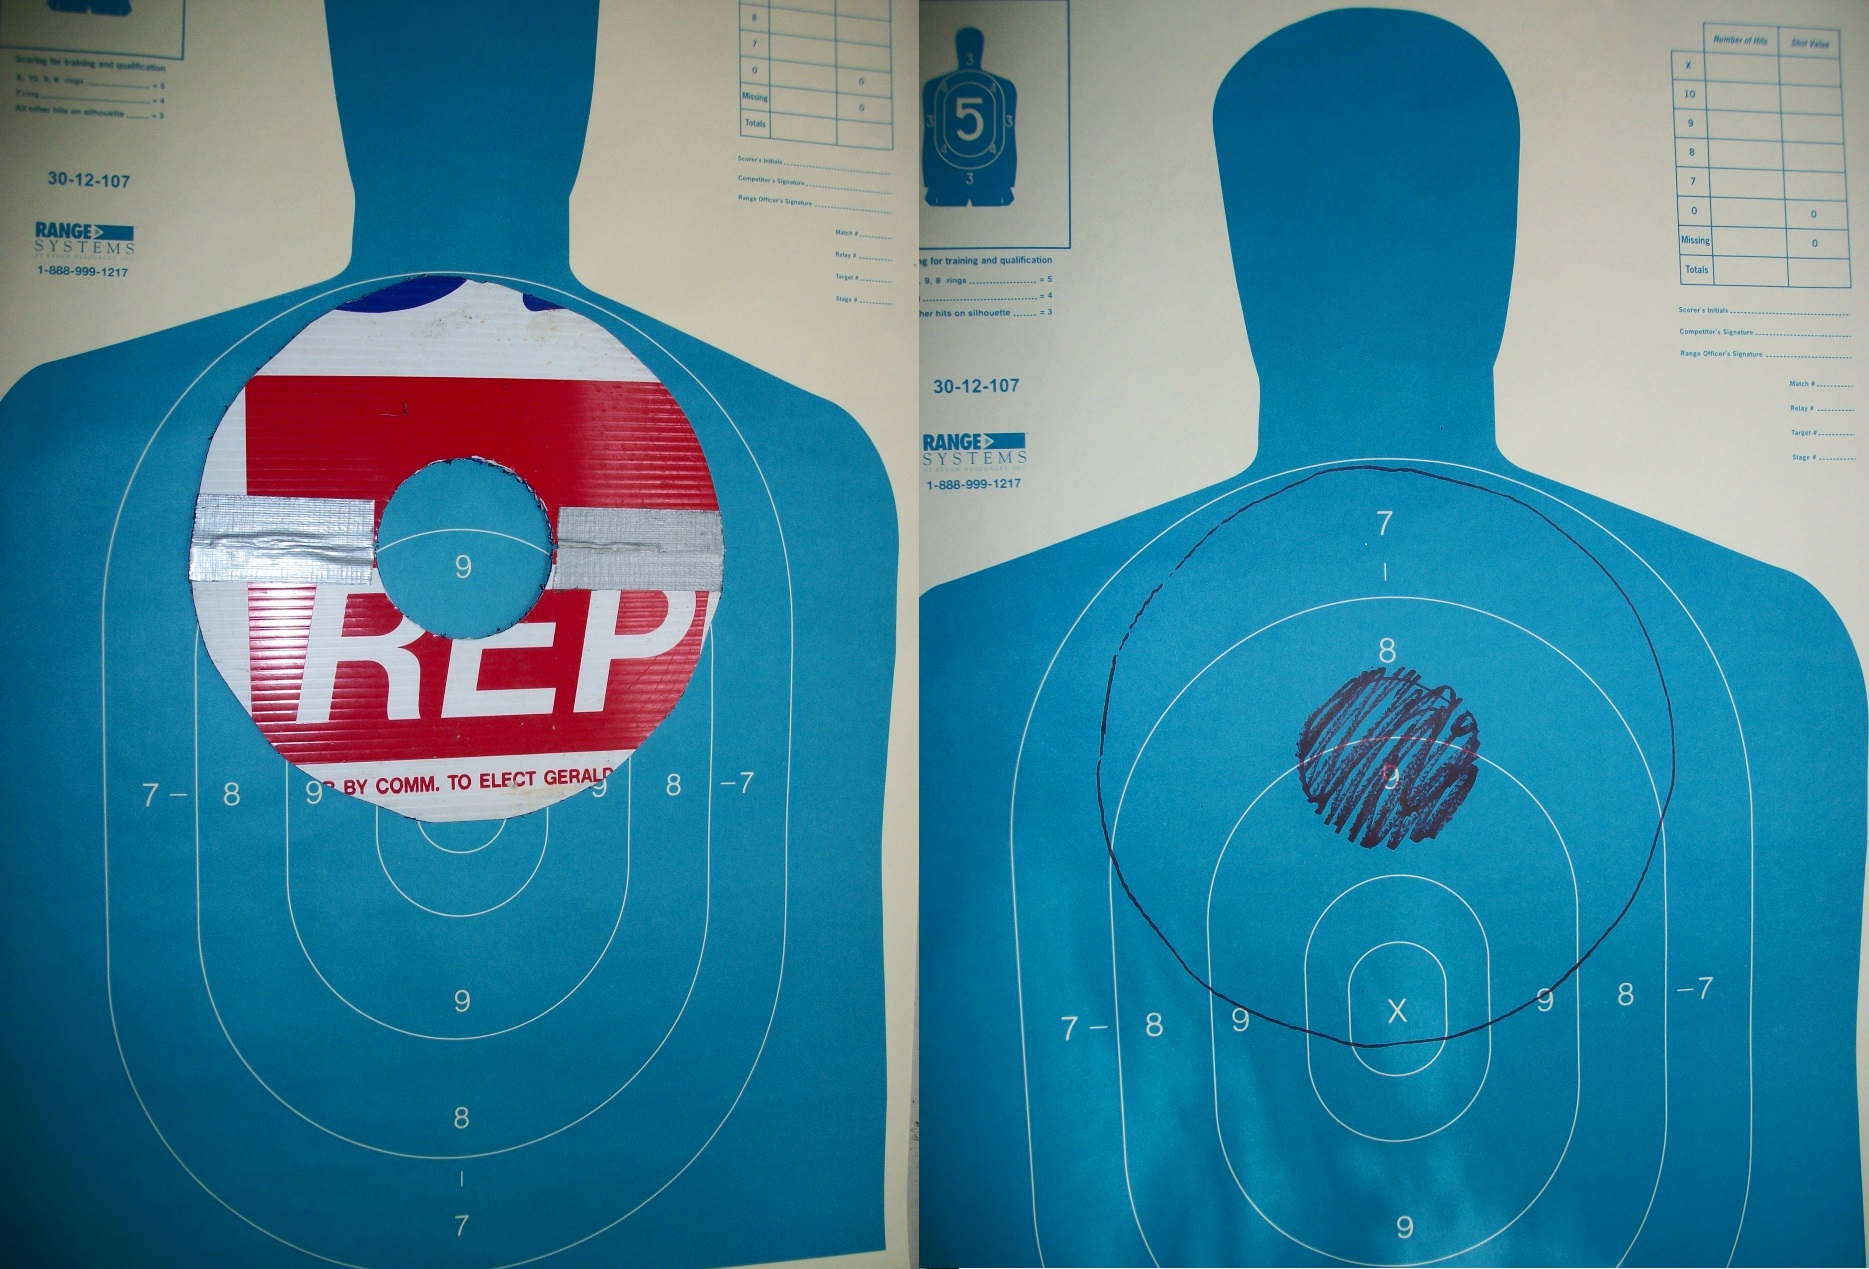
While the Tombstone target isn’t available at all ranges, the allowance for an ‘equivalent’ means you can make a template of the 8 ring and apply it to whatever target is available. Just take your template and a marker with you to the range. I cut mine in half and then taped the halves together with duct tape so it folds and fits easily in my range bag.
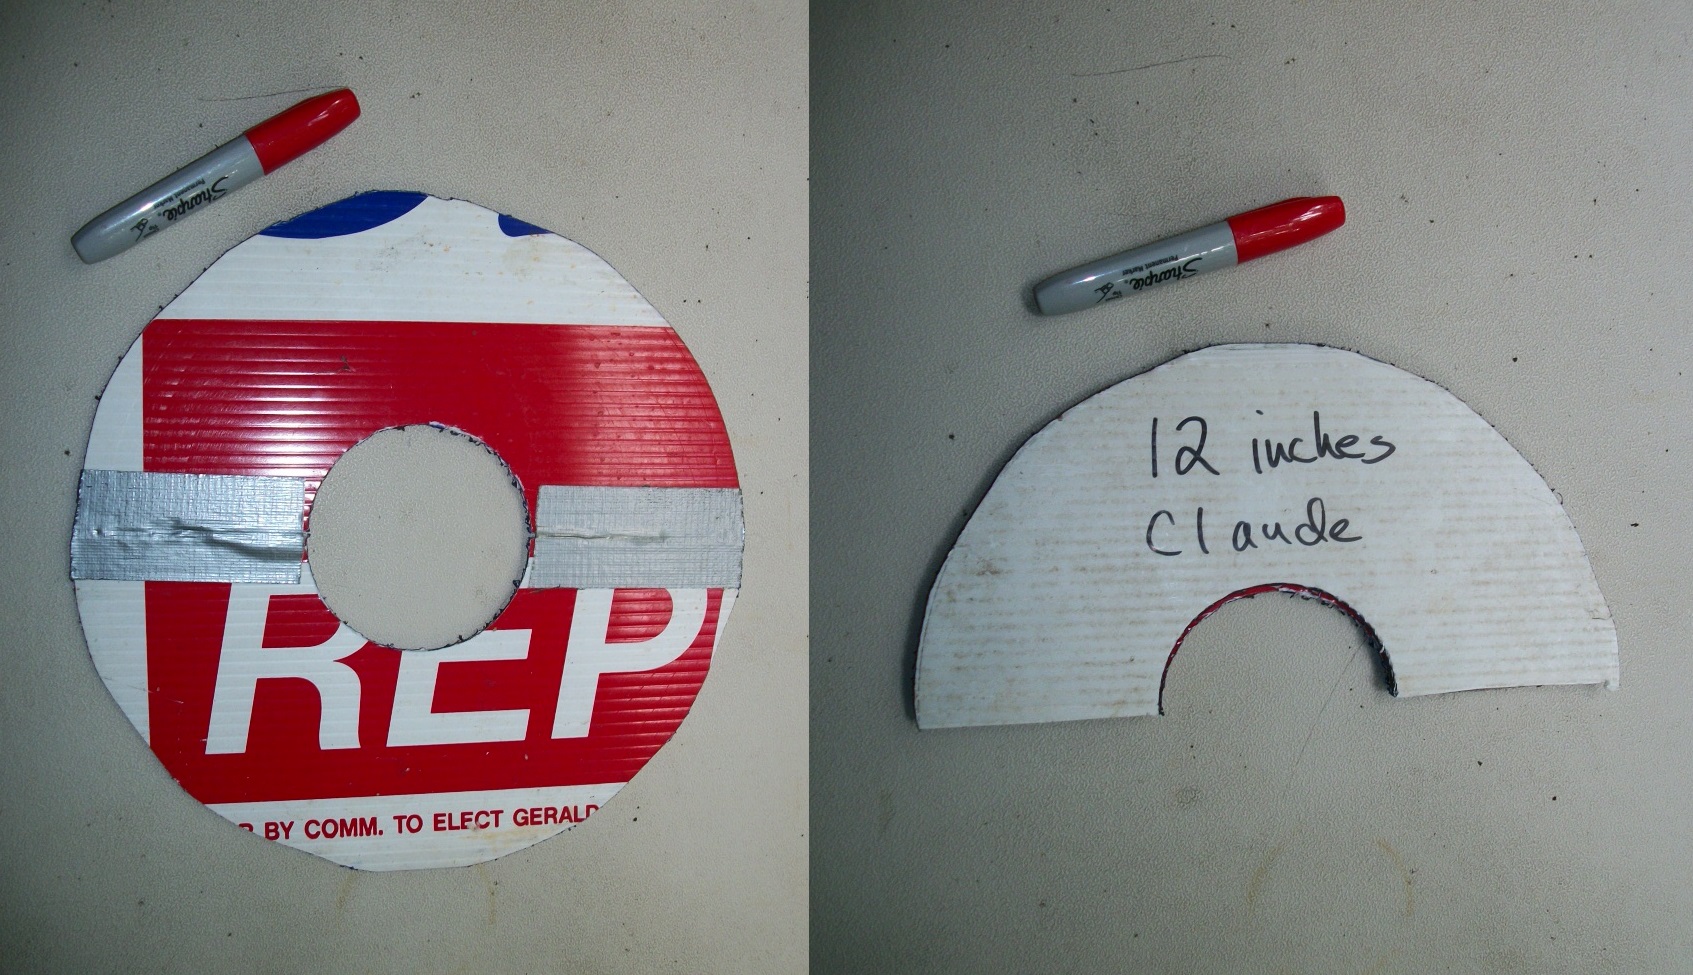
Once you get to the range, outline the template on your target and you’re ready to go. Be sure to take some kind of tape or marker with you so you can mark each run. Marking each run is how you learn to shoot well. As a general rule, I mark my targets after no more than 10 shots. When doing this program, you should mark your target after each string of fire, i.e., each five shots.
A new shooter can structure their practice sessions in many ways. What’s important is to plan what you do before you go to the range so you don’t waste your time and resources. The NRA program appeals to me because it’s already made up, it contains relevant skills, and it’s workable at most indoor ranges.
There are also awards available from the NRA for participating in the program. NRA membership is not necessary to participate. The NRA Marksmanship Qualification Program Booklet explains the entire program in detail. It is available for download from the NRA Training Division’s website.

Lowlight dryfire practice
- At night, have a flashlight next to your gun.
- Pick them both up at the same time and identify the person before making the shoot decision
- Flashlight usage implies the need for one handed shooting
- Competing probabilities are in favor of it being a family member
- Thinking the light is a ‘lead magnet’ is a problem
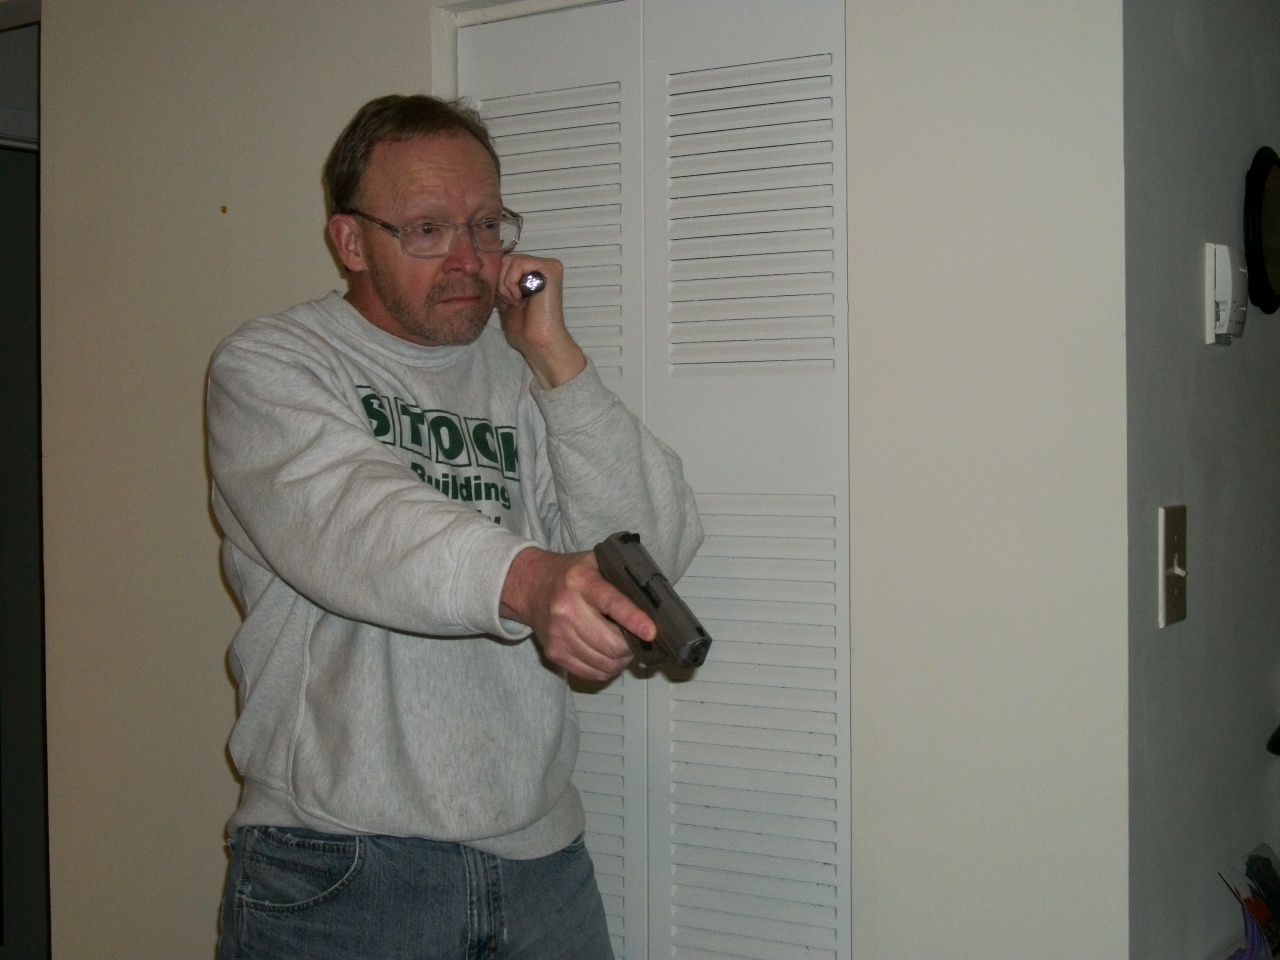
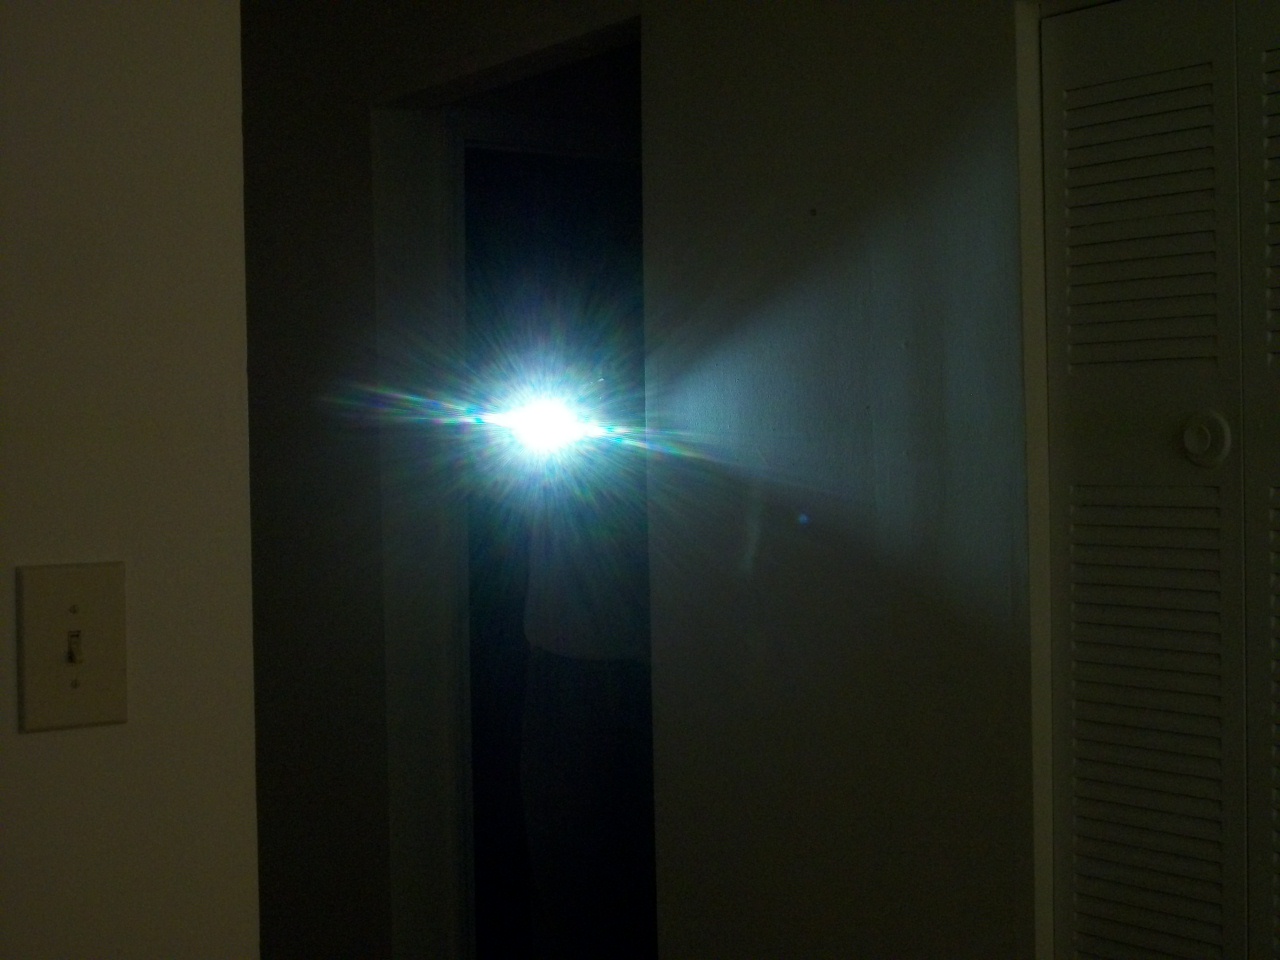
I emphasized very strongly about the need for keeping a flashlight next to your ‘nightstand gun’ during my Negative Outcomes presentation at the Rangemaster 2015 Tactical Conference. Although I practice dryfire with a flashlight regularly, it occurred to me that I don’t have a structured regimen for doing so. Tonight, I thought I would work on that a bit.
At first, I started doing my 12 shot drill on my dryfire range with the flashlight. I used the left column to practice with the Harries technique as my ‘outside’ technique. For a general search and ‘inside’ technique, I used the right side column. I just did it this way due to habit because that’s similar to the way I shoot the drill livefire.
 By ‘outside,’ I mean the flashlight is outside both my body and the pistol. ‘Inside’ means the flashlight is inside of the gun and toward my body. It’s necessary to have both an inside and outside technique so that you can use the light on either side of a piece of cover or concealment. For a right hander, the outside technique is used when using the light around the right side of cover and the inside technique is used around the left side. Left handers reverse that.
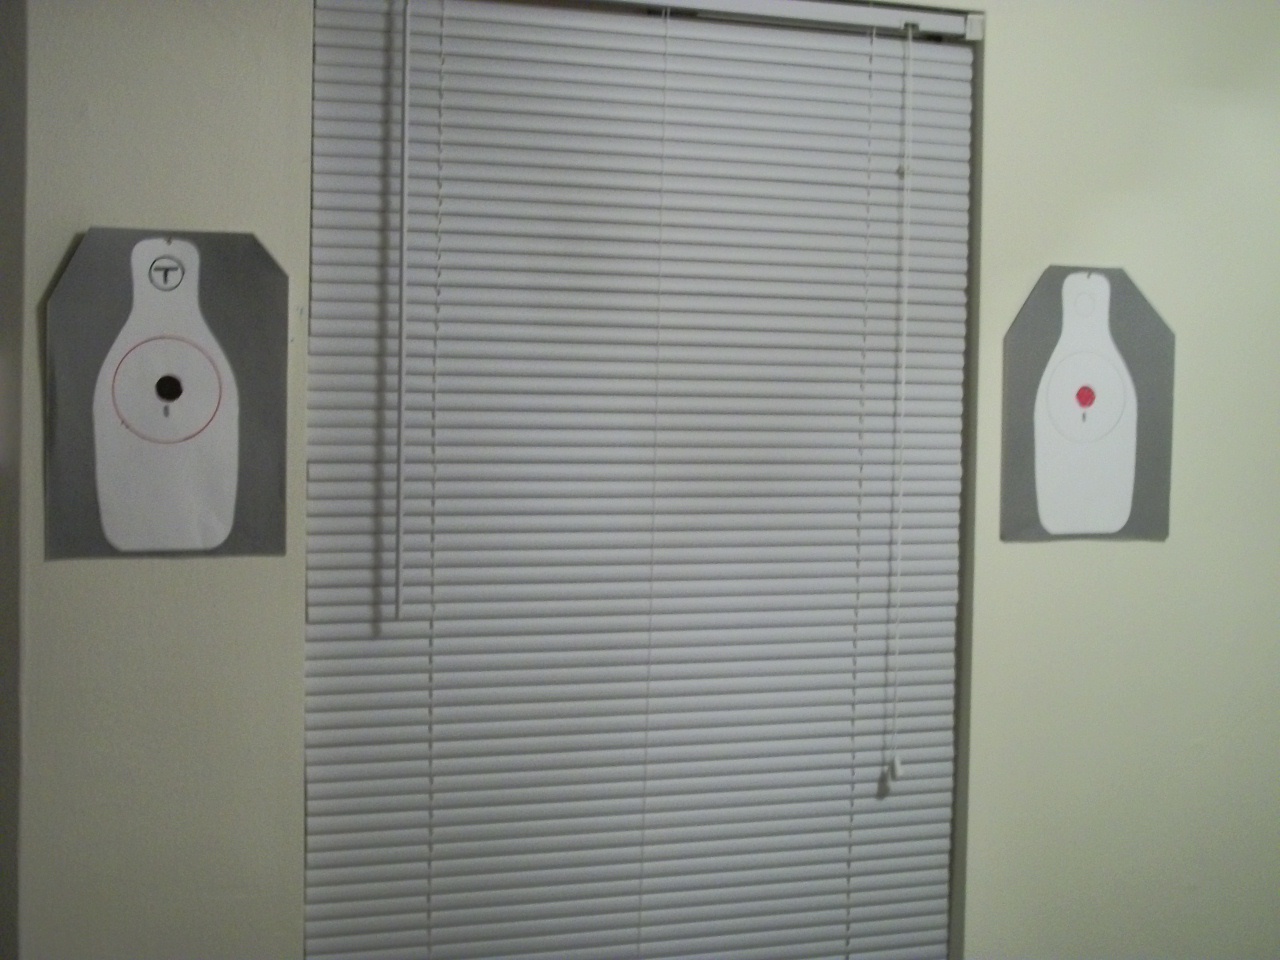
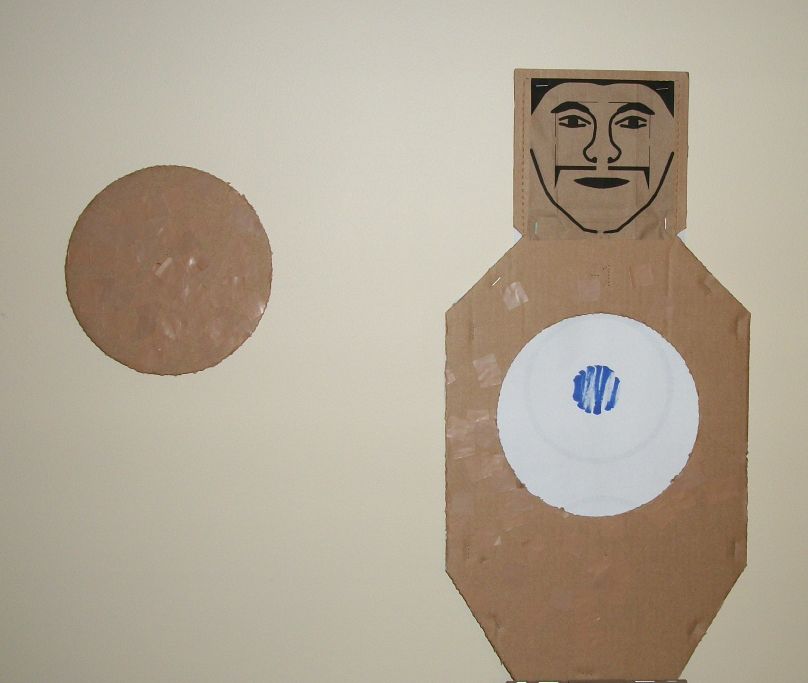
It occurred to me that I could use the same setup I use for the Air Marshal Tactical Pistol Course. I’ve modified that target setup slightly so I get more traverse on the multiple target strings. My setup also allows me to use both inside and outside techniques because of the arrangement of my apartment.
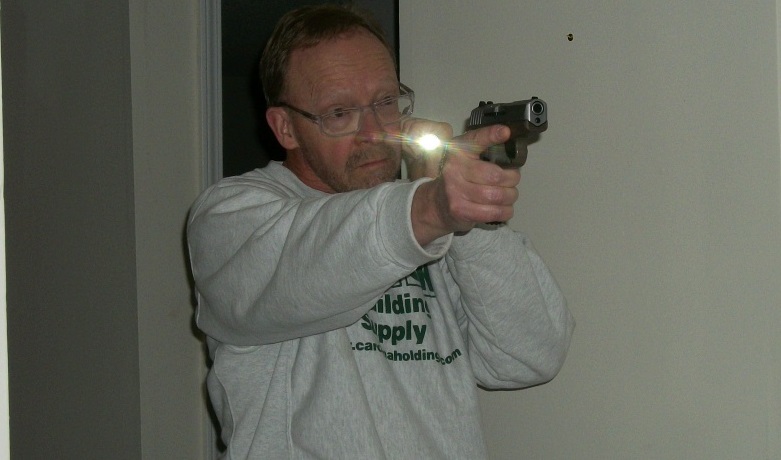
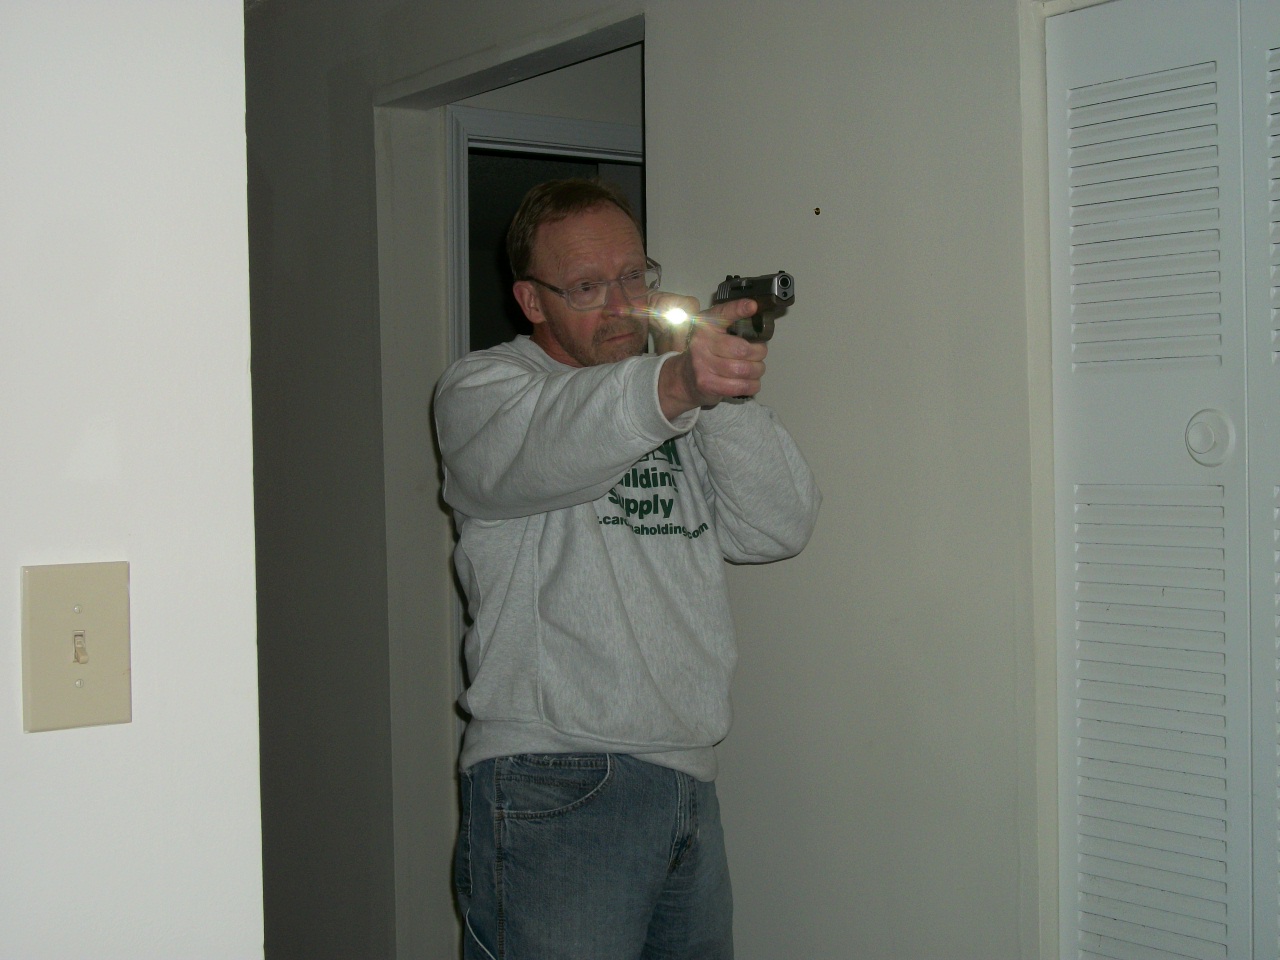
I started the Harries practice with the light pointing toward the target but the pistol down at low ready. Even when we’re identifying a target, we don’t want to muzzle them until the shoot decision is made. Then I practiced bringing the pistol up on target while keeping the light pointed at the target. At first, I did this in the hallway, just to get my mechanical movement correct.

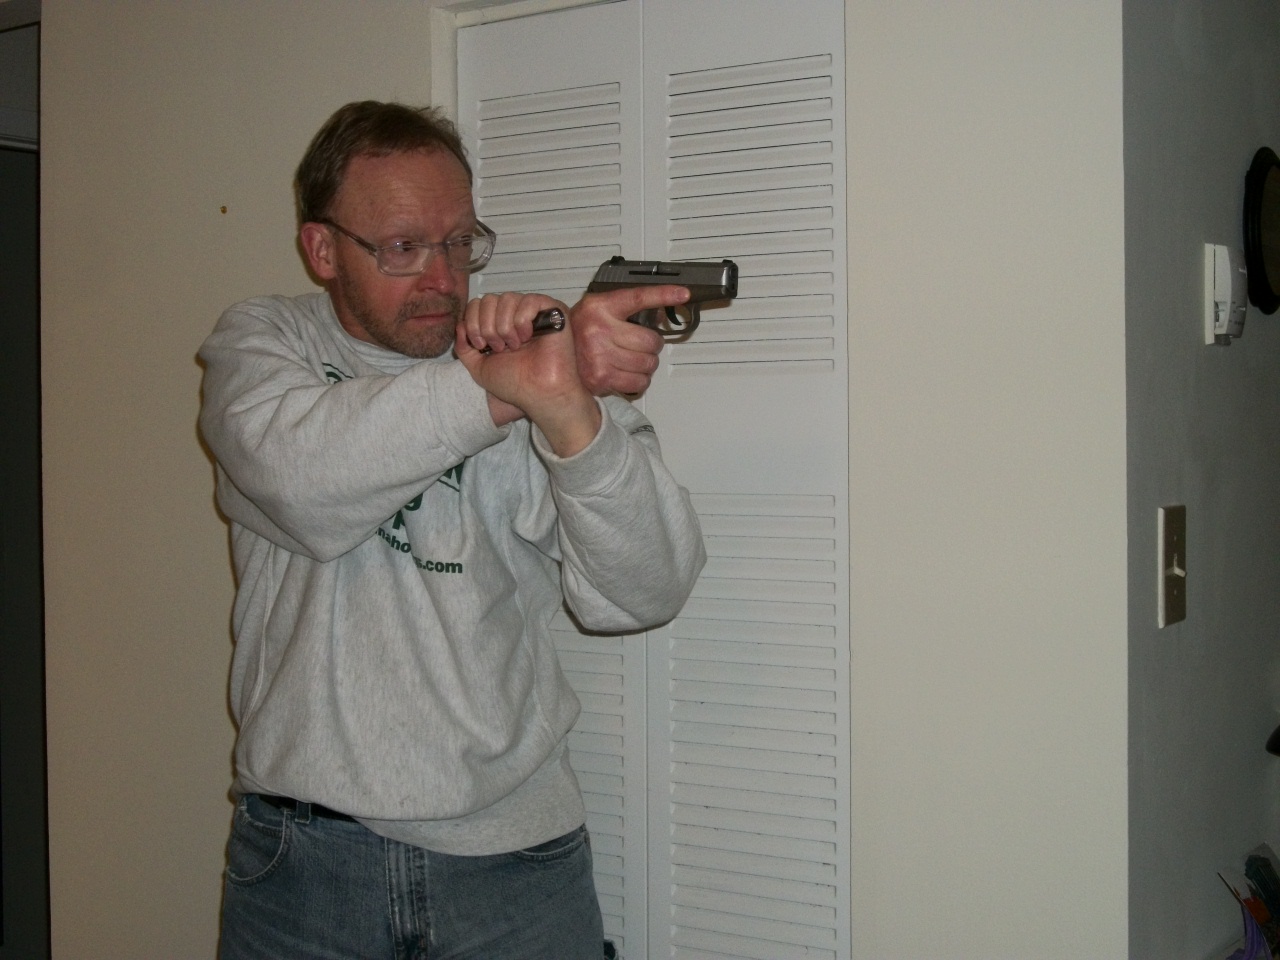
For the cheek practice, once again, I started with the light pointing toward the target but the pistol down at low ready. Since I use the cheek technique as a general search technique, this means I’m going to be shooting one handed, if the shoot decision is made. I like the cheek technique as a general search technique because it allows me to use the light as an impact tool, if necessary. Because there is a possibility during a general search, I would be in a hallway when shooting started, I incorporated turning off the light after the shot and taking a sidestep. But, there’s not much maneuver room in a hallway, so don’t think this is some magic potion that prevents getting shot.
Once I was satisfied I had the mechanicals down pat, I moved to positions of cover, both left side and right side. I practiced on both sides, making sure I didn’t splash the light off the wall and into my face.
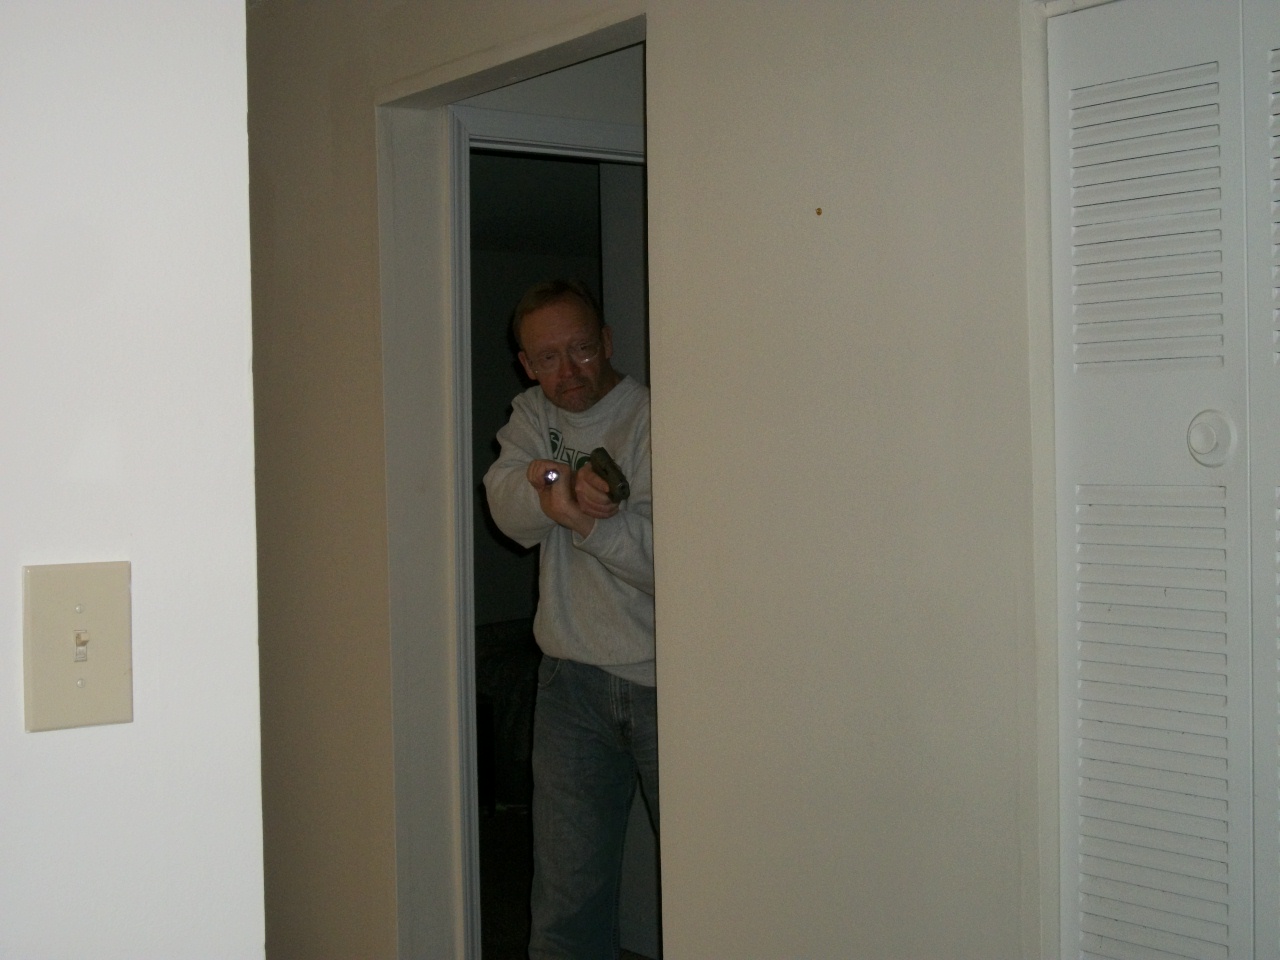
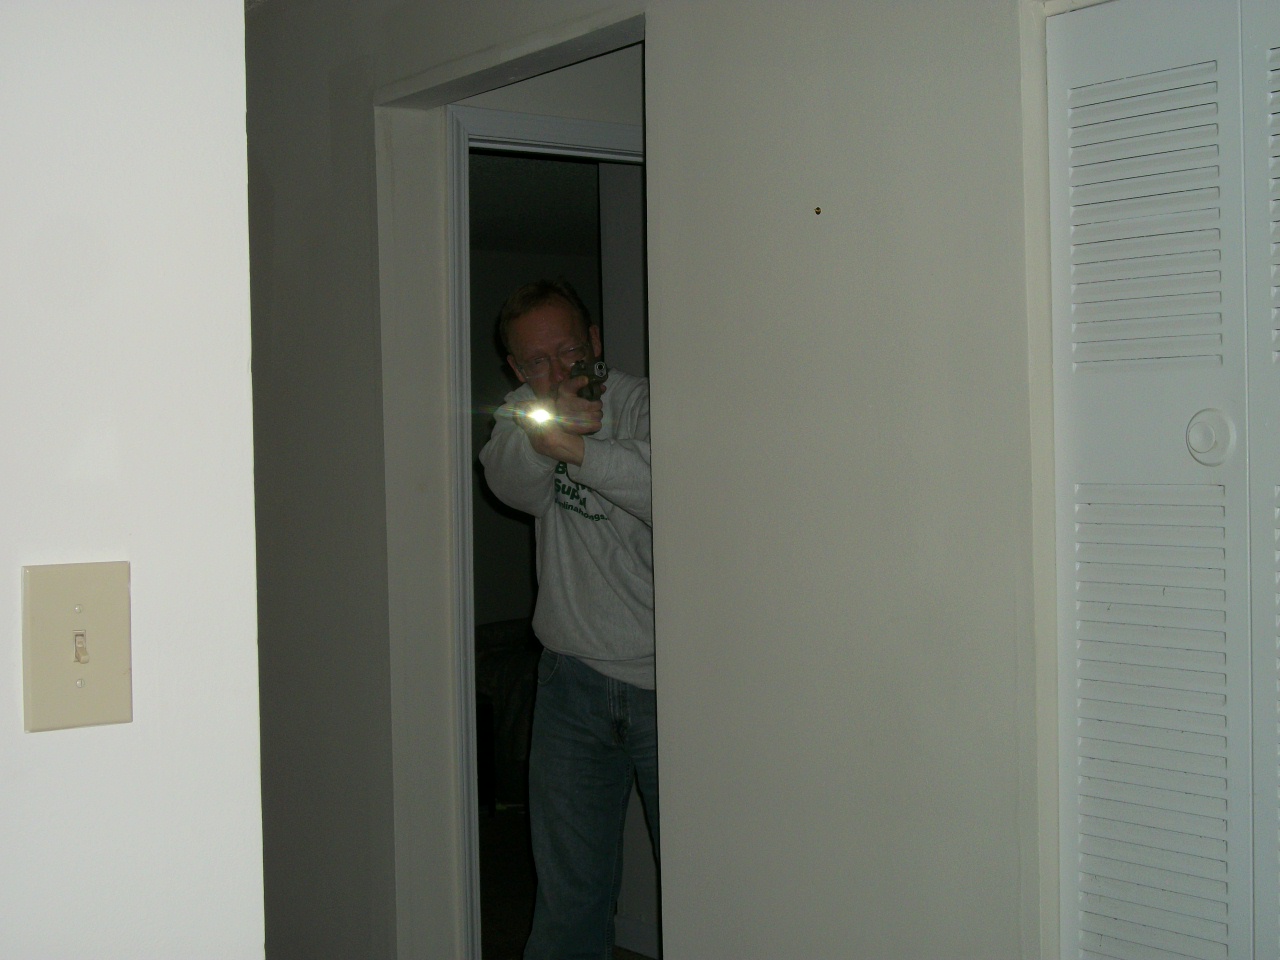
Note that in the photographs I took, I was using a flash or the regular lighting for clarity. When practicing, the place was completely dark. Also note that the camera wasn’t positioned exactly where the target was, so I look more exposed than I actually was.
I’m glad I developed this as a more formal program. I’ll be doing it at least once a week from now on as part of my 1000 days of dryfire.
Keeping dryfire interesting
How much you last practiced isn’t as important as when you last practiced.
One of the Facebook groups I’m a member of is called 1000 Days of Dryfire Challenge. It’s a group whose members have committed to doing my ‘1000 consecutive days of dryfire’ concept. What I found the first time I did the 1000 days was that regularly devising new regimens and switching them around was important to keep the program interesting and avoiding boredom with doing a single regimen all the time.
A regimen I’ve been doing the past few days is a dryfire version of the Federal Air Marshal Tactical Pistol Course. The target I made is a reduced scale triple QIT printed on 11×17 paper at FedEx Office. It’s scaled for 2.5 yards. What I do is print the image from a flash drive on 11×17 paper at FedEx office and set the copier to ‘resize to fit page.’ Resizing is one of the menu options when printing from a flash drive. Feel free to download the image and try it yourself.
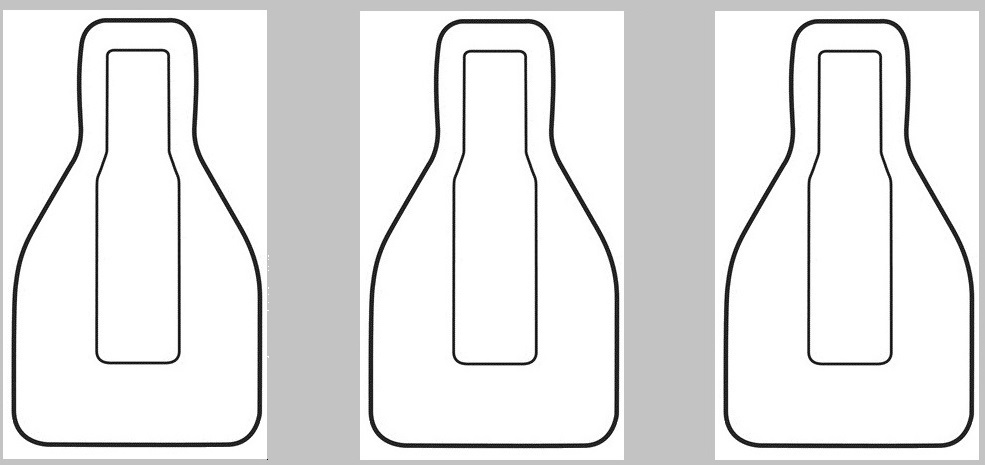 The spacing isn’t quite wide enough on a single piece of paper but nothing is perfect. I punched a hole in the paper at the measured middle point so I can hang it on a picture hanger in the wall. Regular paper tends to sag when hung on the wall, so I stapled it to a piece of cardstock.
 I’m using my SCCY pistol because it’s DAO with second strike capability so I can pull the trigger on almost all the shots. The only one I have to fudge is the final stage because it involves two strings starting with a slide lock reload. I start those strings with the slide locked back, so the first shot is a dead trigger.
Since the TPC is based on Par times, like most police courses, I set the par times on one of my CED 6000 timers. It’s a great training timer, which isn’t made any more, unfortunately. The CED has an option for multiple strings of par time, which makes it easy to set up the multiple string stages. Like most timers, it only sets par times to one tenth of a second, so I round the times down, e.g., 1.65 becomes 1.6 seconds.
Federal Air Marshal Tactical Pistol Course (TPC)
| Drill | Starting Position | Seconds Allowed | Total Rounds |
| One Round (twice). | Concealed Holster | 1.65 (3.30 total) | 2 |
| Double Tap (twice) | Low Ready | 1.35 (2.70 total) | 4 |
| Rhythm; fire 6 rounds at one target; no more than 0.6 between each shot. | Low Ready | 3.00 | 6 |
| One Shot, speed reload, one shot (twice). | Low Ready | 3.25 (6.50 total) | 4 |
| One Round each at two targets 3 yards apart (twice). (Use the outer targets. I go left to right for one string and right to left for the other.) | Low Ready | 1.65 (3.30 total) | 4 |
| 180 degree pivot. One round each at 3 targets (twice). Turn left, then right. | Concealed Holster | 3.50 (7.00 total) | 6 |
| One Round, slide locks back; drop to one knee; reload; fire one round (twice). | Low Ready | 4.00 (8.00 total) | 4 |
QUALIFICATION:
- TIME: Cannot exceed total time for each Drill. Example: Drill #1 – 1st time 1.70 seconds, 2nd time 1.55 seconds; Total = 3.25 seconds = Go. Must achieve a “GO” on each Drill.
- ACCURACY: Target is FBI “QIT” (bottle). Total rounds fired is 30. Point value that hit the inside bottle = 5. Point value touching line or outside bottle = 2. Maximum possible score = 150. Minimum qualifying score = 135.
All stages must equal “GO” to qualify.
This is a fun course that only takes a few minutes to do but tests a number of skills and is fun, at least for me.
Structured practice (Part I)
What exactly is Claude Werner’s ‘1,000 Day Dry Fire’ program? Is it published anywhere? Anybody tried it? What were the results? Would you do it again?
This question was asked on a forum I visit occasionally. In a narrow sense, the question refers to an idea I had a while ago. About 12 years ago, a friend was working on his Yoga instructor certification and had to do 1000 days straight of meditation. That inspired me, so I decided to do it with dryfire. He said that dryfire is my form of meditation; I will defer to his judgment on that. Another friend of mine wanted to try it last year, so I’m doing it with him now, my second time, his first. We’ll be finished at the end of 2015 but we both agree it’s become such a habit that we probably won’t stop then.
First of all, the ‘program’ is not any particular drill or set of drills. Rather, it’s the commitment to do dryfire each and every day, without fail, for 1000 straight days. If you miss a day, you have to start again at the beginning. The important thing is do some dry practice every single day, even if it’s just a little. My last trigger press is never more than 24 hours in the past. Days that I practice livefire are not exempt from the dryfire requirement. I like to finish each range session with a few dryfire trigger presses.
The first time I did the program, when I was at the GF’s house, I’d do it in the bathroom by using the tile intersections as targets. She finally figured out what I was doing and had me set up a little dryfire range in the spare bedroom. The range consisted of a reduced size target behind a picture and a cassette tape I had made with a specific regimen on it. Eight minutes and I was done.
The reason there’s not one drill or set of drills is to avoid boredom. I regularly change up my regimen. Run different qualification courses dryfire, practice bullseye shooting, run the NRA Defensive Pistol I & II, etc. It doesn’t matter. I make different targets and reduced size target arrays from time to time to change things up, as well.
The most important aspect of the program is that it represents a philosophy of practicing our skills on a regular basis. Those skills might be shooting, threat management, surveillance detection, pepper spray, unarmed combat, etc. Any physical skill is perishable, meaning after a length of time, it’s not as easily performed on demand. The ‘riding a bicycle’ analogy does not completely apply. When we get back on a bike after a long time, we have some time to refresh ourselves with those motor skills. If someone is attacking you, a refresher session for your personal protection skills is not an option for you. You need to be on your game at that point. Shooting skills are especially perishable for those who have never become Unconsciously Competent at them in the first place. That’s most people, frankly.
I dryfire even when I shoot an IDPA match. When I go through the “Unload and Show Clear” process, I don’t just do a trigger mash at the hip like most people. I pick out a spot on the berm, aim at it, and do a good dryfire trigger press. What I don’t want to do is to ever program myself to do a motor skill in a sloppy or detrimental way.
As a friend of mine once remarked, “Claude doesn’t do anything that doesn’t have a purpose.” My cardiologist told me “You are a very programmatic person.” Both of those are completely true, to the extent I can make it that way.
Ego defenses
The maximum effective range of an excuse is zero meters.
While comparing notes from our experiences at Paul-E-Palooza 2, a friend of mine noted how many excuses for poor hits he heard during the live fire block he attended. “I haven’t gotten used to the sights on my gun.” “The offset I have to use at this distance is throwing me off.” “When I shoot pistol in 3 Gun, I smoke it, but I can’t seem to hit these little targets.” Etc., etc., etc. Those are all ego defenses shooters use to avoid saying “When put to the test, it’s clear I’m not as proficient as I like to think I am.”
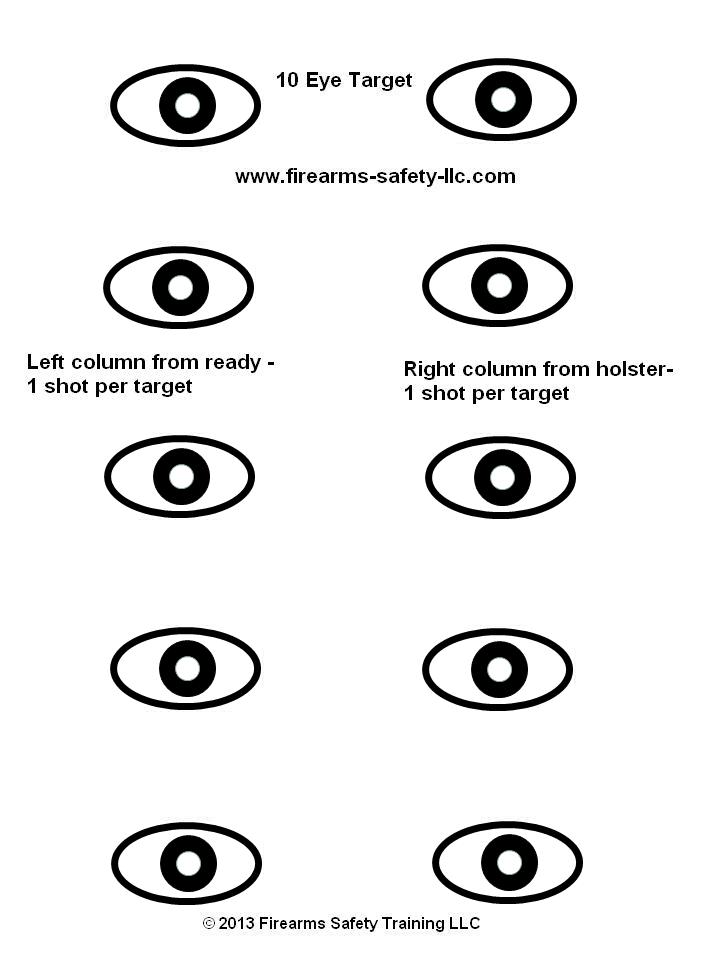
Let’s compare that with the Facebook commentary of a very smart and honest lady I coached a little during the same block.
After this class I had a live fire with Dr. [Sherman] House. He did dot drills and eye targets. We shot at 3 and 5 yards at these tiny targets. Fact from Dr. House, under stress your shot pattern will double in size. [So,] We might as well practice on targets 1 ¾ inches big. Out of the 30 shooters, I suck because I anticipated recoil. [Obviously, from my point of view, she was far from being the only one whose performance could stand some improvement.] I got a private lesson by “THE PROFESSOR Claude Werner”. … Professor Werner taught me to focus on a slow trigger press. [Actually, I was trying to emphasize a smooth trigger press] When Doc Werner pressed my trigger while I had the sights aligned[,] I hit the target dead center. I know what to work on. I need to dry fire weekly.
At times, we all suck, on a relative basis. The way to get past it is to figure how to “shoot better,” as Bill Rogers puts it. Then accept that we need to do some work on our weakness and get to it without using a lame excuse as an ego defense.
A little coaching can help determine what the problem is. In the above lady’s case, she was very good at using her sights; when I pressed the trigger for her, the round struck exactly where it was supposed to. She just needs to work on her trigger manipulation. She self-identified the problem and the solution. I have no doubt she will work on it vigorously.
Many shooters spend a lot of time, money, and effort refining and changing their equipment in an attempt to improve their performance. It was interesting that even at a training conference like Paul-E-Palooza, during the charity auction, ‘cool’ equipment items sold at a premium to retail while training items sold at a discount to retail. My observation is that the solution usually resides inside the shooter rather than in a hardware solution. As one of my colleagues puts it: “I have a friend who will kill you with a Lorcin and there’s nothing you’ll be able to do about it.”

You must be logged in to post a comment.