Snub Dry Practice Training Aids
#wheelgunwednesday
All discharges of a firearm by LAPD officers must be reported to the LAPD Force Investigation Division. Each discharge is thoroughly investigated, adjudicated by the Board of Police Commissioners (BOPC) for LAPD policy compliance, and a public report posted on the BOPC webpage.
https://www.lapdonline.org/police-commission/categorical-use-of-force
Of particular interest are the off-duty discharges. These usually involve one of two situations. First, situations of self-defense similar to what would be encountered by any non-sworn person who owns a firearm for personal protection. Or, second, Unintentional Discharges due to administrative gunhandling such as: placing or removing the firearm in a storage location, cleaning the firearm, or dry practice “to improve accuracy.” In one rare instance, both situations were involved; a firearm was discharged while being retrieved during a ‘tactical situation.’
In adjudicating Unintentional Discharges cases, the LAPD BOPC subdivides them into two categories.
A. Unintentional Discharge
The definitions for an Unintentional Discharge, both Accidental and Negligent, are as follows:
Accidental Discharge: The unintentional discharge of a firearm as a result of an accident such as a firearm malfunction or other mechanical failure, not the result of operator error.
Negligent Discharge: Finding where it was determined that the unintentional discharge of a firearm resulted from operator error, such as the violation of firearm safety rules.
Administrative Disapproval – Negligent Discharge. Finding where it was determined that the unintentional discharge of a firearm resulted from operator error, such as the violation of a firearm safety rule (Los Angeles Police Department Manual, Volume 3, Section 792.05).
From 2005 to 2023, five Unintentional Discharges of five shot revolvers, which are authorized for backup and off-duty carry, occurred. All five were adjudicated as Negligent Discharges and received Administrative Disapproval. Negligent Discharges are one category of Negative Outcomes https://store.payloadz.com/details/2617872-ebooks-true-crime-serious-mistakes-gunowners-make.html and we obviously want to avoid them.
Four of the five involved preparation for dry practice. The cause of all four was the same. Not all five rounds were ejected from the cylinder when the revolver was unloaded. One round remained in the cylinder when the other four ejected. At some point during the dry practice, a loud noise occurred when a click was expected. That universal cause reinforces my concept of how to prepare for dry practice with a revolver.
https://thetacticalprofessor.net/2020/08/21/dry-practice-safety-part-ii/
Since that article was posted, Zeta6 and I teamed up to create the SafeSnap Training Disc.
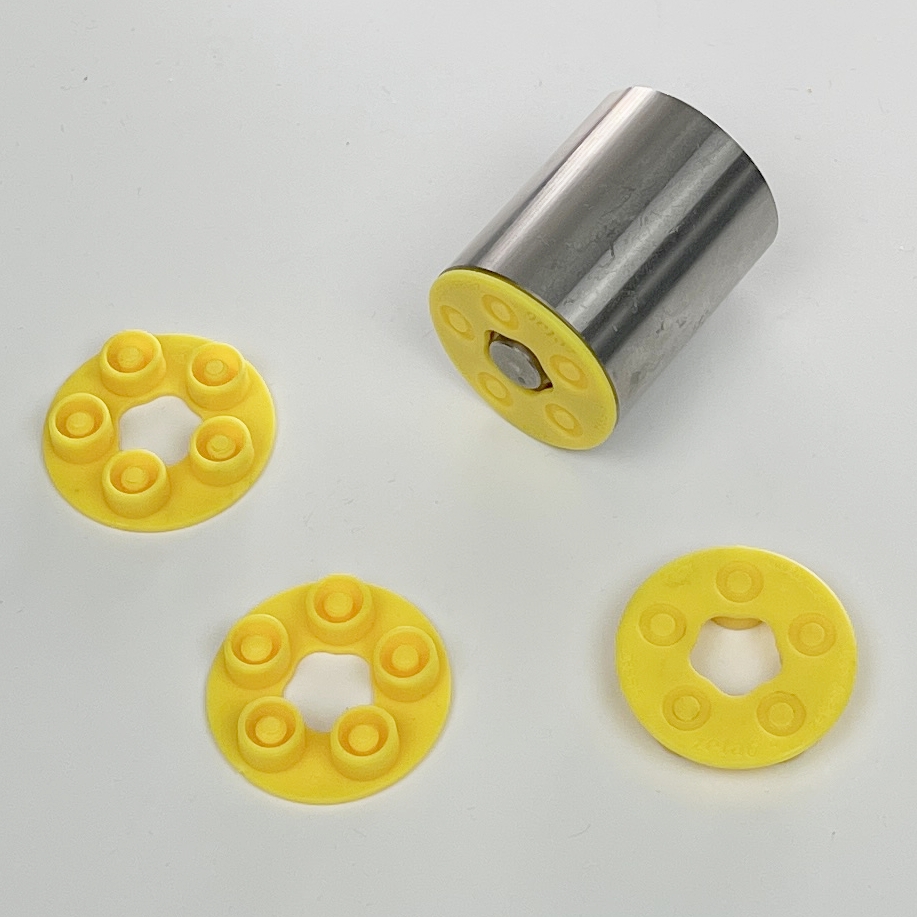
https://zetasix.com/product-category/safesnap
I now keep a SafeSnap Disc in my storage box, along with an empty HKS speedloader, to make my dry practice even safer. Although I don’t carry an HKS, I find it’s the easiest of all speedloaders to put ammunition in.

I rotate the revolver so the muzzle is pointing straight up, eject the live rounds from the snub, place them in the speedloader, and then put the SnapSafe in the revolver. Holding the revolver completely vertical is an important aspect of ejecting the live ammunition. Holding it at angle and catching the rounds in the palm of the other hand is a dangerous technique and is “cruisin’ for a bruisin’.” Sooner or later, doing that will bite you in the ass; hard.
This procedure makes the possibility of having a Negligent Discharge during dry practice fairly remote. I also have a Zeta6 K-PAK2 https://zetasix.com/product/k-pak2/ with dummy rounds for reloading practice in the box. It is set up with a Retention Ring https://retentionring.com/ to mimic my EDC reload.
All the live ammunition stays in the box and the box gets closed while I’m practicing. When I’m finished practicing, I rigidly follow the post-practice safety protocols described in the above linked article.
Dry practice is a key component of learning how to shoot well. When doing it, we want to avoid having the Negative Outcome of “causing damage to equipment or injury to personnel,” which was a graded aspect required to pass the Special Forces Weapons Qualification Course that has stuck with me for the past 44 years. Having the right training aids and following safety protocols in a disciplined manner is how we can avoid those Negative Outcomes.
FTC Note: I have a relationship with Zeta6 and Retention Ring but receive no compensation for mentioning their products.
A Way of the Wheelgun
#wheelgunwednesday
In 2022, I created a four month Patreon series for developing shooting and gunhandling skills with snub nosed revolvers. There are a total of 65 articles in the series and it is the online equivalent of a book. All the articles are now available as a Collection on my Patreon page. Unlike a book, you can read it at your leisure on your Smartphone.
The basis for the Series is the principles and techniques of the Snub Nose classes I taught for decades and the two DVDs I made about snubs. Also included are examples of what went right and wrong in several real life incidents involving snubs.
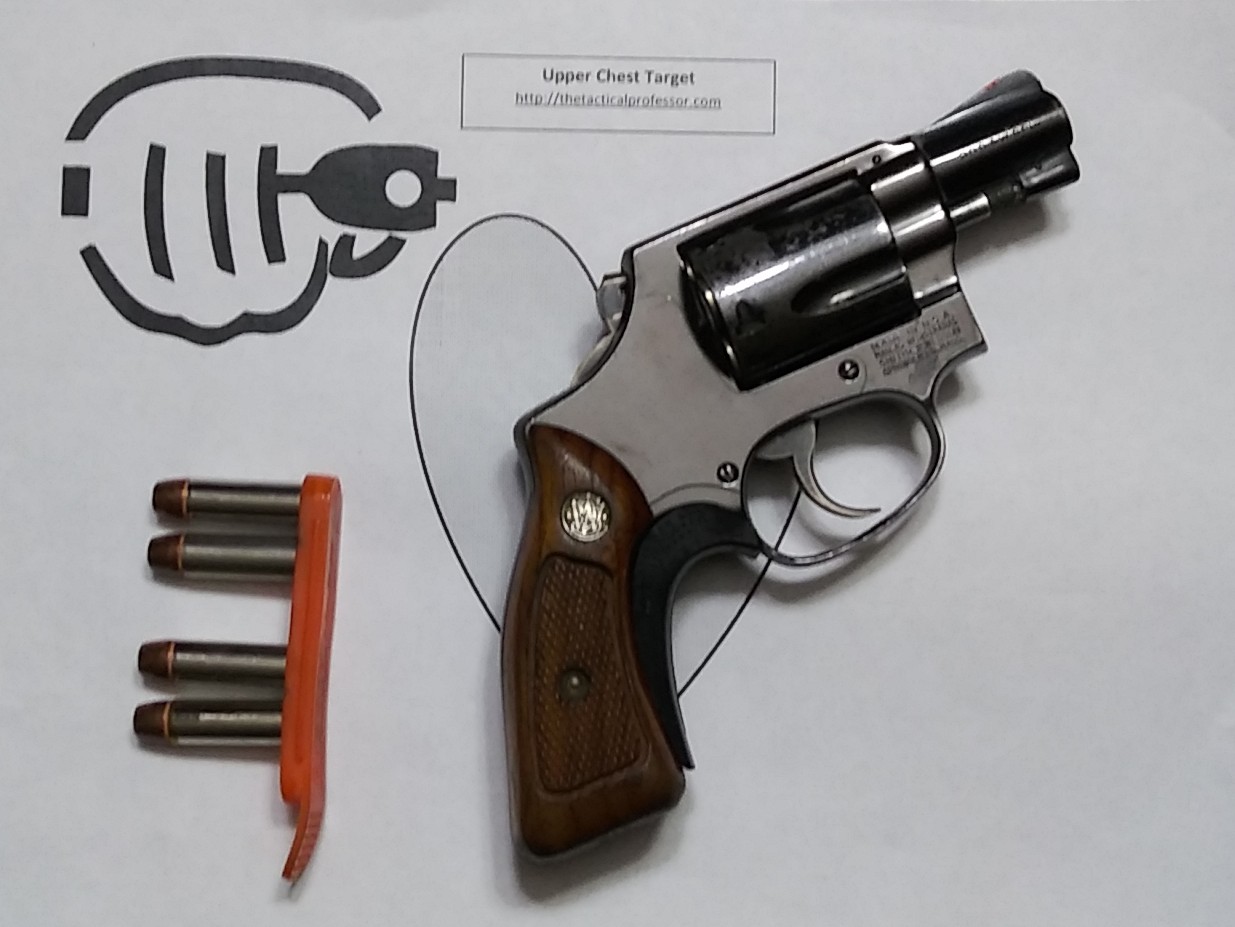
There is a great deal of emphasis in the Series on ‘dry practice,’ i.e., practice without ammunition. There is also periodic live fire (originally monthly) of no more than 50 rounds. The live fire is compatible with either indoor or outdoor ranges because the vast majority (999/1000 by my calculation) of gunowners only have access to indoor ranges.
The first three posts in the Collection are unlocked and available for anyone to read. These initial posts describe Safety Protocols during dry practice to avoid putting bullet holes in people, places, and things where they are undesirable. Tragedies can and do take place during dry practice and we want to avoid those at all costs.
For anyone who owns and/or carries a snub, this is a good program. Anyone who does any dry practice, whether with a revolver or autoloader, will benefit from at least reading the first three posts about Safety Protocols.
https://www.patreon.com/posts/snub-revolver-97045992
Subscribers to my Concealed Carry Skills Tier ($3/month) https://www.patreon.com/TacticalProfessor have access to all the articles in the Collection plus all the articles I write on Patreon about marksmanship and gunhandling. In the financial industry, we’d say the Return On Investment (ROI) is very high.
Taurus 856 Iron Sights v. Laser Comparison
#wheelgunwednesday
Taurus had a screaming deal for 856 revolvers on its website last month. The deal was a Viridian Laser Stock (Grip), Boltaron (Kydex) holster, and two HKS speedloaders for $139. I’m a believer in laser stocks for snub revolvers so I decided to take advantage of the deal and purchased it. I also purchased an Ameriglo front night sight but haven’t installed it yet. FTC note: I made this purchase with my own money, no manufacturer giveaway.
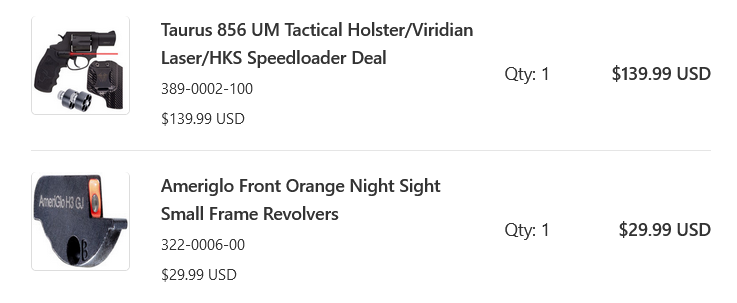
This Viridian laser has the activation button on the front of the stock so when the revolver is gripped, it comes on. This is a far superior system to having to manually press a button to turn the laser on. The stock is also slightly longer than the factory stock so it provides a full three finger grip.
Installing it requires driving out the roll pin that holds the factory stock in place. Once the pin is out, the laser stock is secured via three screws. Pro-Tip: put the bottom screw that goes through the roll pin hole in the frame first. It was relatively well zeroed as it arrived but I later zeroed it at 7 yards when I got to the range.
The UM Tactical Holster was much better than I had anticipated. I thought ‘UM’ meant it was an offshoot of Uncle Mike’s but that assumption is incorrect. It fits the 856 well and the clip holds it securely on the belt. I loosened the tension slightly so that when the holster is held upside down the gun doesn’t come out but it draws easily.
The HKS Speedloaders were the Model 10 developed for the K frame S&W revolver many years ago. Two were included.
To make a comparison of the capabilities of the laser vis-à-vis the iron sights, I did a range trip. The evaluation protocol was the Nevada Concealed Handgun Permit Qualification Course, which is one of my favorite practice structures. It consists of 30 rounds fired at 3 yards (6 rounds), 5 yards (12 rounds), and 7 yards (12 rounds). The evaluation consisted of splitting it in half, shooting one half (15 rounds) with the laser on and one half (15 rounds) with the laser off. I broke the course into several strings for each distance and timed each string.
3 yards – 1 shot from the Holster, 1 shot from Low Ready, and 1 shot from Retention. Three rounds for each sighting system.
5 yards – 2 shots from the Holster, 2 shots from Low Ready, 2 shots from the Holster Primary Hand Only. Six rounds for each sighting system.
7 yards – Repeat the 5 yard sequence at 7 yards.
It was a cloudy afternoon not bright sunlight. I had no trouble seeing the laser dot at 7 yards on the USPSA Metric targets I used. Each system had a separate target.
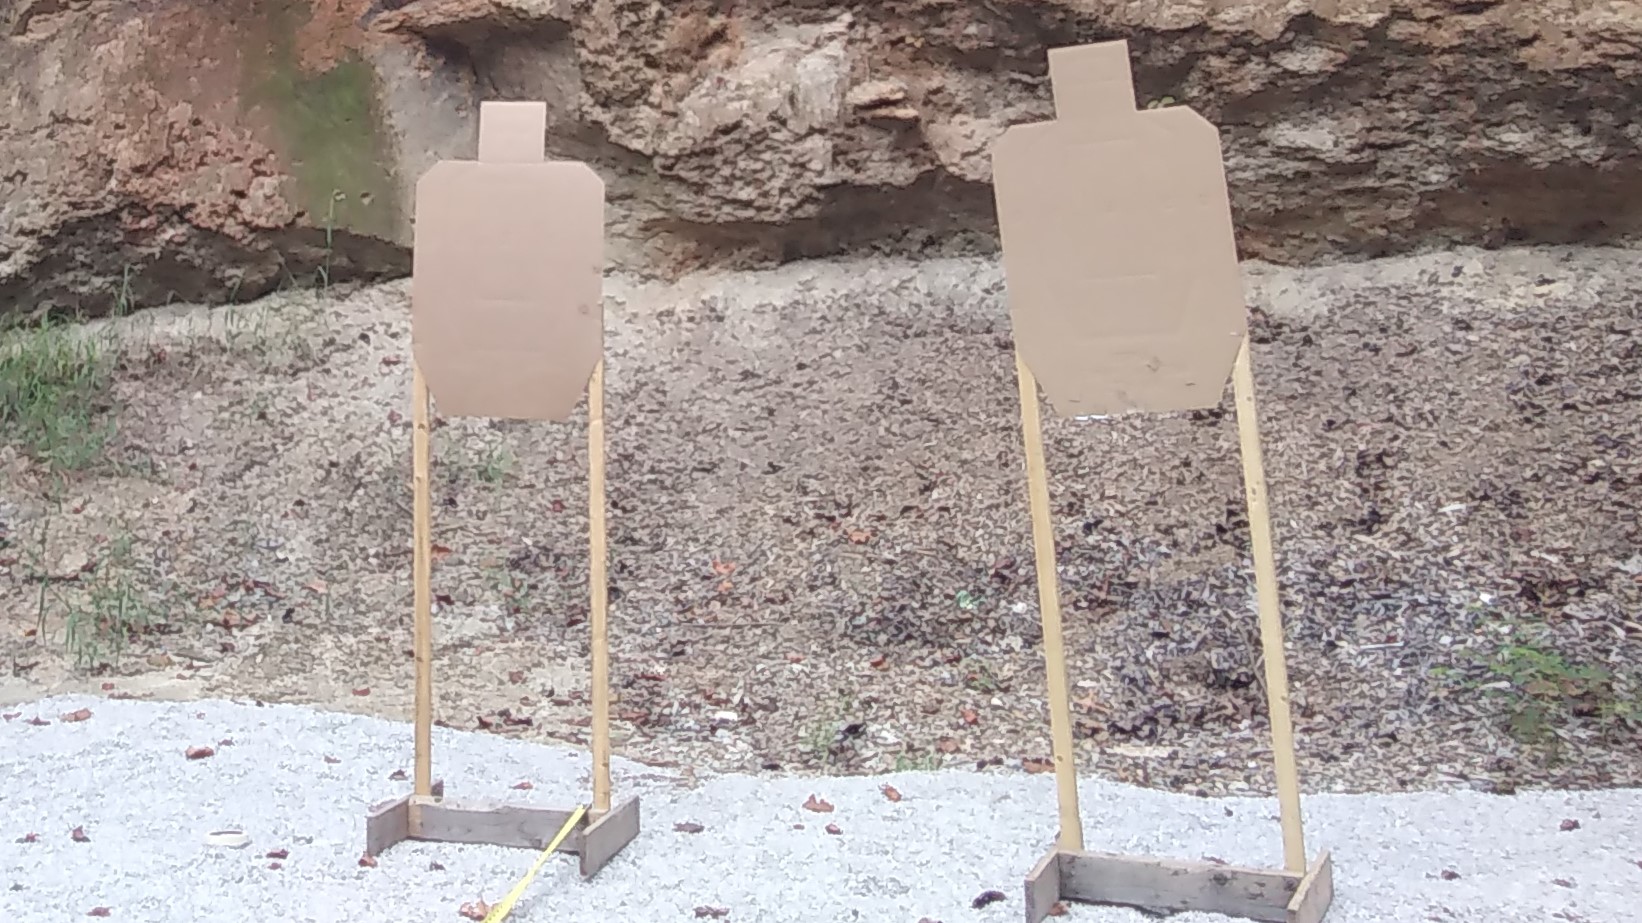
For scoring, I divided the A zone in half. This gave an A zone of 6 inches wide by 5.5 inches long. Hits in the lower part were counted as B hits. This is a scoring system the late Todd Louis Green https://pistol-forum.com/ suggested and I like it. It’s more rigorous than the IDPA -0 zone. The time for each string was recorded.
The results of both sighting systems were then overall Comstock scored. https://www.ssusa.org/content/understanding-uspsa-comstock-and-virginia-count/ This means points achieved divided by shooting time. The results were interesting. The Iron sights had a Comstock score of 4.33, while the Laser had a score of 4.29. Not a significant difference and the laser was not nearly the disadvantage in daylight that’s popularly assumed.
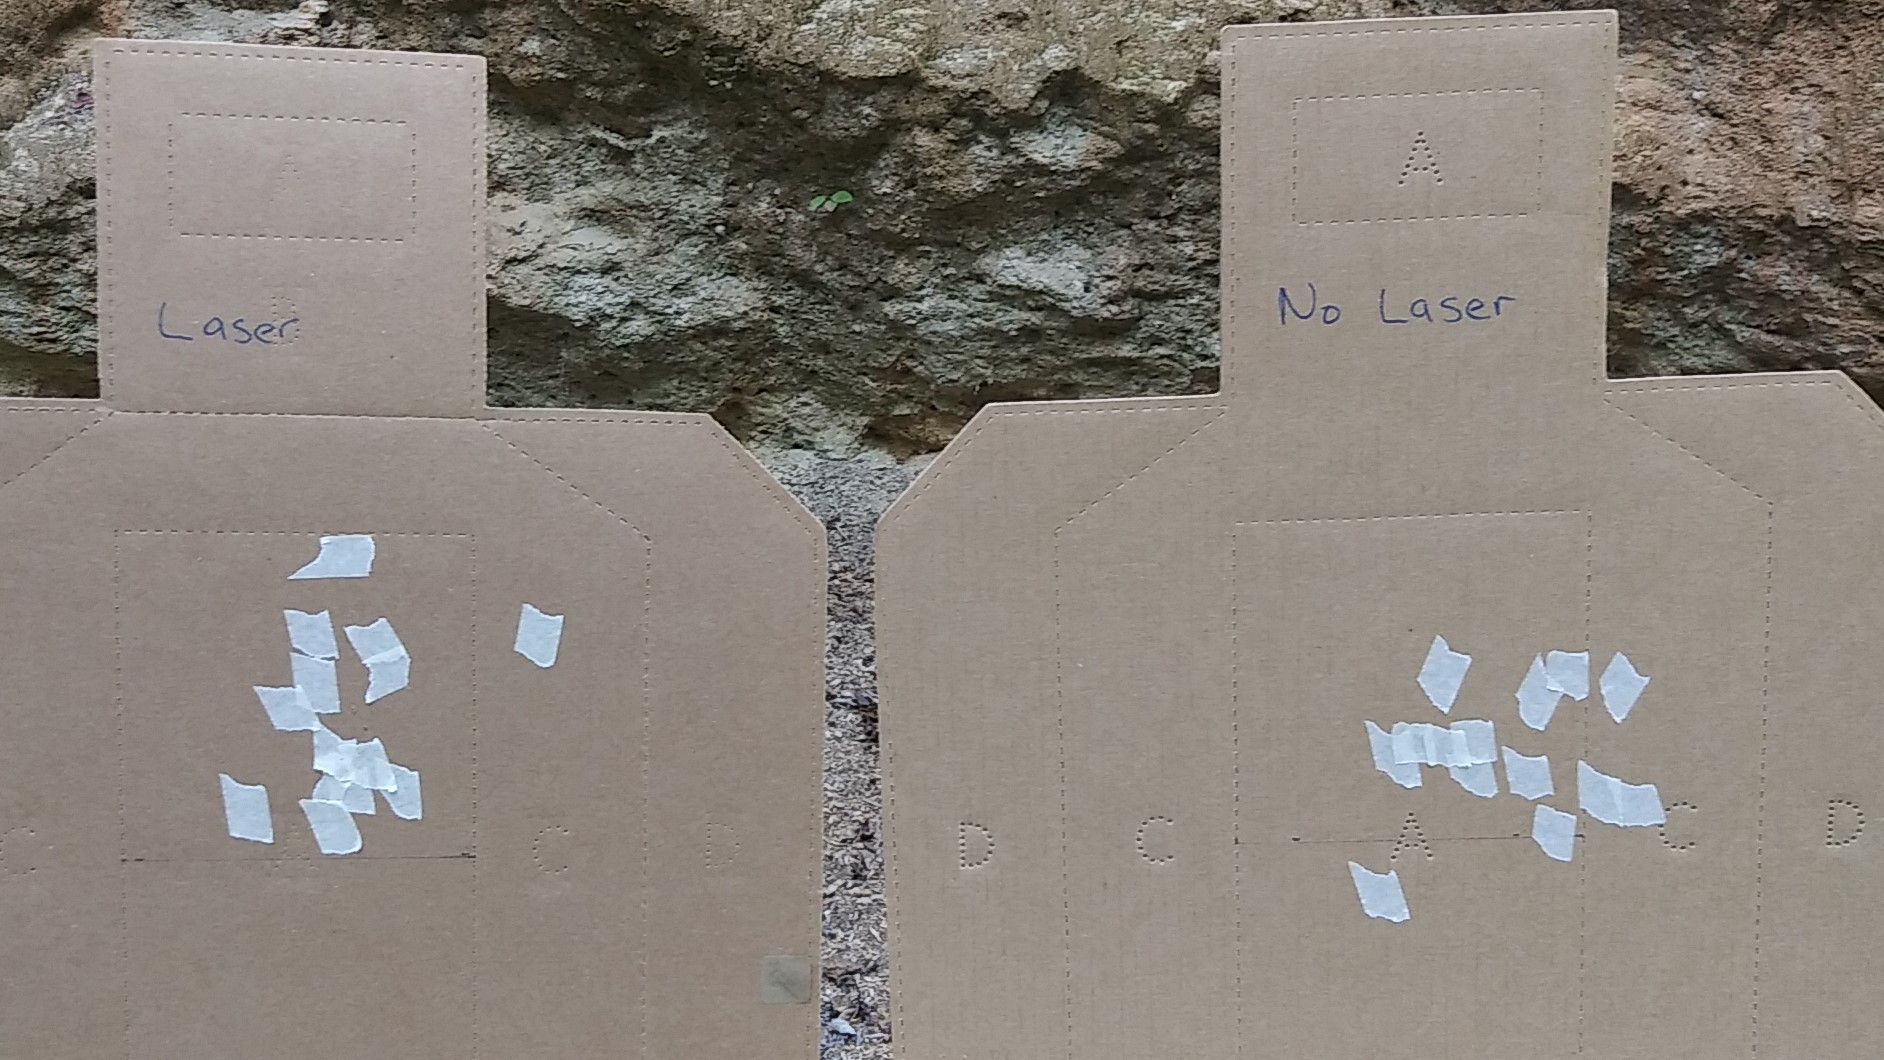
The next phase of my evaluation will be to shoot the same protocol in bright sunlight and at dusk. Those results should provide some interesting contrast.
With regard to the holster, I found it to be quite satisfactory. My only observation is that because the gun and holster is so short, the butt of the gun tends to droop forward and reduce my concealment. On the way home, I stopped at Arbol de Dolares to purchase La Chancla https://www.npr.org/sections/codeswitch/2014/11/04/361205792/la-chancla-flip-flops-as-a-tool-of-discipline . I’ll cut a piece of the flip-flop off to glue onto the back of the holster as a pad, a la Keepers Concealment. https://keepersconcealment.com/
Overall, I very pleased with the results. This makes about 700 rounds through the 856 with no issues. The laser worked well and the holster is satisfactory. A good EDC that I’m comfortable with.
How Do I Choose Which Carry Gun?
One of my Patrons https://www.patreon.com/TacticalProfessor?fan_landing=true&view_as=public sent me the following message. With his permission, I’m going to answer it for a broad audience.
My question for you is how do you decide which gun you carry most often. … I know from following you over the years that you carry various pistols and revolvers from time to time. I’m just curious how you decide which gun you carry most often.
That’s a pertinent and insightful question.
The short answer is that I don’t change guns very often. My EDC handguns all are sufficient to deal with what I consider my most likely threat profile. Because that’s so, I don’t feel the need to scale my armament up and down.
I will change my gun to fit different mission profiles. As a professional trainer, my mission profile is based on what I’m teaching not a varying threat profile. For instance, when I was working on my LCP Project, I carried an LCP for almost a year. When I began the Snub Nose Revolvers – Hands-on Shooting program on Patreon, I switched back to carrying a J frame. During the program, I would occasionally alternate between a S&W 317 and Taurus 856 to evaluate their differences, but that was about all.
When I end the Snub Nose Revolvers program at the end of this year, I will start the Subcompact Pistols – Hands-on Shooting program. For that program, I’ll switch from a J Frame to a Glock 42 that Glock sent me for evaluation in the program. The LCP will also go back into service as another example of subcompacts.
Handguns have different triggers, index onto the target at different points, and even draw differently. The difference between where the Glock 42 indexes onto the face of a target vis-à-vis the 317 is quite noticeable. Obviously, the triggers are different, even with the NY1 trigger spring I installed in the 42.
For simplicity sake, I prefer to stay with the same system day to day. When I do change, I do an hour’s worth of dry practice before venturing out with a new carry piece. How I can make the gun perform is much more important to me than aspects of caliber and ‘firepower.’ It’s just a handgun, folks. As John Farnam says, in the end they’re all just pathetic popguns. I’m a firm believer that “It’s the ‘finest light cavalryman in the world,’ not the arrow,” even when one arrow isn’t quite as pointy as the other.
3X3X3 – Level One
Three Shots, Three Seconds, Three Yards has been discussed in the context of gunfights since the 1970s. It is the most commonly cited statistic about gunfights.
Practicing to hit the silhouette every time using the 3X3X3 basis is Level One of learning to shoot the drill well. It is a good baseline for entry level shooters and those who have never measured their performance.
Level One – hit a silhouette consistently
Level Two – hit a sheet of paper consistently
Level Three – hit a half sheet of paper consistently
Level Four – hit a quarter sheet of paper consistently
The dry practice drill was discussed in a previous post.
Here’s the live fire version.
When I wrote Real Shootouts of the LAPD, I wasn’t surprised that NYPD Lt. Frank McGee was pretty much on the mark when he first described it. Almost all of the off-duty shootouts fit into that statistic.
A related note is that I fired about 100 .22 Long Rifle rounds through my 317 snub with a standard (8.5 lb) mainspring. There was not one Failure to Fire during the session. Ammunition for my .38 is precious and hard to come by so I used the .22 for demo purposes. For those who think that was cheating, I also shot with my SCCY CPX-2 9mm.

If you would like to purchase my book about actual shootouts that are not a figbar of someone’s imagination, click on the image below.
Dry Practice on the Road
#safetysunday
When traveling, we can still do our dry practice. In fact, it may be more important when traveling than any other time. We’re more vulnerable and lack the underlying knowledge of our surroundings that we have during our usual activities in our home area.
Since we’re not at home, some of our usual safety protocols may not be available to us. For instance, our usual safe practice area is no longer available to us. Also, if our home practice regimen involves using a target that is generally concealed unless we are practicing, that will not be an option.
These limitations mean we have to use alternate safety protocols for our dry practice. Having an Unintentional Discharge in a motel room or in the home of a friend or relative will certainly lead to a Negative Outcome. Anyone who has run a major firearms training facility has stories of clients who had UDs in their motel rooms and the consequences. At the very least, the POlice will become involved to some extent. At worst, someone is killed and the consequences are grave. Having a UD in a friend or relative’s home may not result in POlice involvement but is unlikely to have a positive effect on the relationship.
Some of our home protocols can be modified but still used to some extent. The most important thing to remember is that safety protocols have the same importance when we are on the road as when we are at home.
In terms of the practice area, we want to choose the least dangerous direction for our practice. Depending on the nature of the building’s construction, a bullet resistant wall simply may not be available. In that case, we must choose the direction that is least likely to result in a casualty if a round is fired. A bullet hole in a door that opens out to a brick wall has less consequences than a bullet hole in a guest in an adjoining room. Consider carefully where an errant bullet might go before choosing your practice direction.
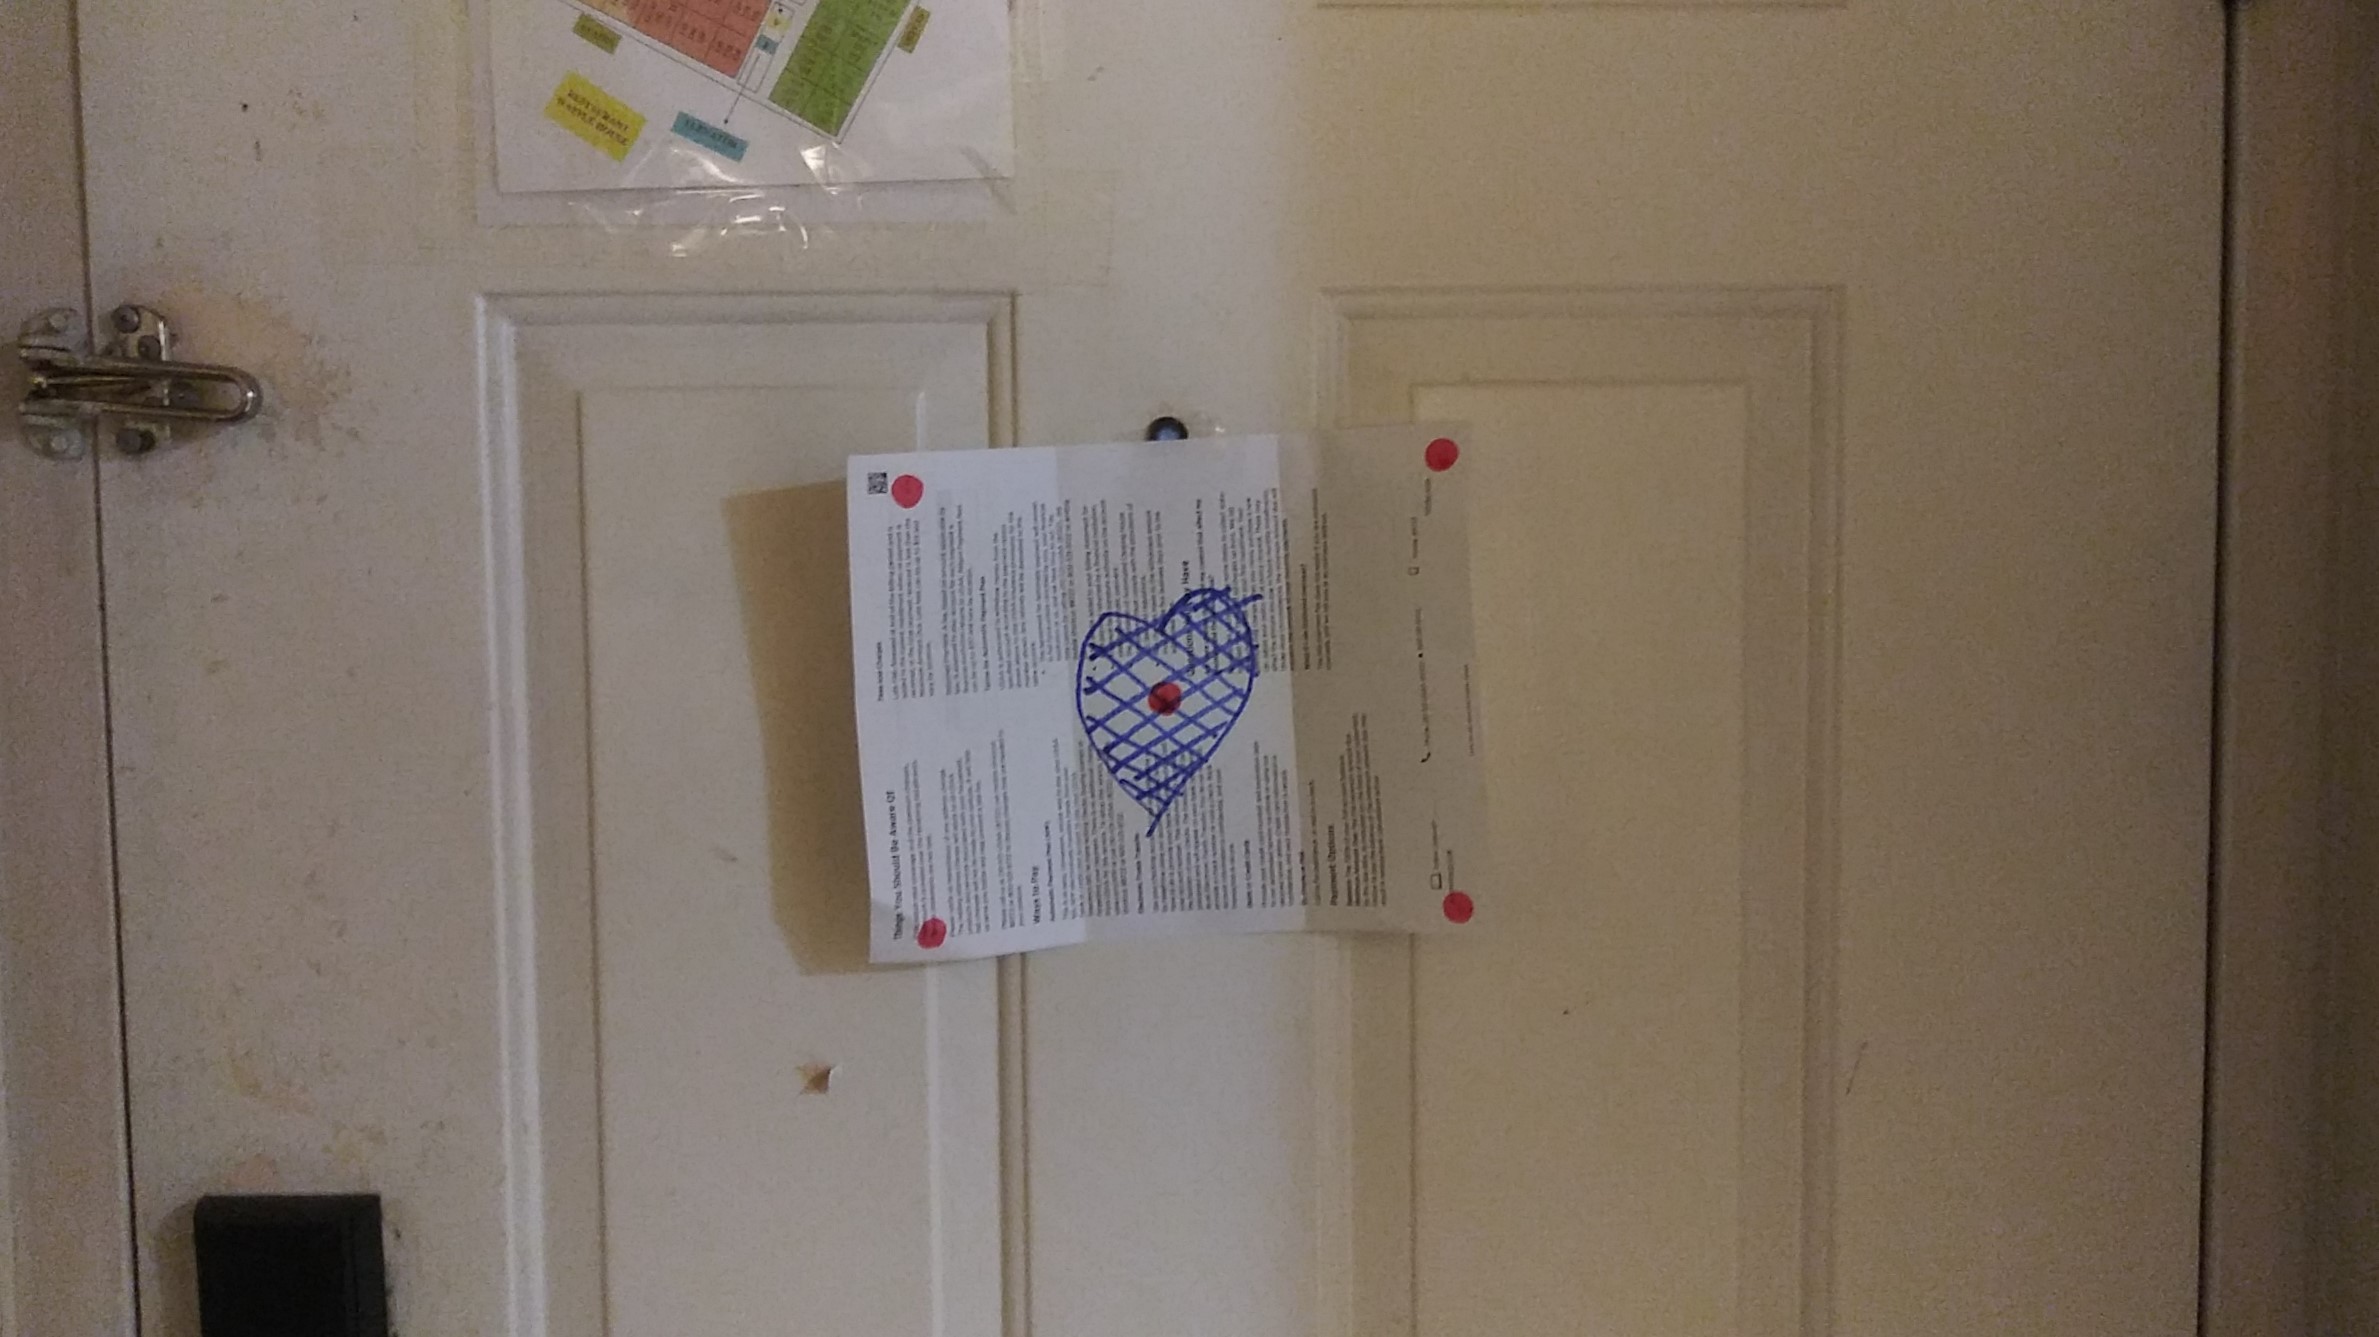
Next, use a target. A sheet of paper with a heart drawn on it is a good target for a ‘3 shots in 3 seconds at 3 yards’ Even more about Skill Development practice regimen. Putting a few small spots on it provides targets for precision aiming and trigger practice work.
A few easily carried training aids are useful for ensuring safe practice with a revolver. The first is inert ammunition. Three different types of inert ammunition are easily carried in an 18 round MTM Ammo case. The Ammo Case is itself a part of the safety protocols.
The first training aid is snap caps. Different varieties are available. If the primer pocket isn’t filled, such as with the ST-Action Pro inert ammo, you can fill the pockets in with a hot melt glue gun and trim the excess off. This will protect the firing pin or hammer nose of your revolver. Good snap caps are easily identifiable by their color. A-Zoom has recently started making their snap caps in orange, which are more identifiable when loaded in a blue steel gun than the darker A-Zoom offering. The spring loaded primer type of snap caps have a limited service life and are not recommended for serious practice.
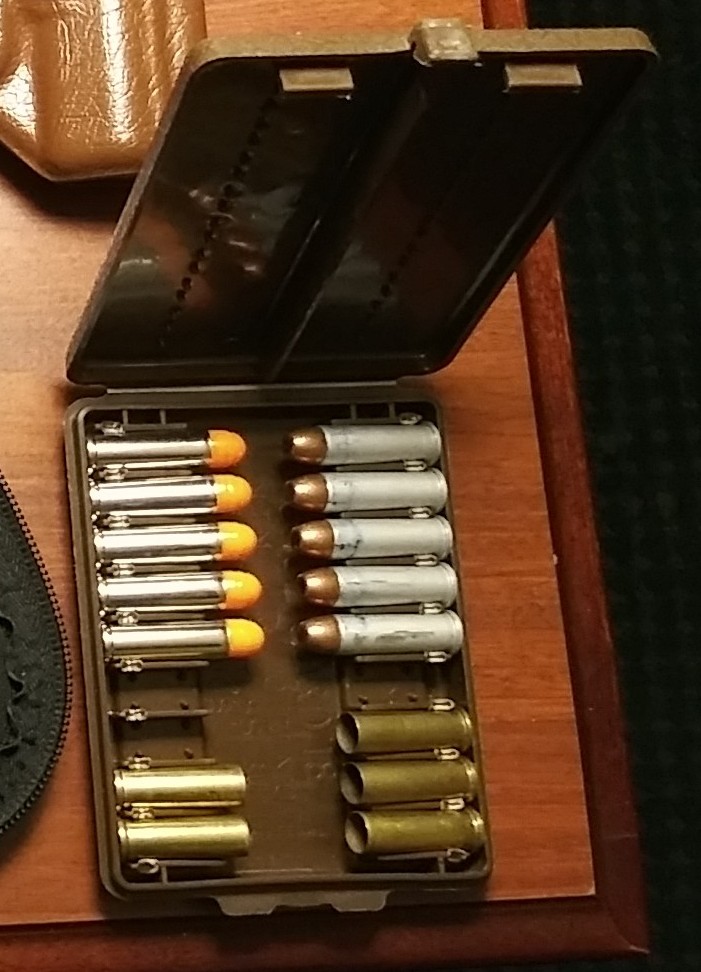
After unloading the revolver, replace the live ammunition with snap caps. Since two objects cannot fit in the same place at the same time, this precludes leaving one live round in the cylinder, which is not an unknown occurrence, as gunowners sometimes discover. After the snap caps have been loaded into the revolver, put the live ammunition in the Ammo Case and count the number of rounds. If the rounds you place in the case are less in number than the capacity of your revolver, the FBI calls that ‘a clue.’
A second training aid is full weight dummies for reloading practice. Snap caps are a good safety aid and for protecting the revolver, however, they usually lack the weight necessary for effective reloading practice. Dummy ammo should be easily identifiable, which is often a problem with homemade dummies. The dummies in the picture were made from Blazer Aluminum cases scrounged from a local indoor range. The bullet noses and cartridge base are colored blue with a Magic Marker for additional visual identification.
The third training aid is fired cases. Reload practice with revolvers should always include getting the empty cases out in addition to reloading with fresh ammo/dummies. A new speedloader manufacturer that was displaying at the SHOT Show years ago failed to consider this in their demonstration. When asked how the empty cases were to be ejected while holding the revolver in one hand and the speedloader in the other, a blank stare was the only answer.
A pistol case is another training aid for practice on the road. The pistol case is for placing the pistol in after the practice session has been finished and the gun reloaded.
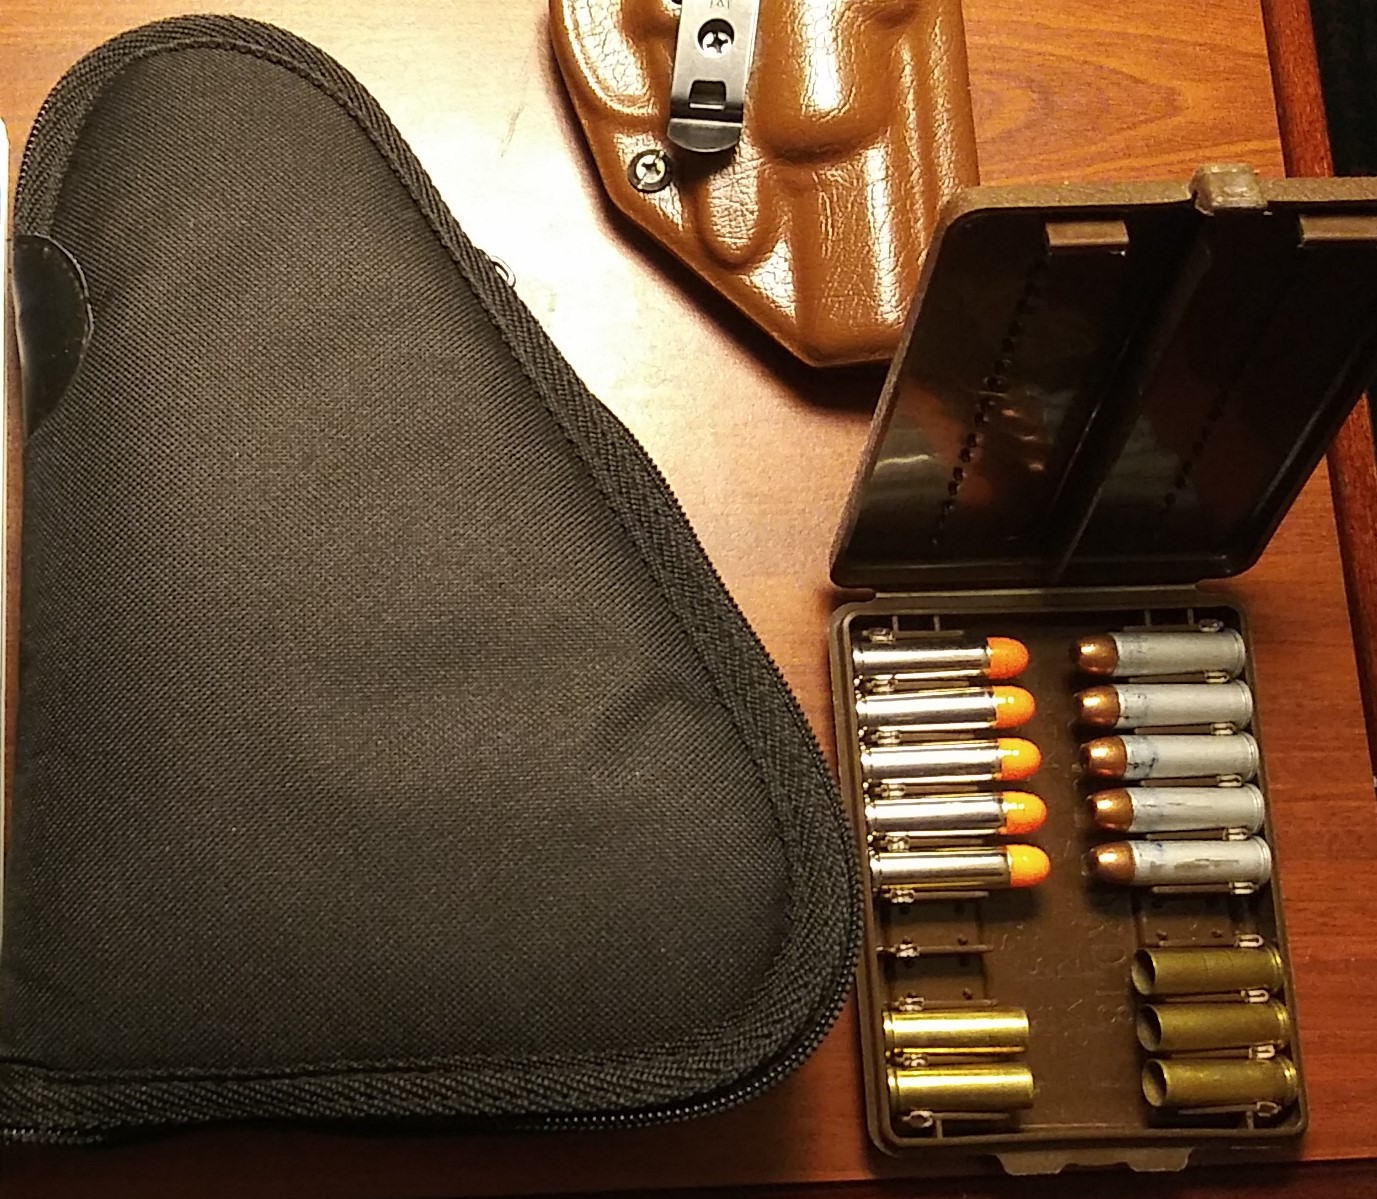
The sequence for finishing the session is:
- Declare out loud “This session is finished.”
- Take the target down.
- Remove whatever snap caps/dummies/fired cases are in the gun.
- Set the gun down completely empty.
- Again, declare out loud “This session is finished.”
- Load the pistol with live ammunition.
- Place the loaded pistol in the pistol case. The case does not have to be complete zipped but should be at least partially. This is a visual and situational indicator that the gun is loaded and not available for practice.
- Do something else to remove dry practice from your thoughts.
Reading something dry and difficult is a good way to remove dry practice from your thoughts.
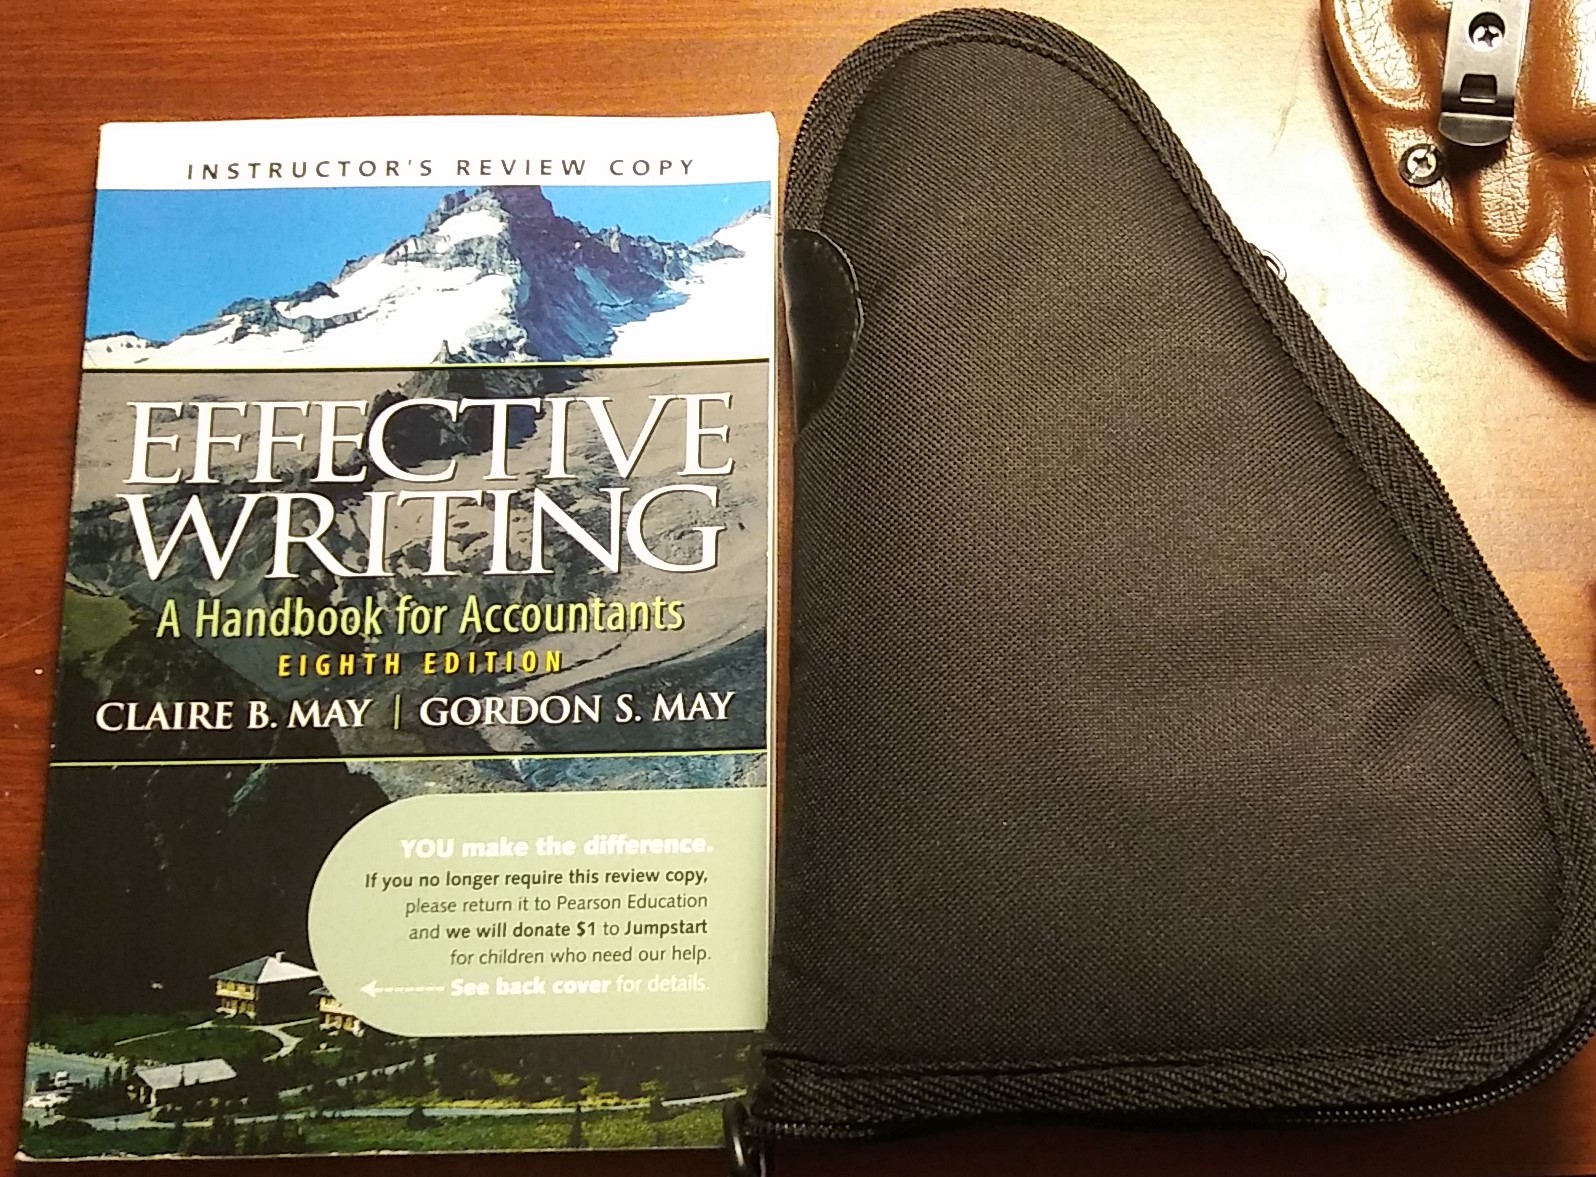
Keeping an awareness of safety in mind allows us to maintain our proficiency on the road without menacing innocent people around us.
The circumstances of Unintentional Discharges at home are covered as the third Section of Real Shootouts of the LAPD. Off-duty Officer Involved Shootings and Officer Involved Animal Shootings are the first two. If you would like to purchase the book, click on the cover below.
Helping or hurting your case
The justifiability of this shooting will be determined in the courtroom. However, it’s fairly safe to say that not reporting a shooting/killing to the POlice and subsequently tampering with evidence, i.e., throwing the spent shell casings in the dumpster and concealing the revolver, is unlikely to help your case.
Win, Lose, or Draw; the cost of this killing will be high, both psychologically and financially.
Also, the optics of two shots to the back of the head are not good.
Tactical Professor books (all PDF) (not Free)
- Serious Mistakes Gunowners Make http://seriousgunownermistakes.com
- Indoor Range Practice Sessions http://indoorrangepracticesessions.com
- Concealed Carry Skills and Drills http://concealedcarryskillsanddrills.com
- Advanced Pistol Practice http://bit.ly/advancedpistolpractice
- Shooting Your Black Rifle http://shootingyourblackrifle.com
- Package deal of Serious Mistakes, Indoor Range Sessions, Concealed Carry, and Shooting Your Black Rifle (20% off) https://store.payloadz.com/details/2644448-ebooks-sports-shooting-drills-package.html

Dry Practice Safety – Part II
#fridayfundamentals
The LAPD Categorical Use Of Force report about the UD of a snub revolver https://lapdonlinestrgeacc.blob.core.usgovcloudapi.net/lapdonlinemedia/2021/12/040-19-PR-NTUD.pdf generated a fair amount of interest. Here’s a follow-on idea.
These three Lessons To Be Learned From The Incident were mentioned last time.
- While we sometimes have to perform administrative functions with our guns, those administrative actions should mimic our actual handling and firing procedures, whenever possible. In this case, ejecting the rounds straight down as if getting ready to reload would be a better procedure.
- Count the rounds when they come out of the revolver. You should be aware how many chambers your revolver has. Five chambers but only four rounds indicates a problem. Note that a nickel plated single round in the cylinder of a stainless or anodized revolver is not necessarily immediately obvious. By counting the rounds and then carefully examining the cylinder, the chances of a round remaining in a chamber is mitigated.
- Dummy ammunition not only protects the firing pin, hammer nose, or striker of a handgun during dry practice, it also provides an additional layer of safety during the practice session. If a visually identifiable dummy is in the chamber(s), then a live round cannot be. This is also physics. Dummies are available from A-Zoom and ST Action Pro. They can be found on Amazon or better gun stores.
Keeping a speedloader filled with dummy rounds accessible allows you to accomplish all three of these tasks. You could do the same thing with a Speed Strip, pouch, or loops.

- Put your speedloader where you might carry it. If you don’t habitually carry a speedloader for your reload, just put it in your pocket.
- Eject the live rounds from your revolver on the ground.
- Reload with the dummies using the speedloader.
- Holster your revolver.
- Put the live rounds in the speedloader and secure it with your other live ammunition.
- Go to your dry practice area, which is a place where there is no live ammunition.
- When you have finished your dry practice, put your revolver away without reloading it.
- Do something else to remove dry practice from your thoughts.
- When dry practice is distant from your thoughts, reverse the reloading process and reload your revolver with the live ammunition. Replace the dummy rounds in the speedloader. This gives you a reminder that your revolver is now loaded with live ammunition.
- Put your revolver away or immediately exit your home to preclude the last repetition that makes a loud noise.
Using this procedure helps protect you, your gun, and gets in two good reloading repetitions.
Tactical Professor books are NOT FREE but if you would be interested in knowing how to better operate the firearms you own during the American Insurgency, they can be purchased from the menu at the top of the page.
Dry Practice Safety
#wheelgunwednesday
There are many valuable lessons to be learned from the LAPD Categorical Use Of Force reports. http://www.lapdonline.org/categorical_use_of_force Most of those lessons relate to the dynamics of Officer Involved Shootings. However, the reports also provide a detailed account for every Unintentional Discharge by a Los Angeles POlice Officer. This particular incident relates to the UD of a snub revolver.
http://www.lapdonline.org/assets/pdf/040-19%20PR%20(NTUD).pdf
Incident Summary
Officer A brought his/her back-up service revolver home with the intention to clean it.
With the muzzle of the revolver pointed toward the ground, Officer A held the revolver with his/her right hand and used his/her right thumb to push the cylinder release button, disengaging the cylinder from the revolver. Once the cylinder disengaged, Officer A placed his/her left hand under the open cylinder and used his/her left index finger to depress the ejector rod, releasing the live rounds into his/her left hand. Officer A did not count the live rounds and placed them on top of the kitchen counter directly behind him/her. Officer A then closed the cylinder.
Officer A held his/her revolver with two hands in a standing shooting position. He/she raised his/her revolver and pointed it in the direction of the vertical blinds covering a sliding glass doors, which led to an exterior patio. Officer A placed his/her finger on the trigger and pressed it to dry fire the revolver. Officer A conducted two dry fire presses of the trigger.
According to Officer A, he/she normally conducted dry trigger press exercises approximately three times per week, on his/her days off. However, Officer A stated that he/she usually practices with his/her semi-automatic service pistol, and this was the first time that he/she practiced with his/her revolver.
According to Officer A, believing his/her revolver was still unloaded, he/she placed his/her finger on the trigger and pressed it a third time, which caused the revolver to discharge a single round. No one was injured by the discharge.
Los Angeles Board of Police Commissioners’ Findings
The BOPC determined that Officer A’s actions violated the Department’s Basic Firearm Safety Rules and found Officer A’s Unintentional Discharge to be Negligent.
Lessons To Be Learned From The Incident
The value of reading about incidents like this is not to criticize or heap scorn but rather to learn hard lessons from someone else’s Negative Outcome.
- Revolvers have multiple chambers not just one like an autoloading pistol. Especially if the revolver is dirty, either from firing or carrying, it’s not uncommon for one or two rounds to remain in the cylinder when the rest eject. Two factors can contribute to this. One, the ejector rod of a snub is shorter than the cases so it doesn’t push the rounds completely out. Two, gravity has effect when loading or unloading a revolver. If the revolver is not held completely vertical when being unloaded, gravity causes the cases to drag on the bottom of the chambers. This is simply physics in action.
- “Officer A placed his/her left hand under the open cylinder and used his/her left index finger to depress the ejector rod, releasing the live rounds into his/her left hand.” This is pretty much impossible to do with the revolver held vertically. It is also a bad repetition of reloading procedure. While we sometimes have to perform administrative functions with our guns, those administrative actions should mimic our actual handling and firing procedures, whenever possible. In this case, ejecting the rounds straight down as if getting ready to reload would be a better procedure.
- Count the rounds when they come out of the revolver. You should be aware how many chambers your revolver has. Five chambers but only four rounds indicates a problem. Note that a nickel plated single round in the cylinder of a stainless or anodized revolver is not necessarily immediately obvious. By counting the rounds and then carefully examining the cylinder, the chances of a round remaining in a chamber is mitigated.
- Dummy ammunition not only protects the firing pin, hammer nose, or striker of a handgun during dry practice, it also provides an additional layer of safety during the practice session. If a visually identifiable dummy is in the chamber(s), then a live round cannot be. This is also physics. Dummies are available from A-Zoom and ST Action Pro. They can be found on Amazon or better gun stores.
- Dry practice should always be conducted at a specific target located on some kind of bullet resistant backstop. “[V]ertical blinds covering a sliding glass doors [sic] leading to an exterior patio” DO NOT fulfill this requirement.
Dry practice is a valuable way to build skill, especially with a wheelgun. Make sure that you are alert and focused on the task and observe safety procedures rigorously.
Tactical Professor books are NOT FREE but if you would be interested in knowing how to better operate the firearms you own during the American Insurgency, they can be purchased from the menu at the top of the page.
Snub Dry Practice During the Beer Plague
#wheelgunwednesday
We can use our time at home productively during the Beer Plague by doing some dry practice. Here’s a regimen for snub revolvers that’s quick and useful. It’s derived from the LAPD Back Up Firearm Qualification Course. There are two targets at 3 yards.

String 1
From a concealed holster, using two hands, draw and snap twice on the right target, twice on the left target, then one snap on the right head.
String 2
From a concealed holster, using two hands, draw and snap twice on the left target, twice on the right target, then one snap on the left head.
String 3
From a concealed holster, using the Primary hand only, draw and snap twice on the right target, twice on the left target, then one snap on the right head.
String 4
From a concealed holster, using the Primary hand only, draw and snap twice on the left target, twice on the right target, then one snap on the left head.
String 5
From Low Ready, using the Support hand only, snap twice on the right target, twice on the left target, then one snap on the right head.
String 6
From Low Ready, using the Support hand only, snap twice on the left target, twice on the right target, then one snap on the left head.

You can use fired cases as snap caps to protect the hammer nose (firing pin). Marking the case head with a black Sharpie provides a visual indicator that the case is a snap cap and not a wadcutter. Having a specific container for them keeps them easily accessible.


You must be logged in to post a comment.