TacCon 2021 Match
The Rangemaster 2021 Tactical Conference is in the books. A small part of the Conference is the shooting match. Of the over 200 attendees, 161 elected to shoot the match. I didn’t bring a gun because of my flight situation, so I borrowed a 642 from a friend and shot with it. Only three of us shot with revolvers.
All shooters have the opportunity to shoot the first two parts of the Course of Fire.
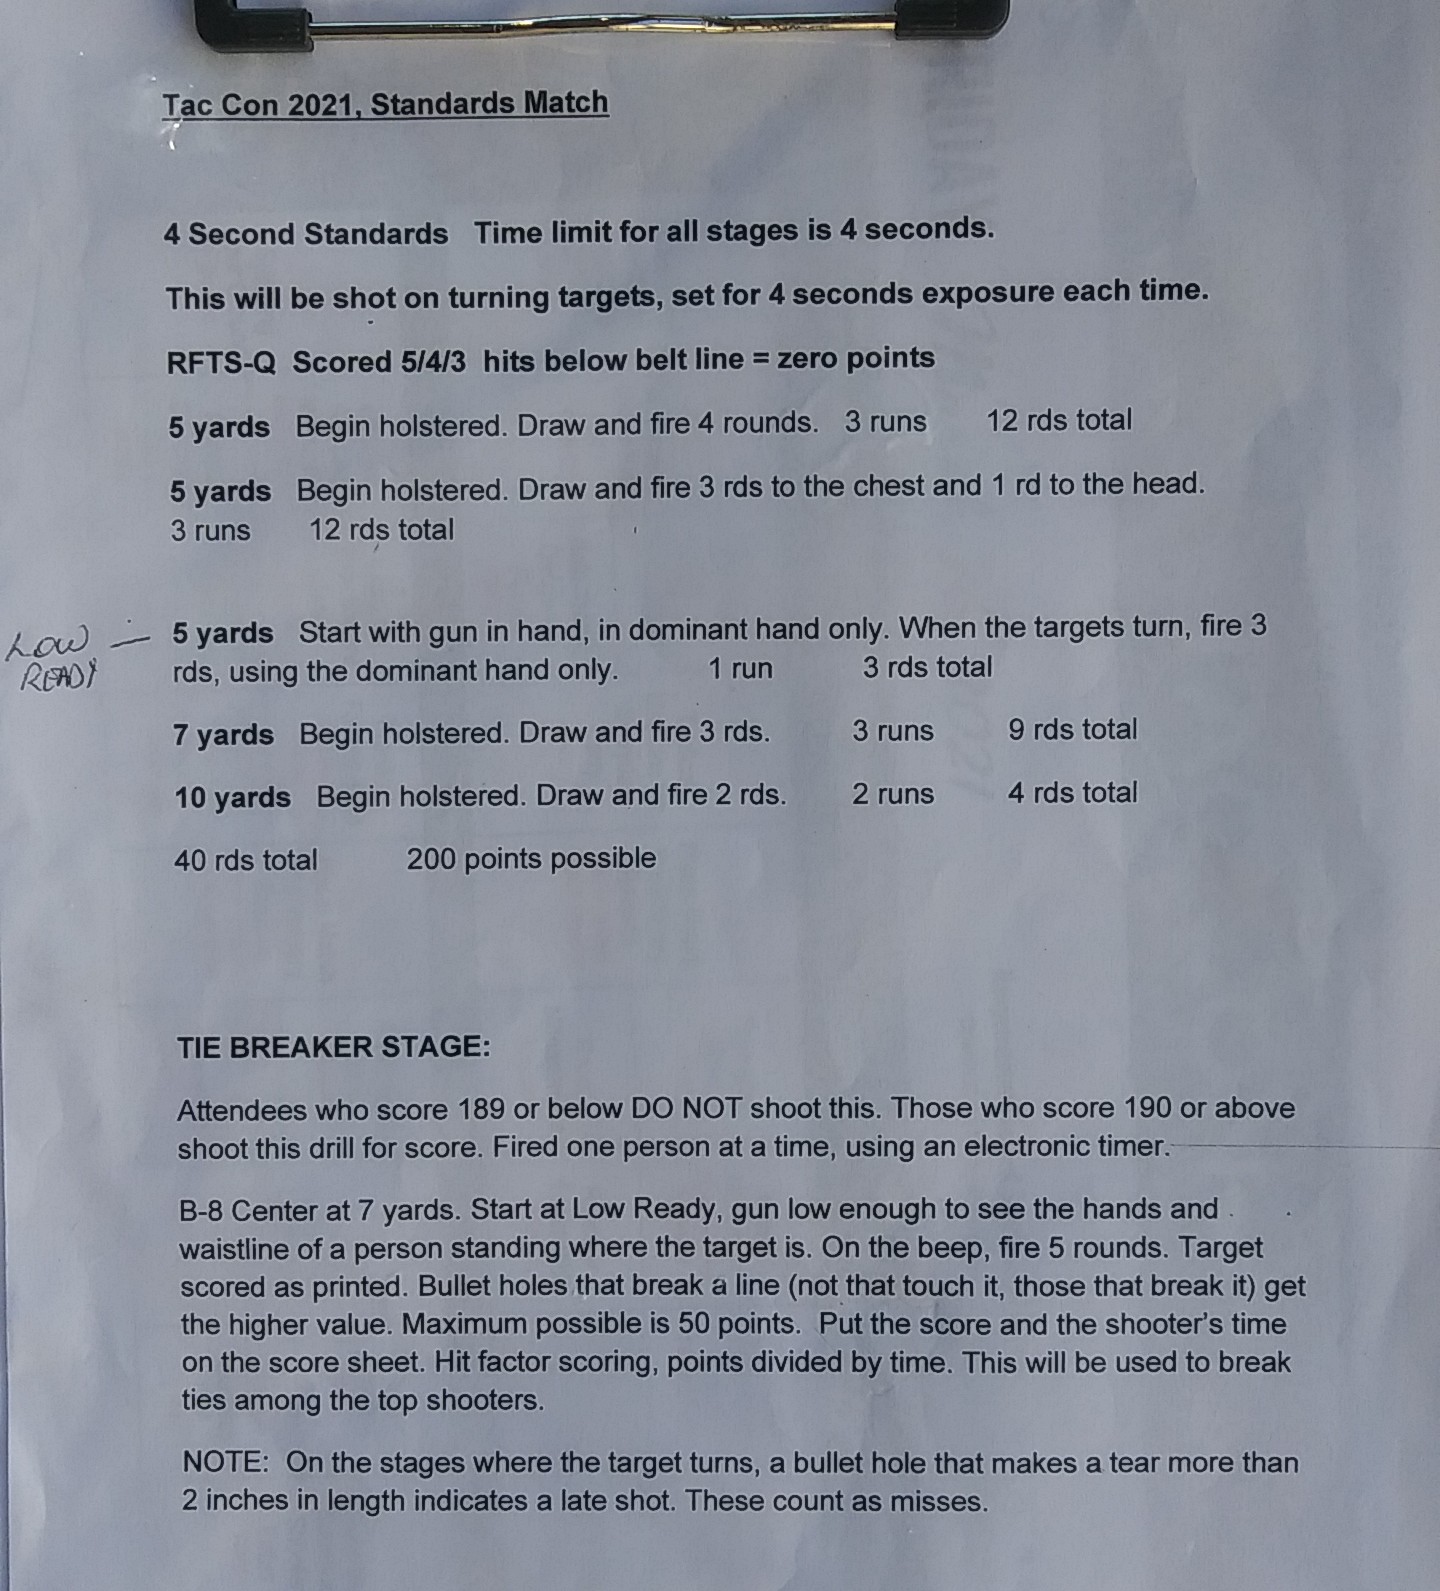
The first part of the match is shot as a standard exercise using turning targets. This was my target for the Standards. My score was 198. The 99 percent score meant I was able to shoot the tiebreaker.

For those who score 95 percent on the standards, a five round tiebreaker is shot on a B-8 target using Comstock scoring (points divided by time). I shot this well, scoring a 49 but using a lightweight snub nose revolver meant I was slower than I needed to be to get into the shootoffs on Sunday.

The top 16 shooters then enter a man v. man shootoff using a double elimination ladder. The shootoff format uses falling steel targets. Each shooter has an array of three clothed steel target with an eight inch steel circle [Correction about the target: The plate is a vertical rectangle, 5.5″ X 6″. If you run a vertical centerline down the mannequin, and a line across at armpit level, the intersection of those lines is the center of the 5.5″X6″ plate] that has to be hit to make the target fall. After knocking down all the shirt targets, the shooter must knock down the mini-popper in back. The popper that ends up on the bottom determines the winner.

It was a fun match and I’m glad I was able to shoot it.
I’ll be recapping the Conference in the next few posts.
Rangemaster Course of Fire
This is the Course of Fire for the Rangemaster Tactical Conference 2018. It’ somewhat different each year but usually has similar elements to this.
It’s not complicated yet is a good test of marksmanship ability.
Decisions and experience
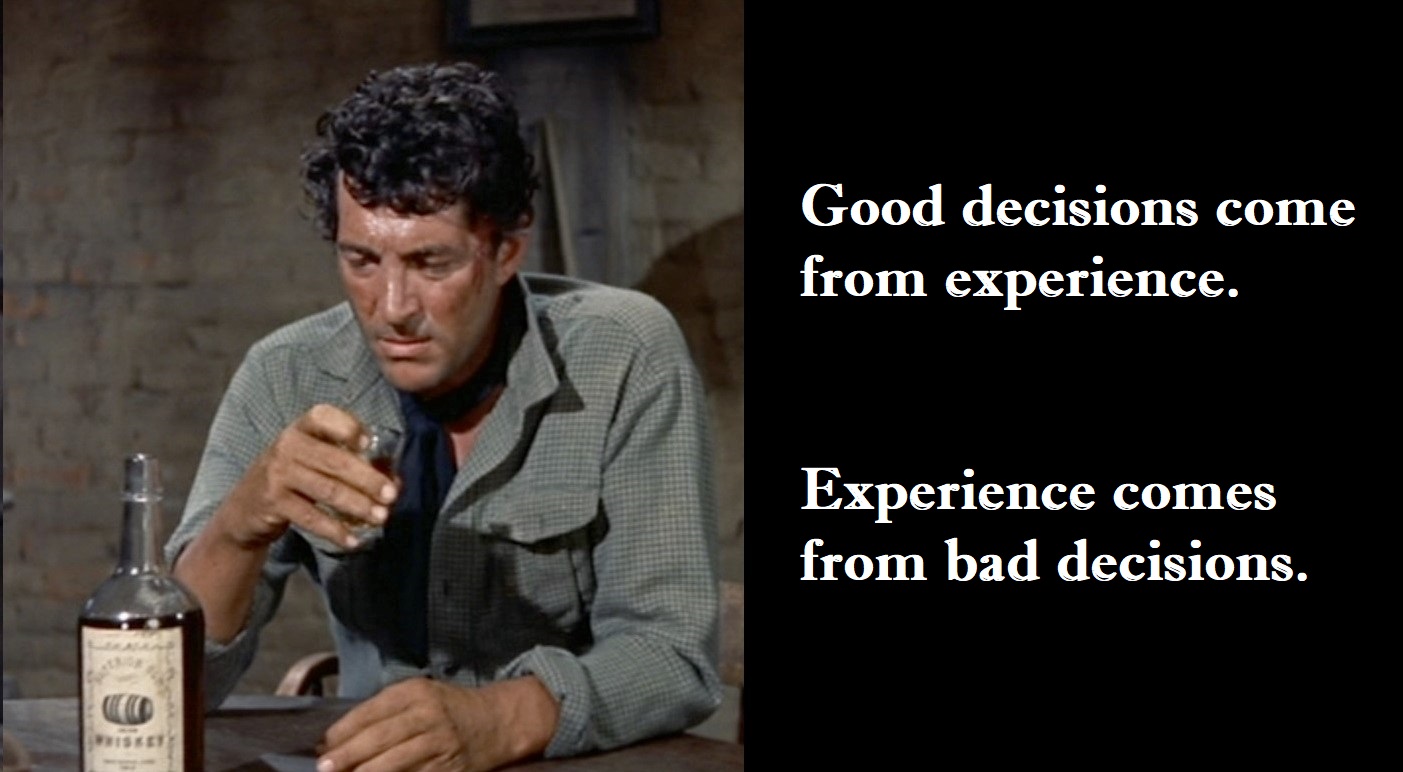
Good decisions come from experience. Experience comes from bad decisions.
Although incorrectly attributed to Will Rogers, the concept of learning from other peoples’ experience rather than our own still has value. We can use the Intelligence community’s technique of ‘walking back the cat’ to de-construct an incident. This allows us to visualize it and learn from the experience of someone else.
The concept of ‘Decision points’ has been emphasized by both Gary Klein, PhD., a noted expert on the decision-making process, and President George W. Bush. Any drama contains not just one, but a sequence of decisions and decision points we can study.
The Don’t Shoot/Shoot decision is the one most commonly focused on the training and firearms communities. However, any Defensive Gun Use, whether shots are fired or not, contains a plethora of decisions and decision points. These occur before, during, and after the shooting or display of a firearm takes place.
A rich source for walking back the cat is the Categorical Use of Force reports by the LAPD Board of Police Commissioners. The following is an analysis of one incident by an off-duty LAPD officer. The analysis will use the phases of an incident as described in my book Real Shootouts of the LAPD. http://realshootoutsofthelapd.com
The incident began as an Aggravated Assault on an LAPD off-duty officer. The full report by the Board of Police Commissioners, including its Findings about Tactics, Drawing and Exhibiting of a Firearm, and Use of Lethal Force can be found here. http://www.lapdonline.org/assets/pdf/011-11_Harbor-OIS.pdf
Incident Summary
The Situation
Officer A, who was off-duty, walked to his vehicle parked in the driveway of a residence. He did not see anyone around at the time. His duty weapon was in the right front pocket of his pants. After driving out of the driveway, he backed his vehicle up and left the lights on. He then walked back to the gate to close it.
- Decision point — Leave home armed with his weapon on his person or at least accessible? Even for POlice officers, this is not as absolute a decision as it would seem, as can be seen in other LAPD off-duty incidents.
- Decision point — Close gate (initial entry barrier to home) or not? As mundane as this decision seems, many people leave their garage doors open when they drive away from their home.
The Buildup
Officer A saw the Subject walking on the sidewalk coming toward him. The Subject then began to run toward Officer A. As the distance to the Subject became closer, Officer A saw the Subject had a handgun in his hand. The Subject pointed the handgun at Officer A.
- Decision point — Maintain awareness of surroundings or focus on telephone or other attention divider?
- Decision point — Maintain surveillance on the suspect or not?
- Decision point — Recognize and accept that an armed attack is imminent or not?
Drawing and Exhibiting
Officer A drew his service pistol from his pocket.
- Decision point — Draw own pistol or not?
The Gunfight
Immediately after drawing his pistol, Officer A fired one round at the Subject.
- Decision point — Don’t Shoot or Shoot?
- Decision point — Fire in place or Shoot on the Move?
- Decision point — Obtain an adequate sight picture to make a hit or fire without visual reference?
The Subject seemed unaffected, so Officer A fired a second round at the Subject.
- Decision point — Don’t Shoot or Shoot a second time?
- Decision point — Fire in place or Shoot on the Move?
- Decision point — Obtain an adequate sight picture to make a hit or fire without visual reference?
After running past Officer’s A car, the subject collapsed on the sidewalk behind a short block wall.
Post Gunfight Actions
Because he could not see him and wanted to wait for responding officers to arrive, Officer A did not approach the Subject.
- Decision point — Approach the suspect or not?
Officer A retreated to cover at the house and called 911.
- Decision point — Hold position or retreat to cover?
- Decision point — Call 9-1-1 or do something else?
While he was calling 911, Officer A observed another male come over to the Subject, squat down, then stand up and adjust his shirt. The second male then walked away.
- Decision point — Interact with/challenge the secondary suspect or not?
Two other males walked to the fallen Subject, leaned over to look at him, and then walked away.
- Decision point — Interact with/challenge the tertiary suspects or not?
There are also implied decision points subsequent in the drama but were not elaborated on by the BOPC.
- Actions on approach of responding officers.
- What statements, if any, should be made to responding officers and then to detectives.
- Whom else to notify about the incident; Significant Other, etc.
- Retain an attorney or call pre-paid legal assistance plan.
At least 21 decisions/decision points are readily discernible in this incident. There are perhaps even more, despite this being a relatively uncomplicated DGU. Also note that of the 21, only six (Don’t Shoot or Shoot [X2]), (Fire in place or Shoot on the Move [X2]), and (Obtain an adequate sight picture to make a hit or fire without visual reference [X2]) can be readily practiced with live fire. Those and another, (Draw own pistol or not) can be practiced dry. The other two-thirds of the decisions are more in the nature of ‘soft skills’ that are best decided upon in advance and then practiced away from the range.
“Best decided upon in advance and practiced away from the range” represents our opportunities during the current ammo shortage. Rather than sit on our hands because ammo has become so precious, we can begin developing and practicing a more complete repertoire of the skills we need for Personal Protection. If you would like to read my analyses of the rest of the incidents described in the book, please subscribe to me on Patreon. Patreon link I will be posting the rest of them there.
Dry Practice on the Road
#safetysunday
When traveling, we can still do our dry practice. In fact, it may be more important when traveling than any other time. We’re more vulnerable and lack the underlying knowledge of our surroundings that we have during our usual activities in our home area.
Since we’re not at home, some of our usual safety protocols may not be available to us. For instance, our usual safe practice area is no longer available to us. Also, if our home practice regimen involves using a target that is generally concealed unless we are practicing, that will not be an option.
These limitations mean we have to use alternate safety protocols for our dry practice. Having an Unintentional Discharge in a motel room or in the home of a friend or relative will certainly lead to a Negative Outcome. Anyone who has run a major firearms training facility has stories of clients who had UDs in their motel rooms and the consequences. At the very least, the POlice will become involved to some extent. At worst, someone is killed and the consequences are grave. Having a UD in a friend or relative’s home may not result in POlice involvement but is unlikely to have a positive effect on the relationship.
Some of our home protocols can be modified but still used to some extent. The most important thing to remember is that safety protocols have the same importance when we are on the road as when we are at home.
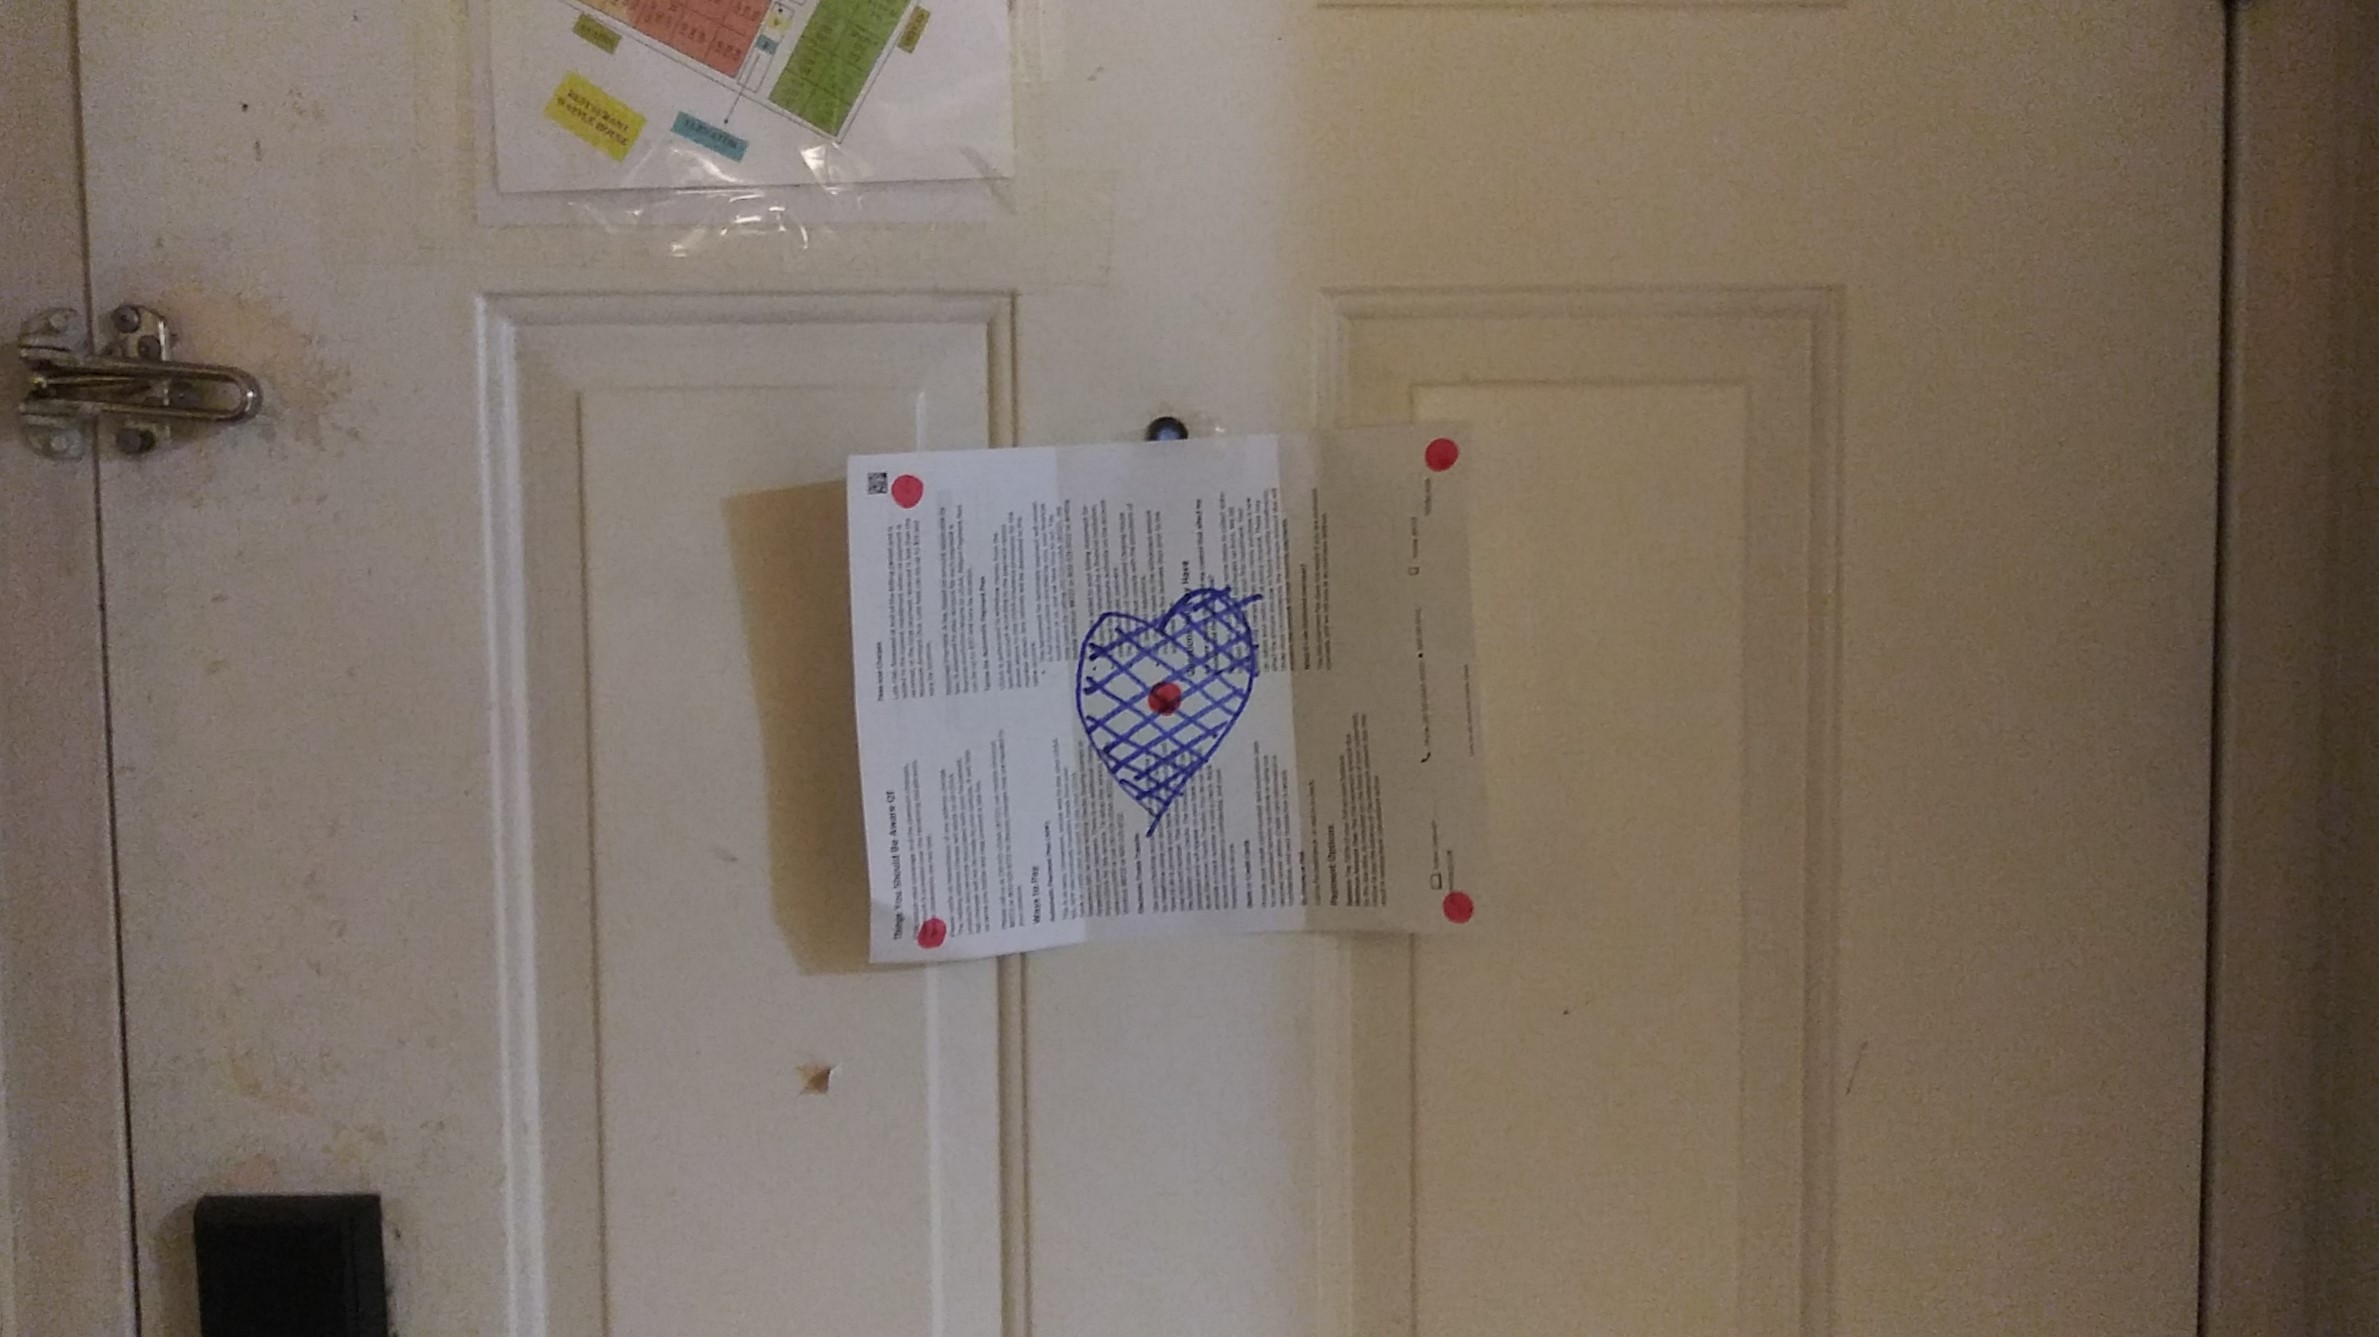
In terms of the practice area, we want to choose the least dangerous direction for our practice. Depending on the nature of the building’s construction, a bullet resistant wall simply may not be available. In that case, we must choose the direction that is least likely to result in a casualty if a round is fired. A bullet hole in a door that opens out to a brick wall has less consequences than a bullet hole in a guest in an adjoining room. Consider carefully where an errant bullet might go before choosing your practice direction.
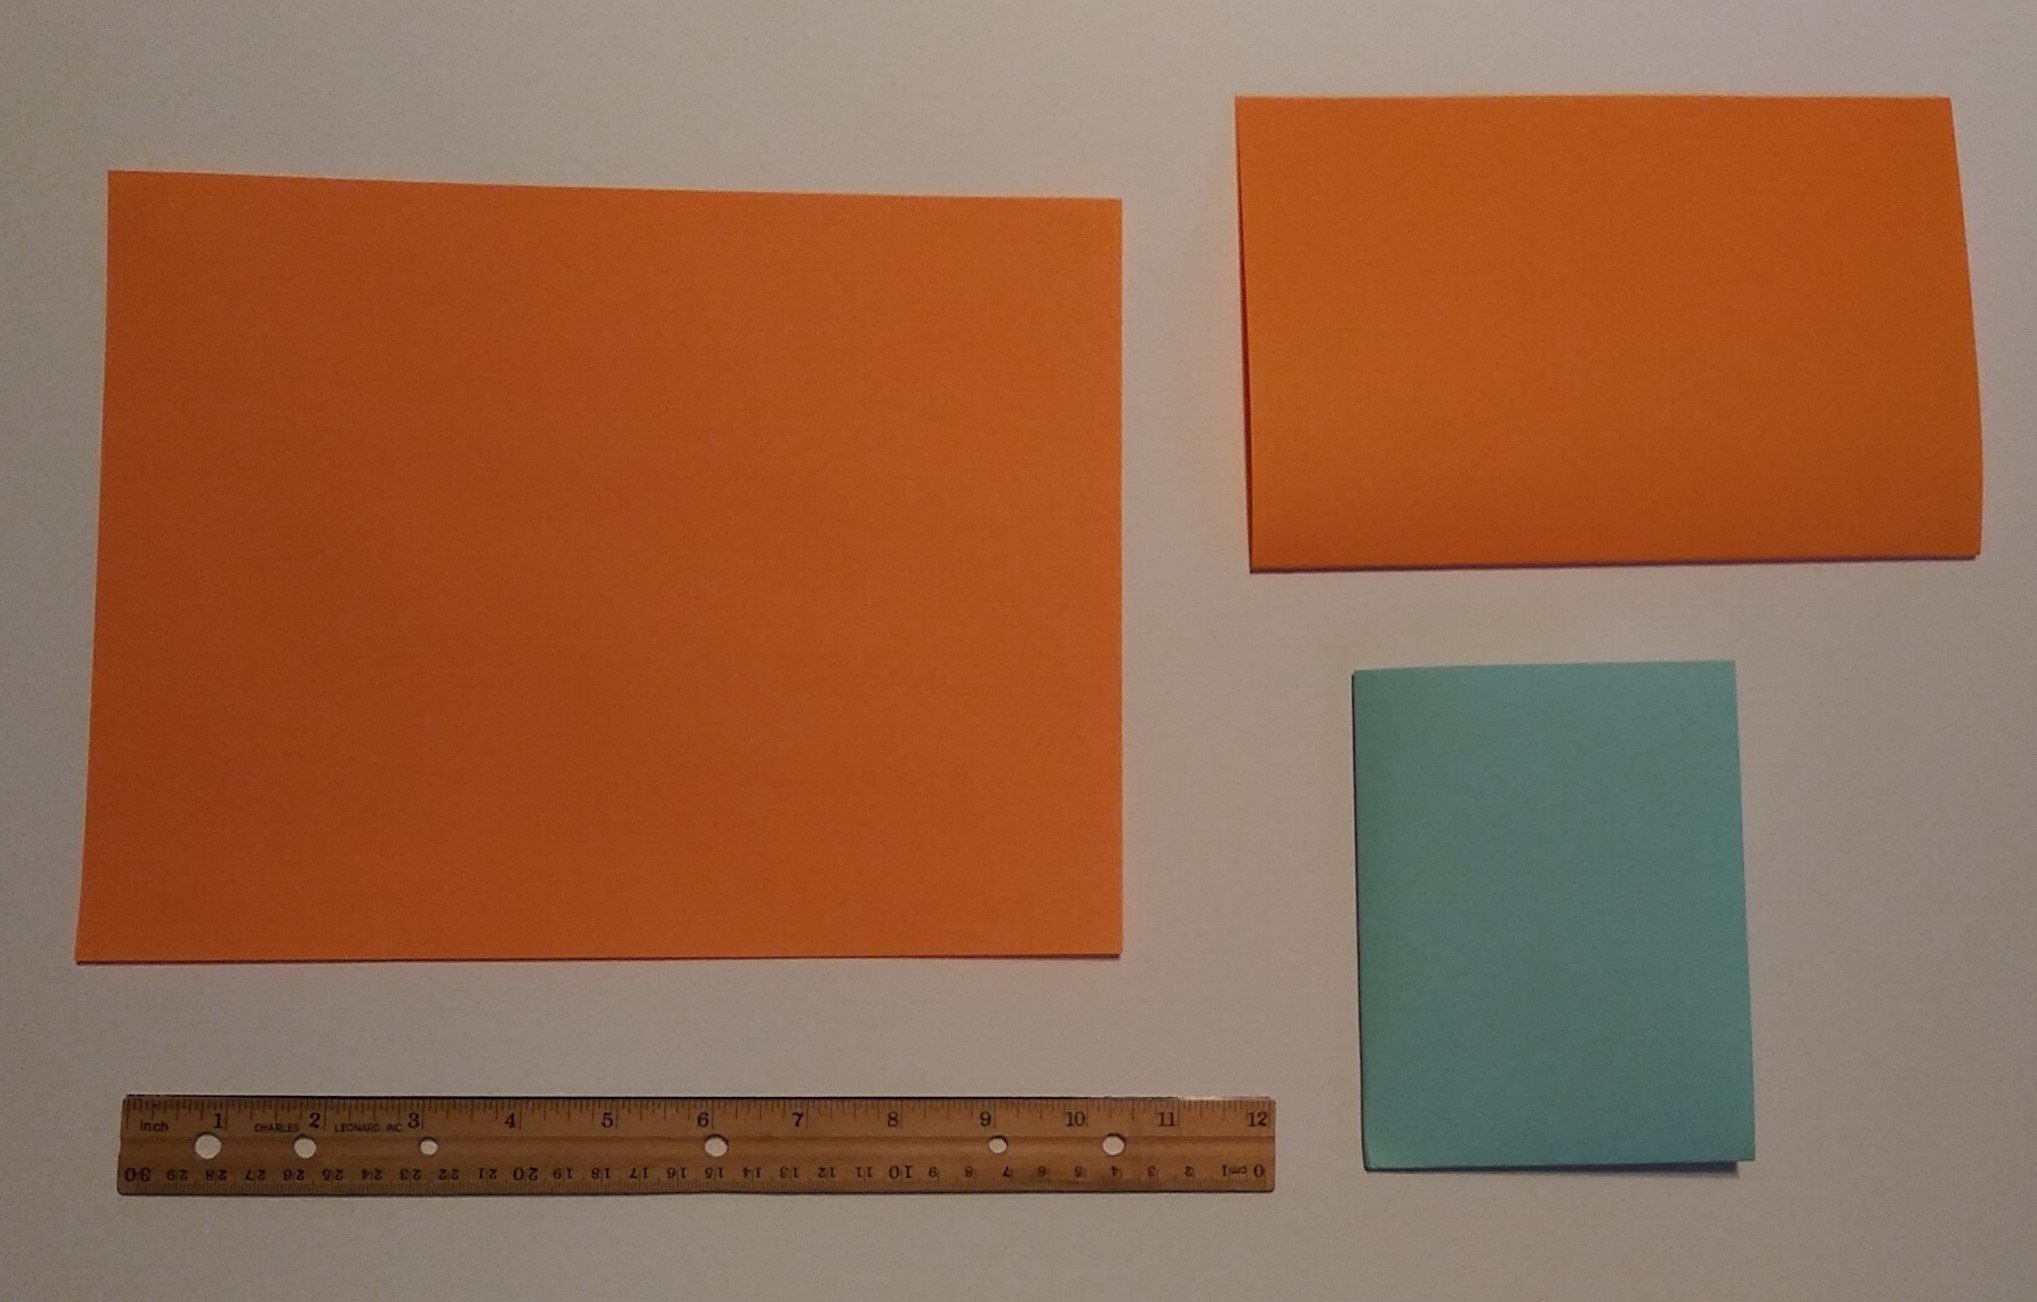
Next, use a target. A sheet of paper with a heart drawn on it is a good target for a ‘3 shots in 3 seconds at 3 yards’ Even more about Skill Development practice regimen. Putting a few small spots on it provides targets for precision aiming and trigger practice work.
A few easily carried training aids are useful for ensuring safe practice with a revolver. The first is inert ammunition. Three different types of inert ammunition are easily carried in an 18 round MTM Ammo case. The Ammo Case is itself a part of the safety protocols.
The first training aid is snap caps. Different varieties are available. If the primer pocket isn’t filled, such as with the ST-Action Pro inert ammo, you can fill the pockets in with a hot melt glue gun and trim the excess off. This will protect the firing pin or hammer nose of your revolver. Good snap caps are easily identifiable by their color. A-Zoom has recently started making their snap caps in orange, which are more identifiable when loaded in a blue steel gun than the darker A-Zoom offering. The spring loaded primer type of snap caps have a limited service life and are not recommended for serious practice.
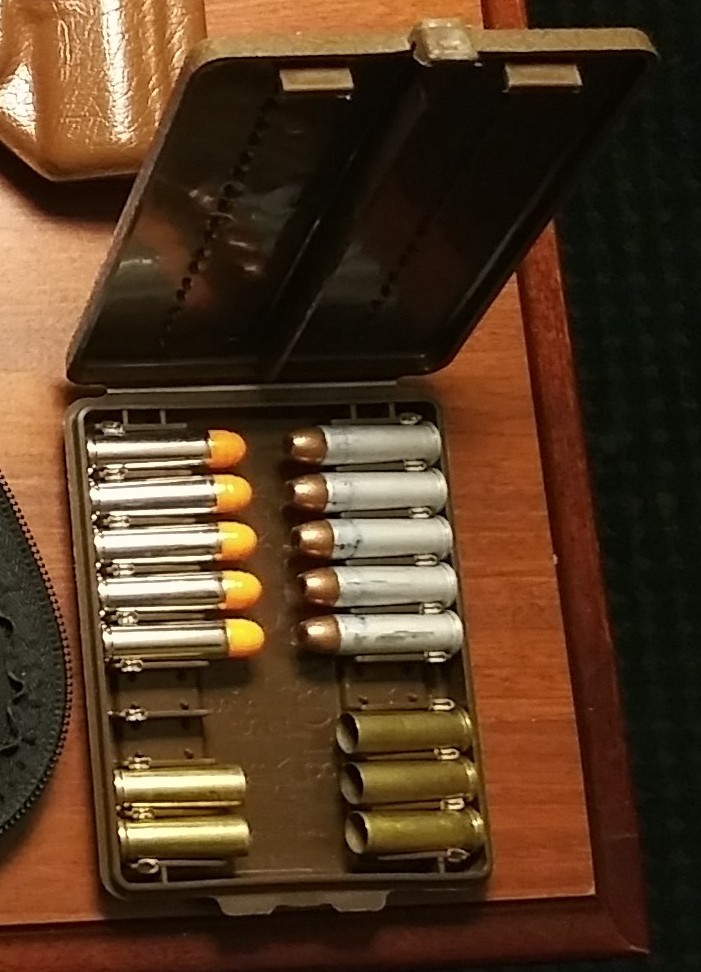
After unloading the revolver, replace the live ammunition with snap caps. Since two objects cannot fit in the same place at the same time, this precludes leaving one live round in the cylinder, which is not an unknown occurrence, as gunowners sometimes discover. After the snap caps have been loaded into the revolver, put the live ammunition in the Ammo Case and count the number of rounds. If the rounds you place in the case are less in number than the capacity of your revolver, the FBI calls that ‘a clue.’
A second training aid is full weight dummies for reloading practice. Snap caps are a good safety aid and for protecting the revolver, however, they usually lack the weight necessary for effective reloading practice. Dummy ammo should be easily identifiable, which is often a problem with homemade dummies. The dummies in the picture were made from Blazer Aluminum cases scrounged from a local indoor range. The bullet noses and cartridge base are colored blue with a Magic Marker for additional visual identification.
The third training aid is fired cases. Reload practice with revolvers should always include getting the empty cases out in addition to reloading with fresh ammo/dummies. A new speedloader manufacturer that was displaying at the SHOT Show years ago failed to consider this in their demonstration. When asked how the empty cases were to be ejected while holding the revolver in one hand and the speedloader in the other, a blank stare was the only answer.
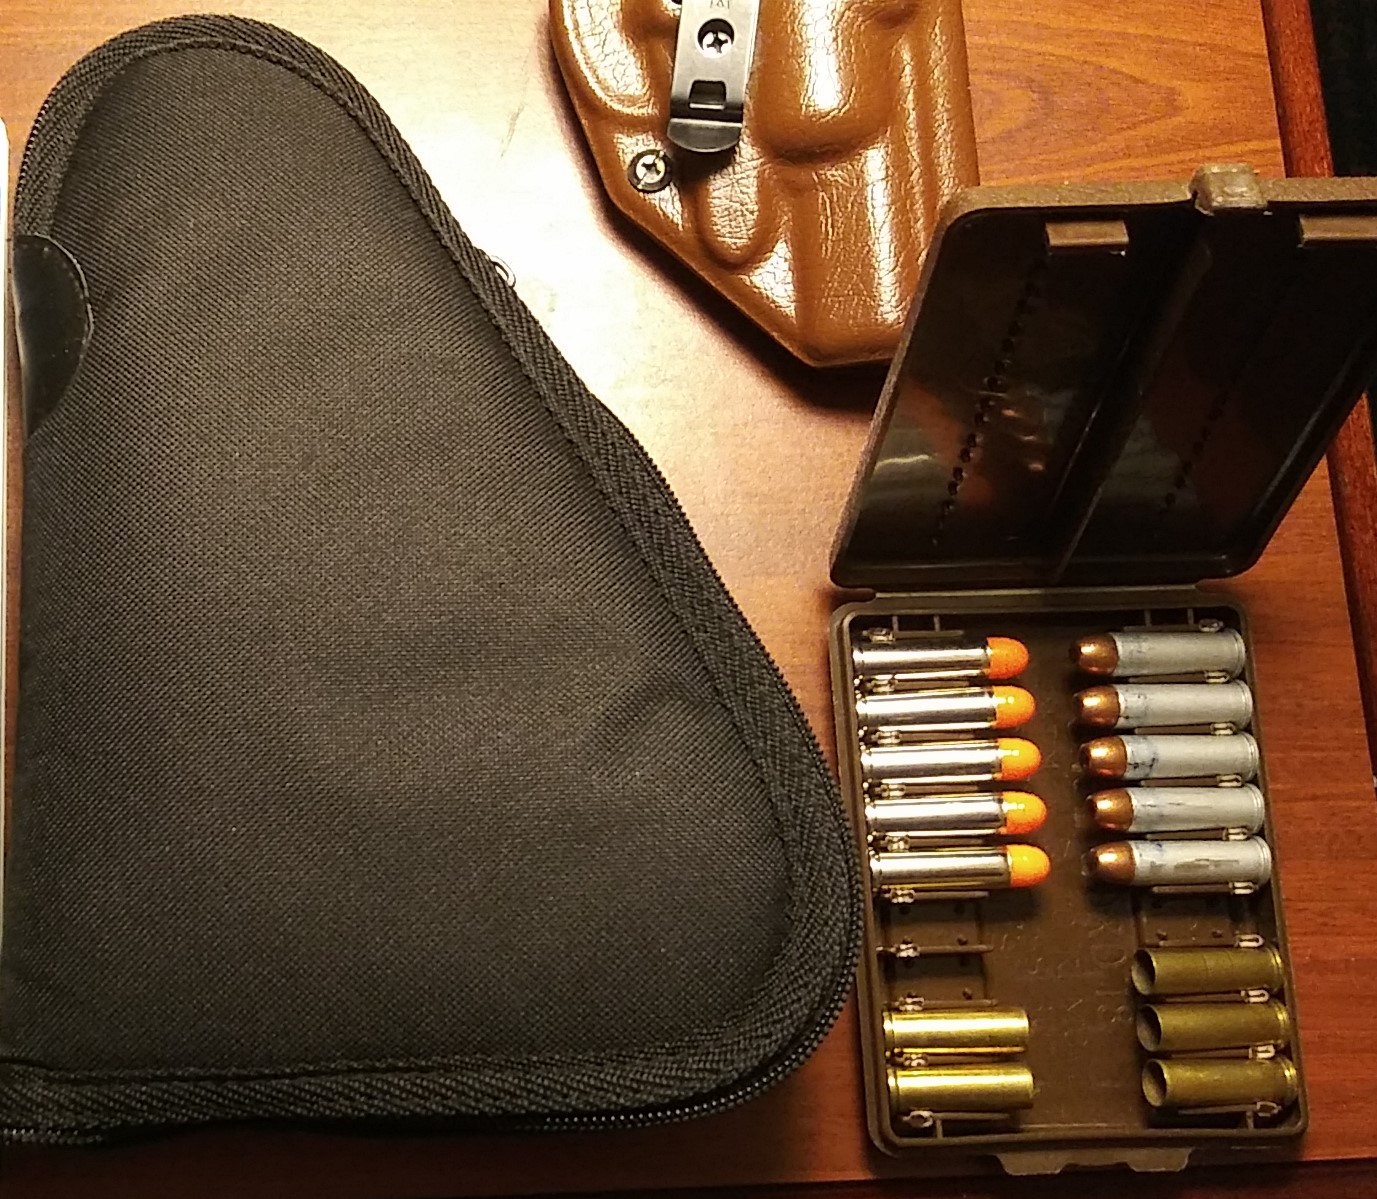
A pistol case is another training aid for practice on the road. The pistol case is for placing the pistol in after the practice session has been finished and the gun reloaded.
The sequence for finishing the session is:
- Declare out loud “This session is finished.”
- Take the target down.
- Remove whatever snap caps/dummies/fired cases are in the gun.
- Set the gun down completely empty.
- Again, declare out loud “This session is finished.”
- Load the pistol with live ammunition.
- Place the loaded pistol in the pistol case. The case does not have to be complete zipped but should be at least partially. This is a visual and situational indicator that the gun is loaded and not available for practice.
- Do something else to remove dry practice from your thoughts.
Reading something dry and difficult is a good way to remove dry practice from your thoughts.
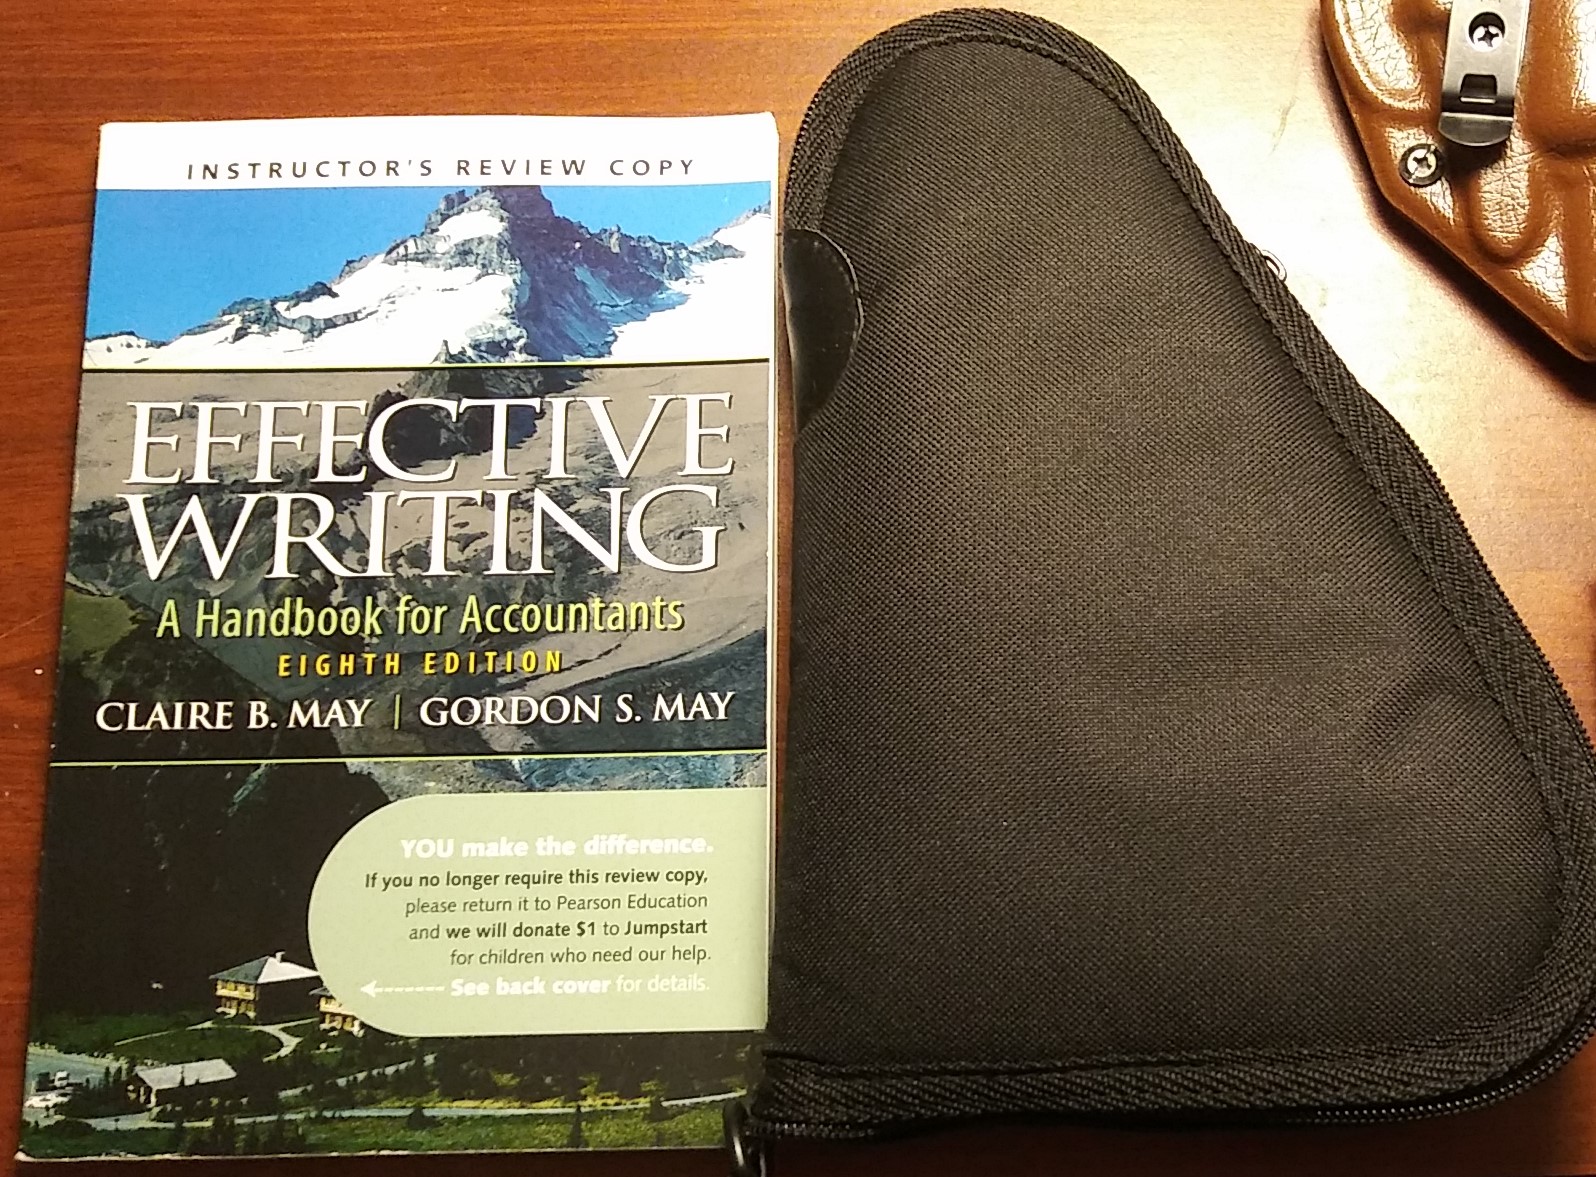
Keeping an awareness of safety in mind allows us to maintain our proficiency on the road without menacing innocent people around us.
The circumstances of Unintentional Discharges at home are covered as the third Section of Real Shootouts of the LAPD. Off-duty Officer Involved Shootings and Officer Involved Animal Shootings are the first two. If you would like to purchase the book, click on the cover below.
Scenario Development from Real Life Incidents
#scenariosunday
Reading about Real Life incidents, such the LAPD Categorical Use of Force reports, is interesting but what good is it if we don’t put some of the lessons learned into practice? One way to make that knowledge actionable is to translate the incident report into a Course of Fire that we could actually shoot. The various action shooting sports, such as IDPA, USPSA, etc., call this Stage Design.
Here’s an example based on one of the incidents in Real Shootouts of the LAPD.
Categorical Use of Force Incident – 011-11
Aggravated Assault
http://www.lapdonline.org/assets/pdf/011-11_Harbor-OIS.pdf
(full original report linked above)
The Board of Police Commissioners Incident summarized the incident as follows:
Off-duty Officer A was leaving a residence. Officer A walked out to his vehicle, which was parked in the driveway. Officer A did not see anybody as he walked to his vehicle. Officer A had his duty weapon in his right front pants pocket at the time.
Officer A backed his vehicle up, leaving the vehicle running with the lights on, while he walked back to close the driveway gate. Officer A saw the Subject walking toward him on the sidewalk. The Subject then started to run in his direction. As the Subject got closer, Officer A saw a handgun in the Subject’s hand. The Subject then pointed it at Officer A. Officer A drew his pistol from his pocket and fired one round at the Subject.
The Subject continued to point the gun at Officer A, so Officer A fired a second round. The Subject passed in front of Officer A’s vehicle before collapsing on the sidewalk, behind a short block wall. Officer A believed the Subject had been shot but could not see him, so Officer A did not try and approach the Subject, pending the arrival of assistance.
Officer A ran toward the back door of the home, while covering the Subject’s last known position. Officer A called 9-1-1. While speaking to the Operator and waiting for the first unit to arrive, Officer A saw a male approach the Subject. The male squatted down near the Subject and Officer A lost sight of him. The male then stood back up, adjusted his shirt, and walked away. Officer A saw two other males walk over to the Subject, lean over him momentarily, then stand back up and walk away. Upon the arrival of assisting officers, the officers were unable to locate the Subject’s weapon.
LAPD Board of Police Commissioners
To design a Stage from this Summary, we would extract Officer A’s actions, step by step. For clarity, each step is italicized in the above report.
Sequence of events for scenario development of 011-11
- While standing at P1, draw pistol from concealment and fire one round at T1 (7 yards).
- Fire one round at T2 (5 yards).
- Retreat to cover at P2 and point pistol at P3.
- Call 911, giving your location, while continuing to maintain pistol pointed at P3.
We can then create a diagram of what that would look like. Someone who was going to shoot it would know step by step what they had to do.
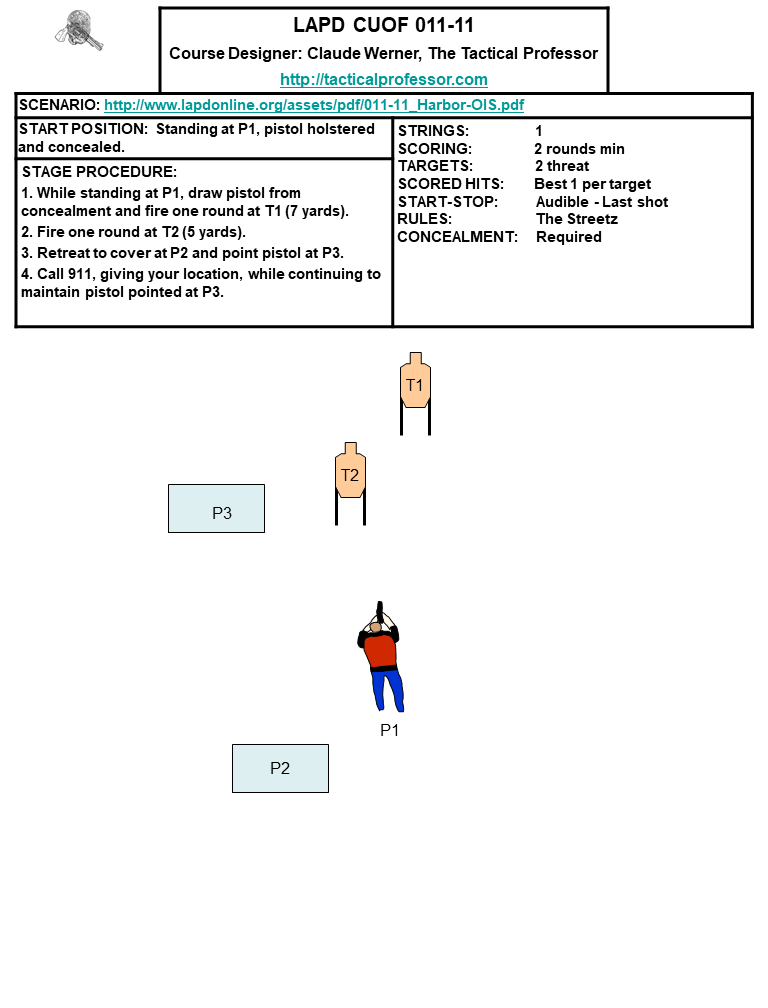
Based on the diagram, we can then replicate what Officer A had to do to keep from getting victimized or killed. While Stages created based on ‘Real Life’ tend to be much less lurid than the Stages shot in organized competition, they do give us an idea of what we might need to do to keep ourselves from being victimized or killed.
The LAPD Board of Police Commissioners made the following Findings about the actions of this Officer A.
- Tactics
The BOPC found Officer A’s tactics to warrant a Tactical Debrief. (This is required after any Officer Involved Shooting.) - Drawing and Exhibiting
The BOPC found Officer A’s drawing and exhibiting a firearm to be In policy. - Lethal Use of Force
The BOPC found Officer A’s use of lethal force to be In policy.
If you would like to read the book and create your own Courses of Fire from it, simply click on the book cover below.

Press On!
#mindsetmonday
In 2011, I had heart surgery two weeks before this match and couldn’t move my right arm. The solution for me was to shoot the monthly IDPA match with my Support Hand Only.
Nothing in the world can take the place of persistence. Talent will not; nothing is more common than unsuccessful men with talent. Genius will not; unrewarded genius is almost a proverb. Education will not; the world is full of educated derelicts. Persistence and determination alone are omnipotent. The slogan Press On! has solved and always will solve the problems of the human race.
President Calvin Coolidge
Click anywhere on the cover below to purchase my ebook as a PDF.
Using Cover Effectively
#fridayfundamentals
Active Self Protection recently made a good video about last December’s murder of a retired Chicargo firefighter during a carjacking.
Unfortunately it won’t embed because it’s Age Restricted. If you care to watch it, this is what to search for.
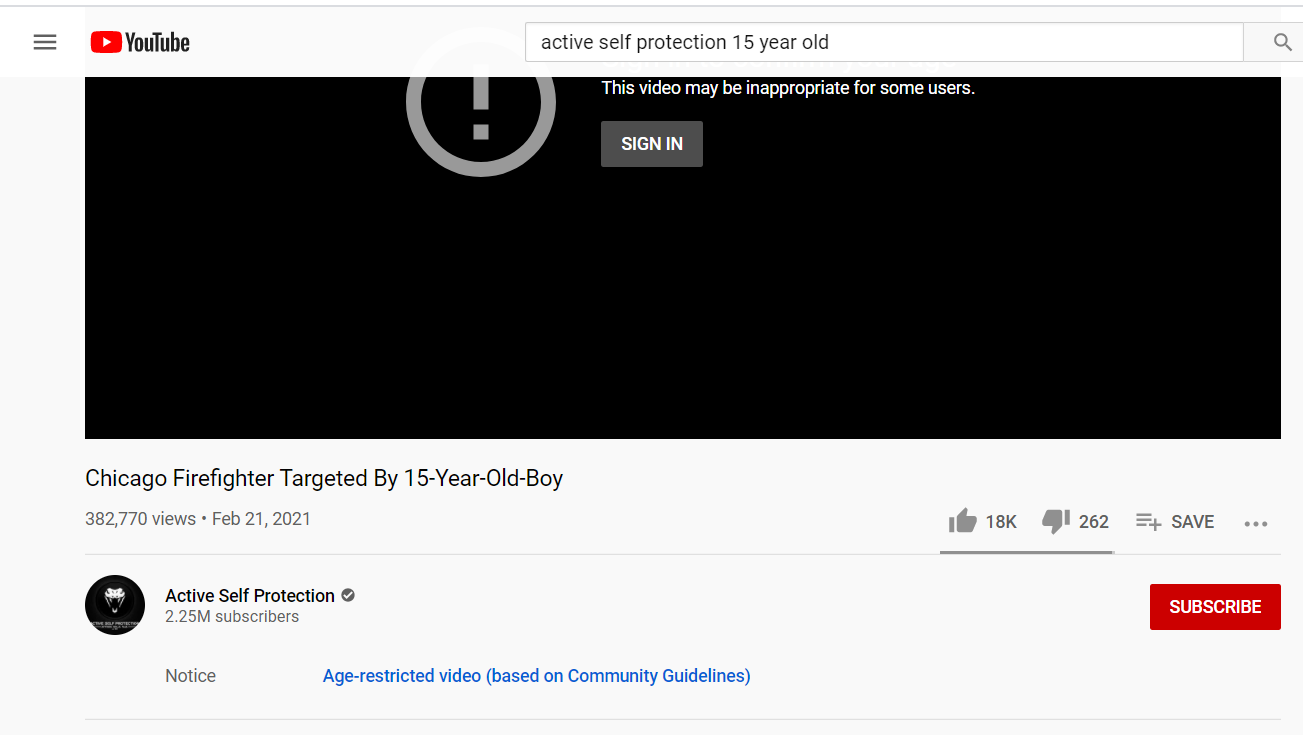
John made an important point in his video that bears reiteration and amplification.
Appropriate and effective use of cover is an important tactic in protecting ourselves.
John Correia
Things to keep in mind about using cover.
- Cover protects us from bullets and contact weapon attacks.
- Any cover can be defeated, either by adequate weaponry or by maneuver.
Here’s my initial video commentary about the situation. It wasn’t as simple as it looks at first glance.
Whether the second Carjacker would have shot LT Williams will never be known but it cannot be discounted as a possibility. There’s a good chance he was the leader of the crew and probably very dangerous. It wasn’t his first rodeo.
The incident provides a good example of the difficulties faced when dealing with multiple attackers. LT Williams was in a very difficult position as a result of this attack. We will never know if he even saw the second armed Carjacker and could have realized that he was vulnerable to being flanked. This was a well-rehearsed Carjacking crew with a good SOP. One comment on the YouTube video about the incident opined that this same crew had tried to Carjack him earlier and he had only escaped by luck.

Here’s the complete video of the incident on YouTube.
Disregard the TV station’s gauche and inappropriate invitation to Like and Subscribe at the end.
This was the funniest comment on the YouTube video. It’s unclear which person the comment is about.

Another of John’s points was that it’s important to keep in mind our mission. As Armed Citizens, we don’t need to get the bracelets on a criminal, we just need to force a Break In Contact and then go home.
My first LAPD Shootouts book is based on off-duty incidents at home. It provides a great deal more documentation and explanation of what Home Defense with a firearm really looks like than news reports. The lessons learned apply whether you’re a POlice officer or an Armed Citizen.
Even more about Skill Development
‘three shots, three yards, three seconds,’ https://tacticalprofessor.wordpress.com/2021/02/19/skills-conversation-about-lapd-shootouts/ has generated some good discussion and questions, which makes me happy. Someone posted a question on the Facebook page for Growing Up Guns.
Nothing was said about whether this done from a low or compressed ready, or from concealment, as far as the par time. Being LE based info, I’m assuming this was done from a duty holster. Thoughts?
It’s a progression, just like the size of the target. When someone is first learning to shoot, do it from Low Ready, muzzle below the feet of the target, finger off the trigger. Once a shooter achieves some degree of proficiency, which I would personally define as being able to consistently hit the quarter sheet, then branching can begin. Others might be satisfied with hitting the full sheet consistently as a standard.
There are numerous possible branching variations.
- From the midpoint of the drawstroke.
- From the holster. Take your pick of open, concealed, or Level III Security.
- Primary Hand Only from Low Ready
- Support Hand Only from Low Ready
- Etc.
I use the term ‘midpoint of the drawstroke’ rather than ‘compressed ready’ because I’m not a fan of muzzling suspects prior to making the SHOOT decision. If the bore is parallel to the ground, there’s almost no way to avoid muzzling others. From that perspective, the idea of having the bore parallel to the ground as a ready position is purely “square range” thinking.
For those who are feeling exceptionally froggy, try stacking all three targets on a single silhouette. Shoot all three targets as one string using three round magazines and reloading between targets. Obviously, your time will be more than three seconds. Keep in mind that the second most missed shot is the first shot after a Stoppage Clearance. Reloading is a Stoppage Clearance so you’ll have two opportunities to maintain your focus.
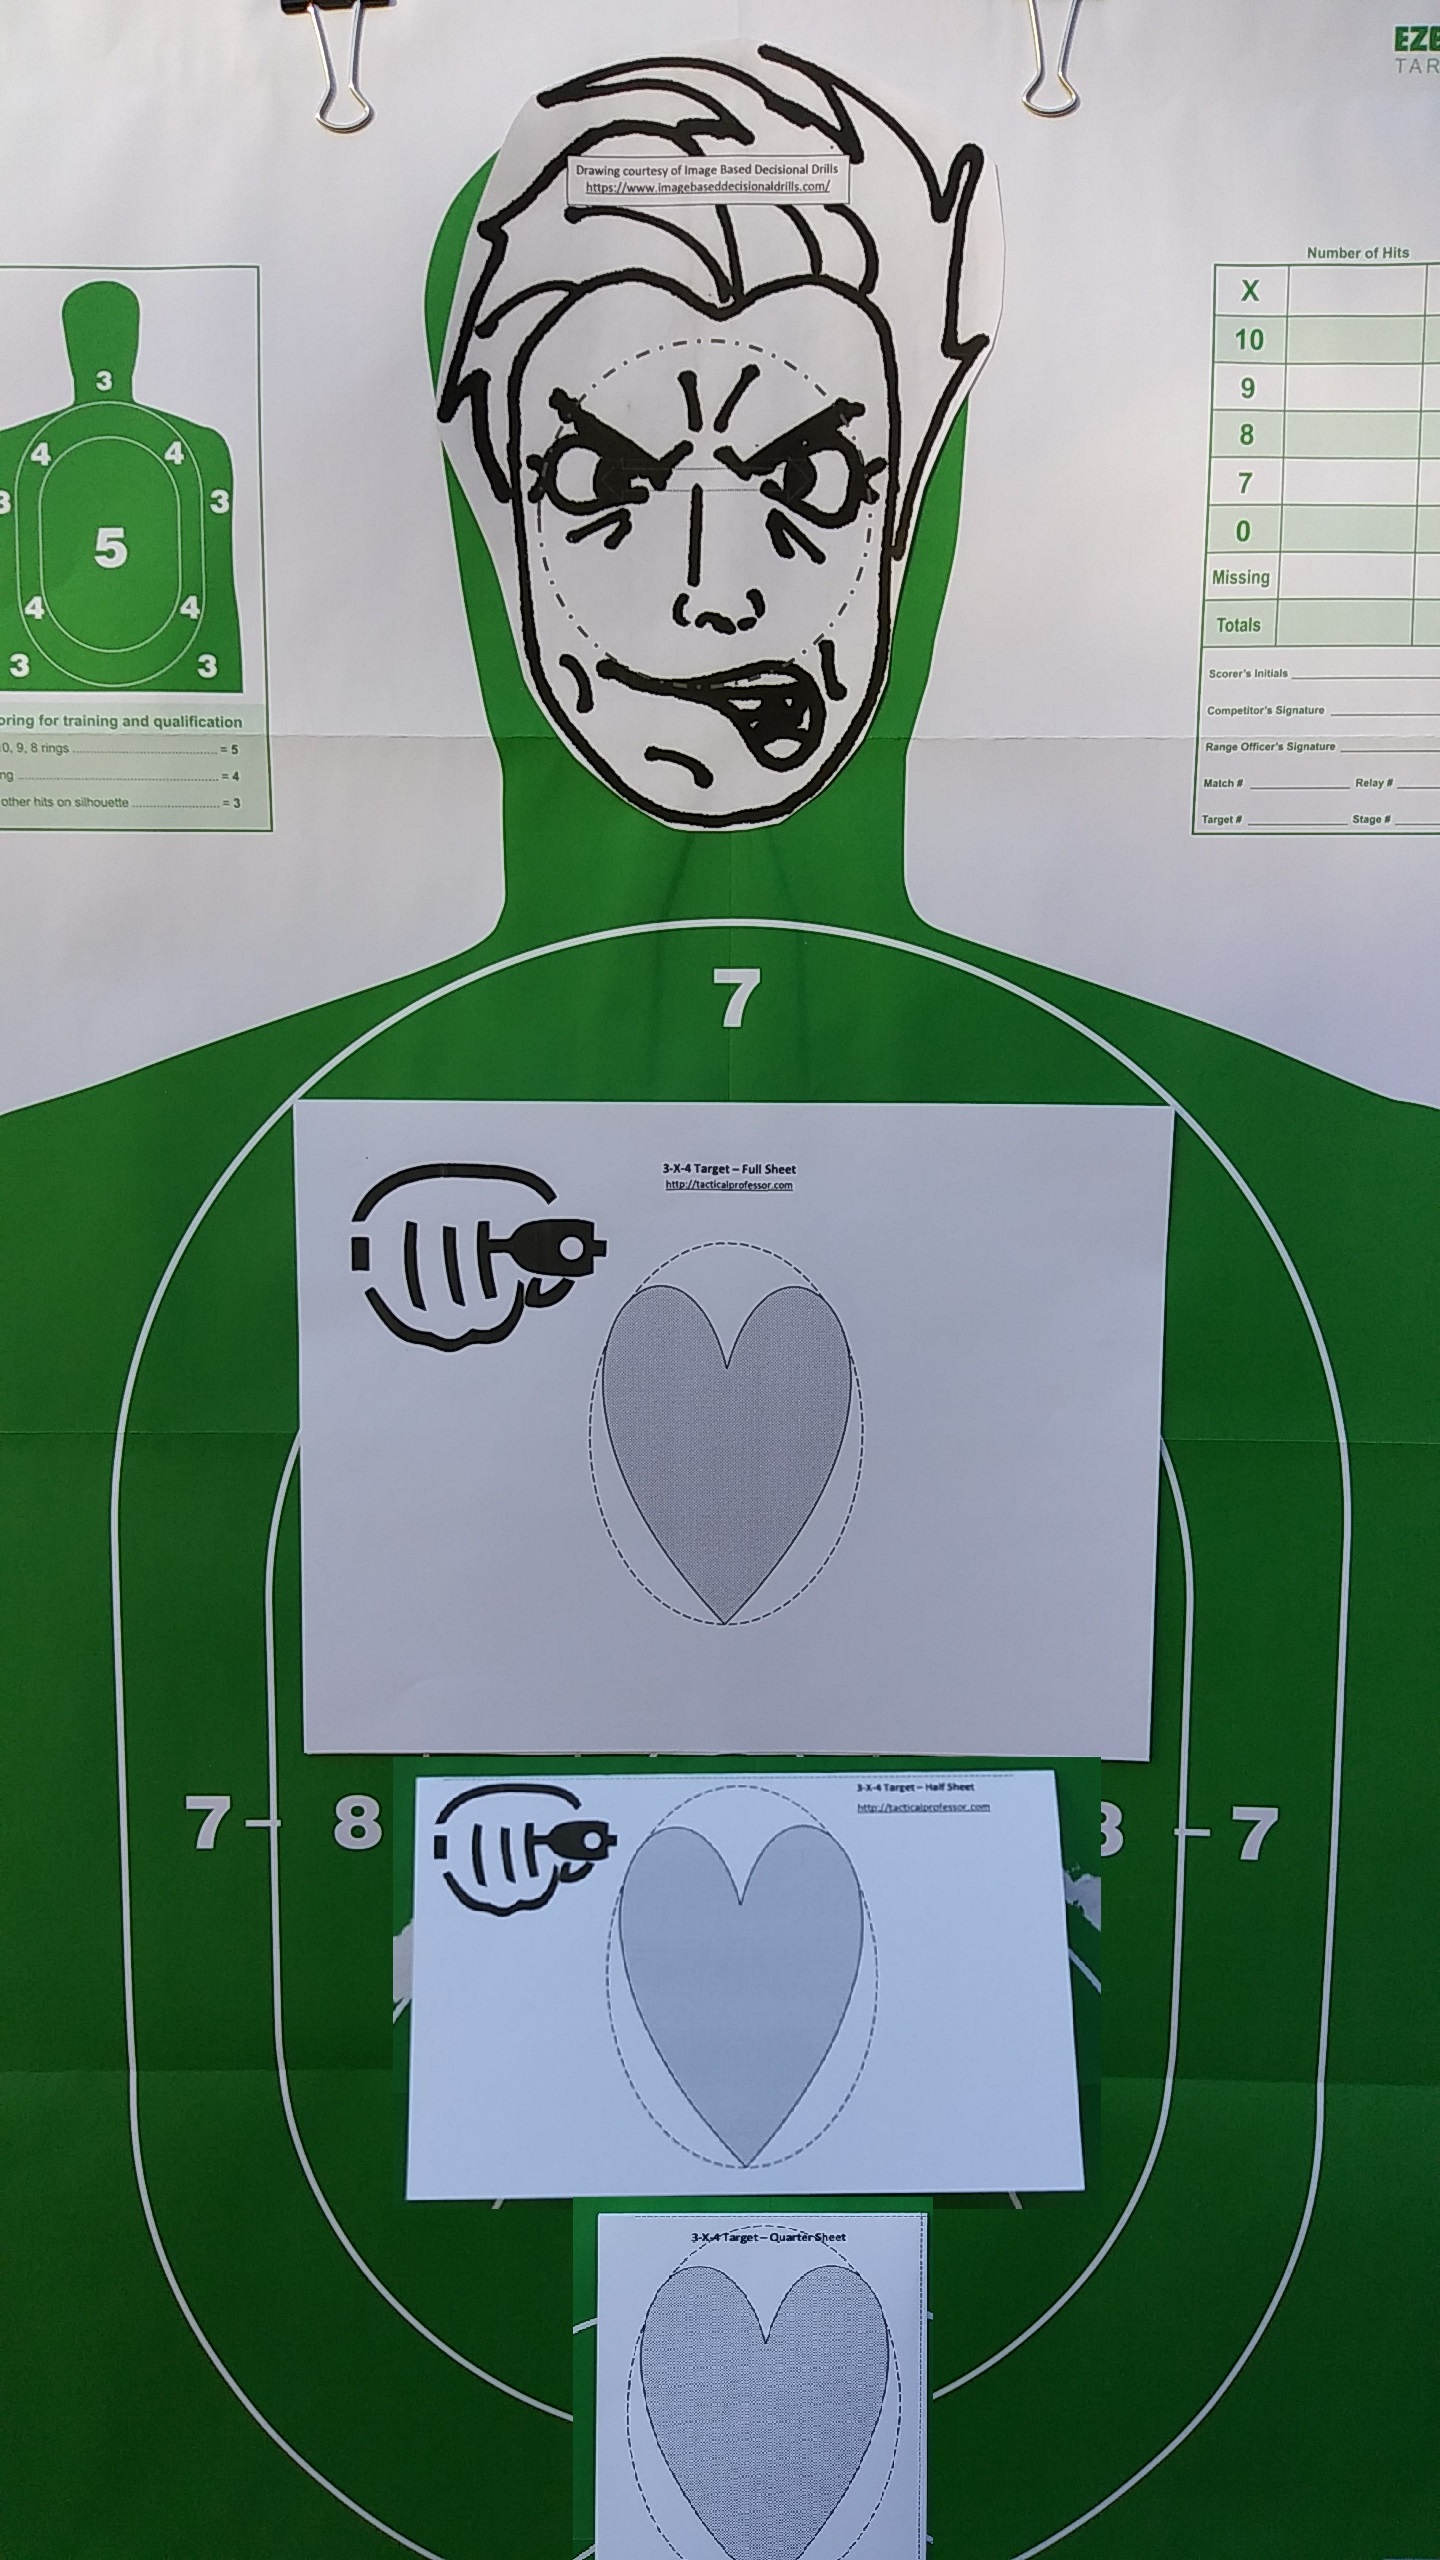
The end outcome, consistent hits on a variable sized target, is the focal point of the drill. There are numerous tasks that can achieve it, most of which have value.
Click on the image below to order Real Shootouts of the LAPD.
Skills conversation about LAPD Shootouts
#fridayfundamentals
I was talking with a friend of mine, who has Been There and Done That (BTDT), about Real Shootouts of the LAPD. He asked:
What was your biggest conclusion after writing the book?
DIA Guy
“When Frank McGee (head of NYPD firearms training in the 70s) said ‘three shots, three yards, three seconds,’ he wasn’t far off the mark” was my response. I still think that on-duty POlice shootouts may be a different story but the off-duty shooting situations are much like those of an Armed Citizen.
We then started talking about the difference between ‘when to shoot’ vis-à-vis ‘how to shoot’ training / practice. He had an interesting take on targets in terms of ‘how to shoot.’
What he tells his students is,
Use a sheet of paper. When you can consistently hit that, fold it in half. When you can consistently hit that, fold it in half again.
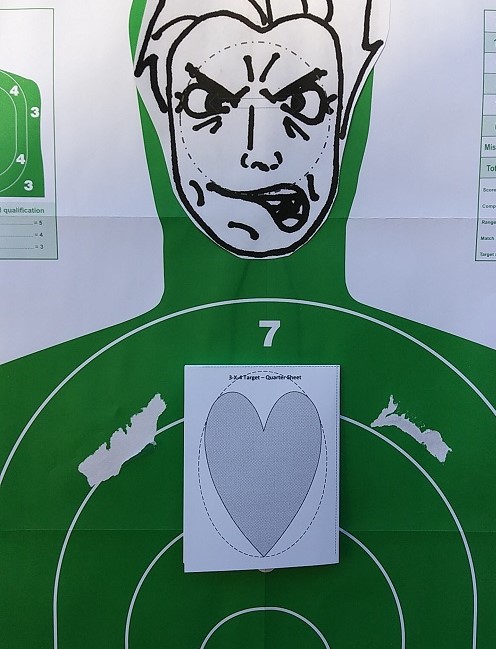
How do we combine that concept with ‘three, three, three?’ Since I am a firm believer in consistency, let’s do it three times in a row. That would make it 3X4. I also think context is important, so let’s put the sheet of paper on a silhouette. Place the silhouette at three yards. Fire three shots at the target. Repeat twice for a total of nine rounds fired in three strings of three. Since it’s a three second Par time exercise, you can use a Par timer app on your phone with your earbuds underneath your hearing protection. I like ‘Dry Fire Par Time Tracker’ but there are others.
If all three strings of three shots hit it, fold another sheet of paper in half. You’ll end up with a target 5.5 x 8.5 inches. Repeat the three strings. You should have nine hits on the half sheet of paper.
Assuming you have all nine hits on the half sheet, fold another sheet of paper in half twice. This time your target will be 4.25 x 5.5 inches. Shoot the three strings again.
Now you’ve done a good 27 round workout that is ‘Reality Based.’
When you get home, put your gun away. Get out your Blue Gun, Nerf gun, or water pistol and do some ‘when to shoot’ exercises.
Click anywhere on the image below to order the book.

Friday Fundamentals 01 – Establishing Your Baseline
Having a solid idea of where you’re starting from is important if you want to get anywhere. Otherwise, you’re just wandering around in the wilderness.
My friend Mark Luell, the author of Growing Up Guns suggested I provide a ‘Friday Fundamentals’ post weekly. We got the idea from my colleague Cecil Burch who wrote a blog post about Fundamentals. It’s a great idea to stay in touch with the basics.
The first installment is Session 01 of my Pistol Practice Program – Establishing Your Baseline. As in any journey, you have to know where you’re starting from before you can get to where you want to go.
The objective of this drill is to determine what distance you can make 100 percent hits on the vital area of a silhouette target. My feeling is that we need to work on achieving 100 percent accuracy because errant rounds in our homes or neighborhoods could be a major problem. Since I also think the first shot is the most important, I structured the session with a…
View original post 643 more words

You must be logged in to post a comment.