Updated version of Boyd’s Aerial Attack Study
Thanks to Rob Pincus, I have found a cleaner copy of Colonel John Boyd’s Aerial Attack Study (AAS). It was recreated by Mr. Mark Hart from the declassified 1964 version. The recreation is much easier on the eyes than the reproductions of the original mimeographed edition that are generally available.
Prior to Colonel Boyd’s AAS, fighter combat was viewed by the majority of fighter pilots as an intuitive skill rather than one that could be codified. Some conceptual principles had been developed along with elementary tactics such as the Thach Weave, but Boyd was the one who wrote the definitive book. Only Major General Frederick “Boots” Blesse had preceded Colonel Boyd in writing a book, No Guts No Glory, about jet fighter combat. Major General Blesse’s book wasn’t the exhaustive treatise on the subject that the AAS was.
Comparing capabilities
For a long time, I’ve wanted to do a comparison of two very popular pocket pistols; the Airweight J Frame and the Ruger LCP. This #wheelgunwednesday, I made it happen. In this case, I used a S&W 642-2 for the Airweight.
The test I used for the comparison was the Nevada Concealed Firearms Permit Qualification Course. I used this as the graduation exercise in my Snub Nose Revolver Classes many times. It’s still one of my favorite CCW qualification courses. The course goes as follows:
The humanoid target, B27 or B21 or equivalent as determined by the firearm instructor shall be utilized.
For 6 shot or higher capacity:
3 yards 6 rounds No time limit Freestyle
5 yards 12 rounds No time limit Freestyle
7 yards 12 rounds No time limit Freestyle
For 5 shot or lower capacity:
3 yards 5 rounds No time limit Freestyle
5 yards 10 rounds No time limit Freestyle
7 yards 10 rounds No time limit Freestyle
A total of 30 rounds for 6 shot or larger capacity, 25 rounds for 5 shot capacity must be fired. A 70% minimum (18/25, 21/30) must be scored to pass.
Notice that as with the majority of State Qualification Courses for Private Citizens, drawing from the holster is not required. Nevada is not one of the States that forbid drawing from the holster, so I include a little holster work.
The way I did the test was to:
- Use the -1 zone of the IDPA target. Then, I fold the bottom tapered part up behind the target. This gives an area approximating the FBI QIT target, which I like.
- Shoot 25 rounds with both guns, even though the LCP would fall into the ‘6 shot of higher capacity’ category. This gives an apples to applies comparison of the two guns.
- Conduct the first Stage as five individual one shot draws.
- Do the second and third stages as two individual strings of five shots each.
- Carry the 642-2 in an AIWB holster, concealed under a polo shirt.
- Carry the LCP in a pocket holster.
- Start the draws with hand on gun.
- Start the Five shot strings with the gun at Low Ready, aimed below the base of the target.
In the end, I was able to achieve slightly better results with the 642-2 (19.87 seconds) than with the LCP (20.71 seconds). I’m not sure a 4% difference is worth writing home to Mom about, though.
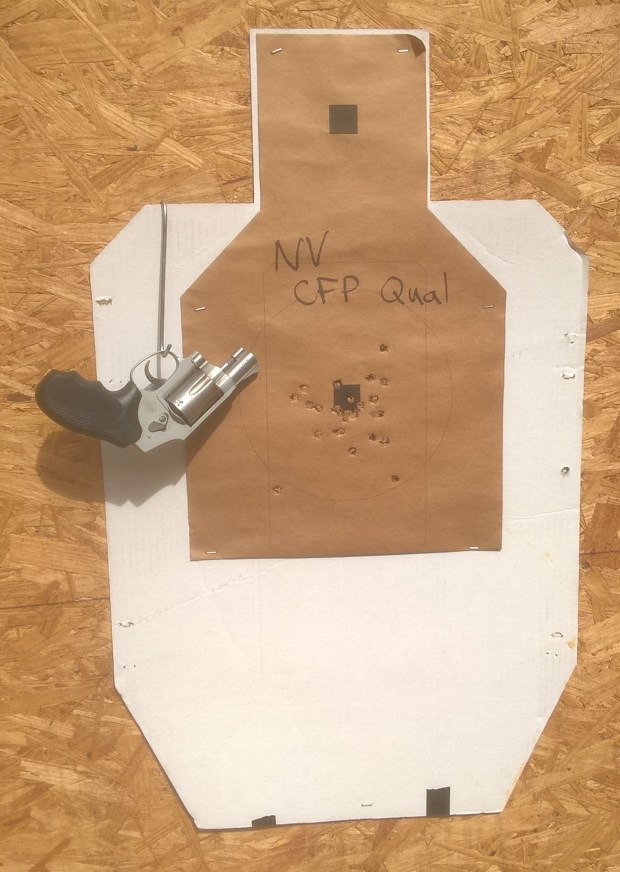

Both guns were mostly stock. The front sights on both are painted with Fluorescent Orange paint. The LCP has a Hogue Hybrid Handall installed. This makes the gun much more pleasant to shoot and I highly recommend it. The 642-2 wears Sile rubber stocks, which are no longer made, unfortunately. No special trigger work has been done on either, other than a fair amount of dry practice.
In the end, either of these in your pocket will provide more personal protection than some big honking clunky autoloader that gets left home. What’s the best concealed carry handgun? The one you have on you.
Wheelgunning at the Tactical Conference
This past weekend, Friday through Sunday, was the 20th Anniversary Rangemaster Tactical Conference. I have a long history of wheelgunning at the Conference, having shot it with a revolver in 1999 through 2001.
This year was no exception. I’ve also taught for many years at the Conference. This year I decided to re-visit teaching my Intro to Snubby Skills block of instruction. One of the other trainers had to cancel due to a family emergency. This gave me the opportunity to conduct my class on both Friday and Saturday. A total of 37 shooters took the two classes. I kept it to two hours and less than 50 rounds. Shooters sometimes lose their focus if the class is longer or the round count is higher and I want to set them up for success.
The topics I focused on were:
- Grip the snub firmly
- See the sights
- Press the trigger smoothly
- Followthrough
We did all the drills dry first and then live. For the live practice, most included spinning the cylinder after a few shots to create a ball and dummy drill. Revolvers do this much more efficiently than autoloaders. I also emphasize loading with loose rounds because speedloaders are not as secure an ammunition holding device as an autoloader’s magazine.
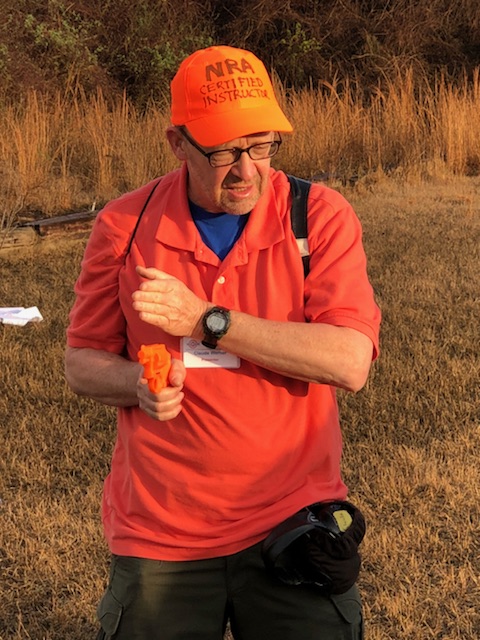
Photo credit: Roka Arms
As the final exercise, the shooters fired all five shots into an eight inch circle, reloaded with two loose rounds and then fired both shots at a facial target 3 inches by 4 inches. This is a good exercise for practicing shooting quickly and then accurately.
After the second class, I then shot the Pistol Match with a Model 65 S&W revolver. Out of 186 people who chose to shoot the Match, two of us used revolvers. The Match featured turning targets, which made it both challenging and fun. The entire match is shot with the shooter’s equipment concealed.
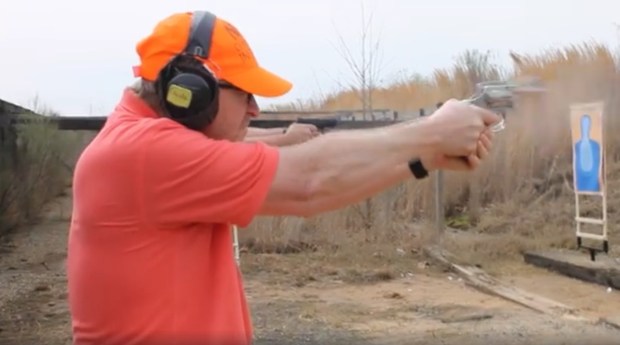
Photo credit: Philip Young III
I’ve been using a Galco Walkabout holster for my J Frame so I used a homemade Kydex centerline speedloader carrier. I’m finding that a speedloader carrier at the centerline is extremely fast. One observer noted that on the Stage that required a mandatory reload, I finished first among my squad.
For each string, we had to shoot a given number of rounds in a fixed amount of time while the target faced. Those who fired a perfect score made it into the Semi-Finals.

The Semi-Finals were held on Sunday morning. Turning targets were used again but this time the Course of Fire was only 10 rounds and was shot on a B-8 25-Yard Timed and Rapid Fire Target. The Course of Fire is revolver neutral but I threw two shots into the 7 ring and that put me out of the running for the Final Shootoff.
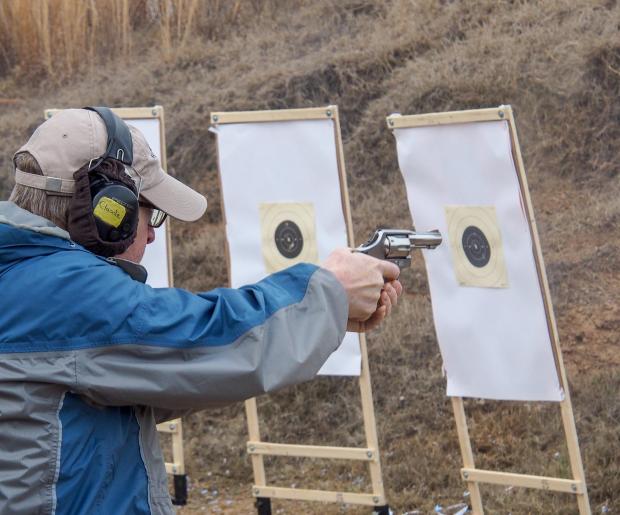
Photo credit: Tamara Keel
The Final Shootoff was a single elimination contest shot on reactive falling targets. Two mannequins with a concealed steel hit area had to be knocked down first. Then a mini Pepper Popper had to be knocked down. Whichever shooter knocked down the Popper first was the winner. The competition was fierce and Mr. Gabe White was the winner.
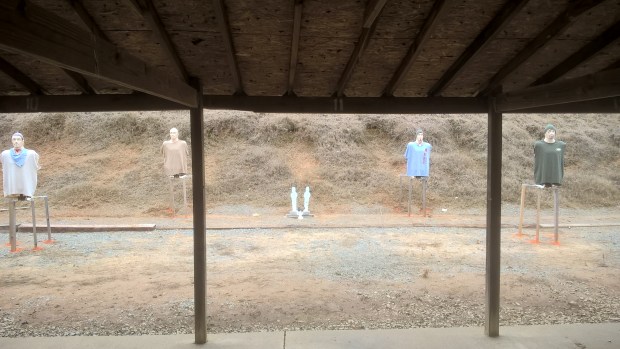
The Ladies did not have a Semi-Final and the top eight Lady shooters of the Match went straight to the Shootoff. It followed the same format as the Men’s Shootoff. Once again, the competition was fierce. Ms. Melody Lauer was the Winner.
Three days of good training was a true pleasure. There were more blocks of instruction, both live fire and lecture, than can be attended. It was a great time and I’m glad I was able to attend and present again.
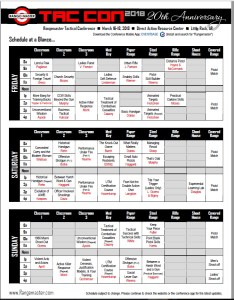
Next year’s Conference will be held just north of New Orleans on March 15-17, 2019. It is open to all those interested in personal protection.
If you would like to purchase my eBook Concealed Carry Skills and Drills, the link to the downloadable ebook is here. http://concealedcarryskillsanddrills.com
If you would like to purchase my eBook Indoor Range Practice Sessions, the link to the downloadable ebook is here. https://store.payloadz.com/details/2501143-ebooks-education-indoor-range-practice-sessions.html
Wheelgun Wednesday
For some reason, #wheelgunwednesday had never crossed my radar before yesterday. Viewing this as a serious deficiency on my part, I decided to shoot the IDPA 5×5 Classifier with some revolvers. It’s a 25 round Course of Fire shot entirely at 10 yards.
I like the 5×5 because it’s five shot friendly and is a demanding skill drill. As some shooters have observed, the IDPA 5×5 is not as easy as it looks. It shares this in common with the 5^5 drill that I designed.
Whenever a Course of Fire is shot repeatedly, there’s a ‘training effect.’ This means that simply understanding the sequence helps the shooter do better. Since I was shooting service revolvers down to Airweight J Frames, I chose to bias the training effect in favor of the J Frames, which are inherently harder to shoot. The order I chose to shoot the wheelies was:
- Model 66, four inch (.38 Special)
- Model 65, three inch (.38 Special)
- M&P 5 screw, 2 inch (.38 Special)
- Model 640-1, 2 ¼ inch (.38 Special)
- Model 36-1, 3 inch (.38 Special)
- Model 642-2, 2 inch (.38 Special)
- Model 30, 3 inch (.32 S&W Long)
- Model 432PD, 2 inch (.32 S&W Long)
Shooting the guns from heavy to light also helped keep me from getting beaten up by recoil early in the process. I’m glad I approached it that way.
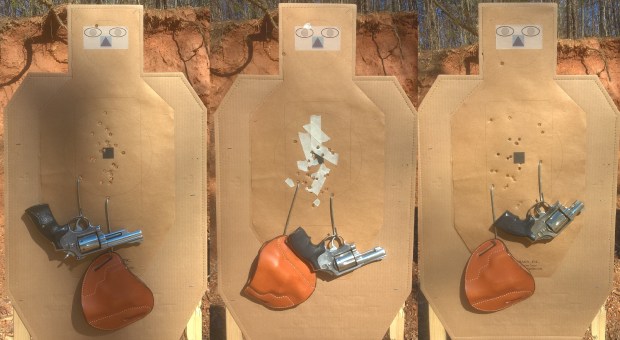
For the K Frames, I used the KIS “Keepin’ It Sippel” holster from Leather Creek holsters. It’s a very comfortable holster that distributes the weight of a service pistol well on the belt and allows a quick presentation. For the reload on String 3, I used a Safariland Comp II speedloader and pouch. When I bought the M&P 5 screw, it had the half moon front sight that was commonly used in the pre-1950s era. This is not an easy sight to see, so I flattened the rear with a file, serrated it, and painted it fluorescent orange with a white undercoat. All of the K frames also have had the rear sight blackened with a Sharpie to provide more contrast and reduce glare.
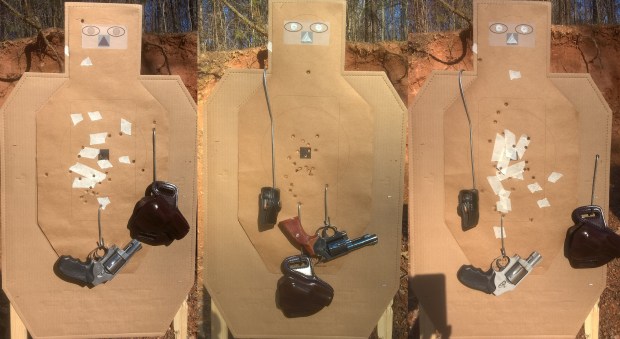
For the J Frame .38s, I used a Galco ‘Concealable’ holster. The forward molded design makes it very comfortable because it doesn’t press on my hip bone at the four o’clock position. Reloading was done with a Safariland Comp I speedloader and pouch.
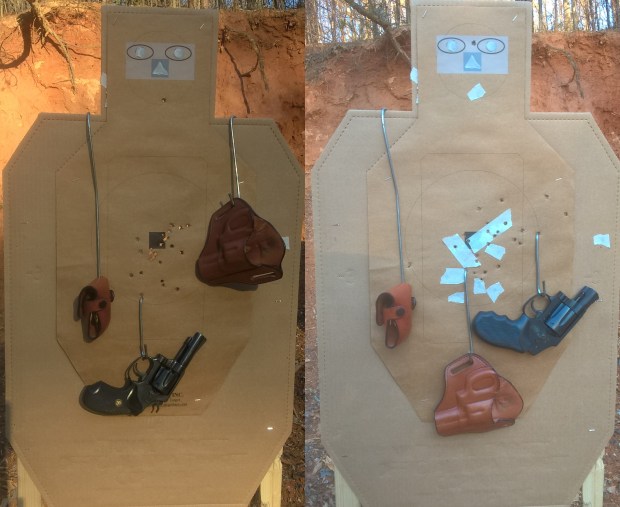
For the J Frame .32s, I used a Bianchi Model 57 ‘Remedy’ holster. This is also a comfortable forward molded design. Reloading was done with an HKS 32-J speedloader and Bianchi pouch.
The ammo used was mostly Tula 130 grain FMJ .38 Special. I can’t recommend this ammo. Probably because of the steel case, it’s very difficult to extract. Most of the time, I have to use a rubber mallet to give the extractor rod a whack to eject the cases. I bought a case of it and when it’s used up, that’s the last I will ever buy. When the stage required a reload, I started with Federal American Eagle 130 grain FMJ, which extracts easily.
In the .32s, I used Georgia Arms .32 S & W Long 85 grain Jacketed Hollow Point and Fiocchi 97 grain FMJ. They both shoot to similar point of impact and proved reliable in the .32s.
#wheelgunwednesday, it’s going to be more of a habit from now on.
Note that the holsters were provided to me at no cost by the manufacturers but I receive no compensation for my evaluation.
Practicing Awareness: An Interview
I’m very pleased to have been interviewed about Practicing Awareness in this month’s Armed Citizens Legal Defense Network Journal.
https://armedcitizensnetwork.org/practicing-awareness
It was an interesting interview that touched on a number of subjects, some old and some new. The interview builds on the series of posts I’ve written about the topic of awareness and positioning.
Bringing worthwhile content like this to its members is yet another reason I’m a member and fan of the Network.
Friday Fundamentals – Understanding Zero for Handguns
Zeroing any firearm is the process of understanding the relationship of Point Of Aim (where the shooter aims the firearm) [POA] to Point Of Impact (where the round actually strikes the target) [POI].
For Soldiers to achieve a high level of accuracy and precision, it is critical they zero their [sighting system] to their weapon correctly. The Soldier must first achieve a consistent grouping of a series of shots, then align the mean point of impact of that grouping to the appropriate point of aim.
–Appendix E – Zeroing, Department of the Army Training Circular 3-22.9 – Rifle and Carbine, May 2016
This is the process most shooters are familiar with regarding zero. However, zeroing a fixed sighted handgun is different than zeroing a rifle.
Bottom Line up front: With rifles, we zero the sights to the ammunition. With fixed sighted handguns, we zero (adjust) the ammunition to the sights.
Snubby recommendation
I was emailed the following question. It’s a good question with an involved answer.
Which snubby do you recommend?
This was my reply:
It depends on the person, their ability, their needs, and their desire to achieve an acceptable standard of performance. The S&W 642 and Ruger LCR .38 Special have become the default purchases for people who want to carry a snub. They work for some people but not everyone.
Determining Your Ability – Friday Fundamentals
The famous Chinese philosopher Lao Tzu is quoted as having said:
The journey of a thousand miles [li] begins with one step.
This is only partially correct. The journey really begins with knowing where you are in the first place. This is also true about the journey to proficiency with firearms. Especially for newer gun owners, it’s important to gain an understanding of what their current capabilities are, if they want to improve. Many people who have purchased handguns made the purchase with the intent of personal protection. In this light, a good first step in gauging proficiency is the Michigan State CCW Basic Pistol Safety Training Assessment Course of Fire. It is a simple course of fire that can easily be done at any indoor or outdoor range. It’s also extremely manageable with a J Frame revolver. The Michigan course of fire is the first evaluation in the Indoor Range Practice Sessions program. It also can serve as the basis for a more challenging evaluation.
The target consists of three 11 inch x 8½ inch letter size pieces of paper stacked vertically. The combined sheets of paper are quite close to the FBI Q target both in area (280.5 square inches v. 275 square inches, respectively) and in general shape (a target much taller than it is wide). The target is placed at 4 yards,
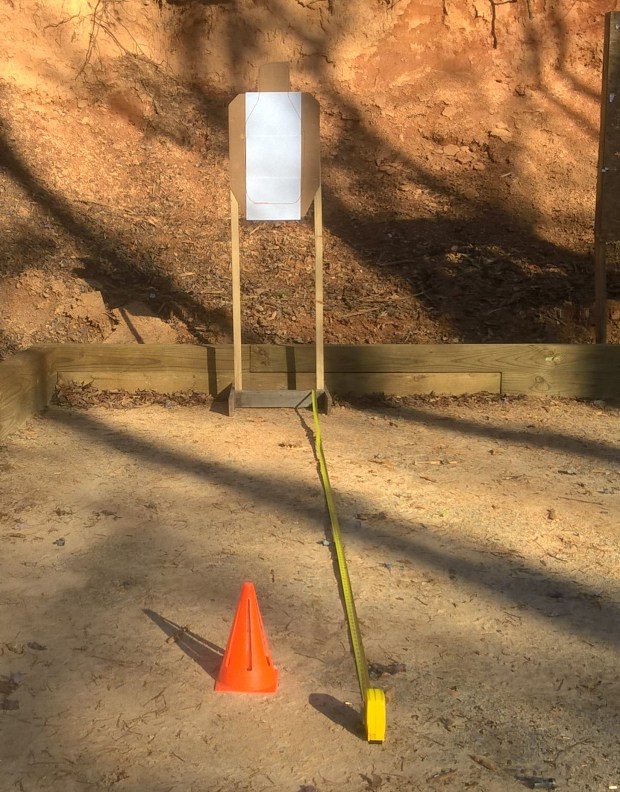
(Note: FBI Q drawn for reference)
Four yards happens to be the boundary between Public Space and Social Space in the study of proxemics. Proxemics is a subject that is worthy of study by anyone interested in the Art of personal protection.

Diagram by WebHamster
There is no time limit. Shooting is done with both hands. You will shoot 5 rounds in three separate sequences. Start with the handgun loaded with five rounds and aimed below the target.
- When ready, aim at the target and fire all 5 rounds.
- Reload with five rounds and repeat the firing sequence.
- Reload with five rounds and repeat the firing sequence one more time.
- At this point, you should have fired five shots at the target three separate times.
- To successfully complete the assessment, at least 2 out of 3 of the sequences must have had five (5) hits within the 25½ inch by 11 inch outline of the three pieces of paper.
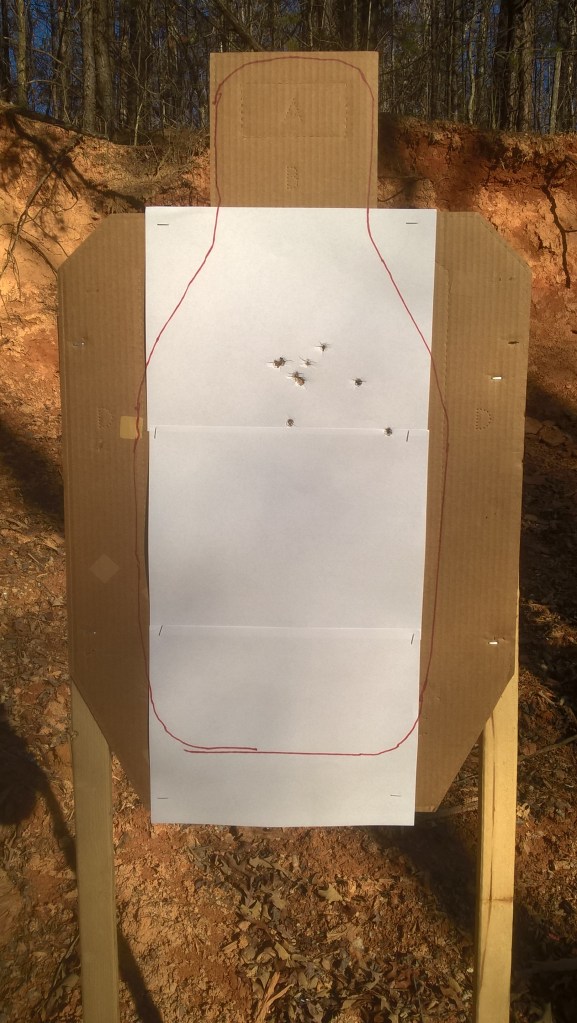
While experienced shooters will consider this course quite easy, for new owners of J Frame revolvers, it frequently is not. This course can also be used as a measure of the effectiveness of Indexed Shooting (shooting without using the sights) by taping up the sights of the gun, in this case a Model 36 S&W snub nose revolver.
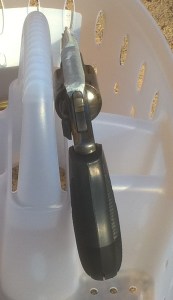
To use this method, bring the gun into the eye-target line and then place the outline of the cylinder or slide on the target. The great NYPD gunfighter Jimmy Cirillo taught this technique to NYPD Officers as a way of effectively using their revolvers at close range in situation where the sights could not be seen. It’s sometimes referred to as ‘metal on meat.’
If the group shot in the first three sequences meets the requirement, then try reshooting the exercise with only one piece of paper. Taking the tape off and using the sights may yield better results.
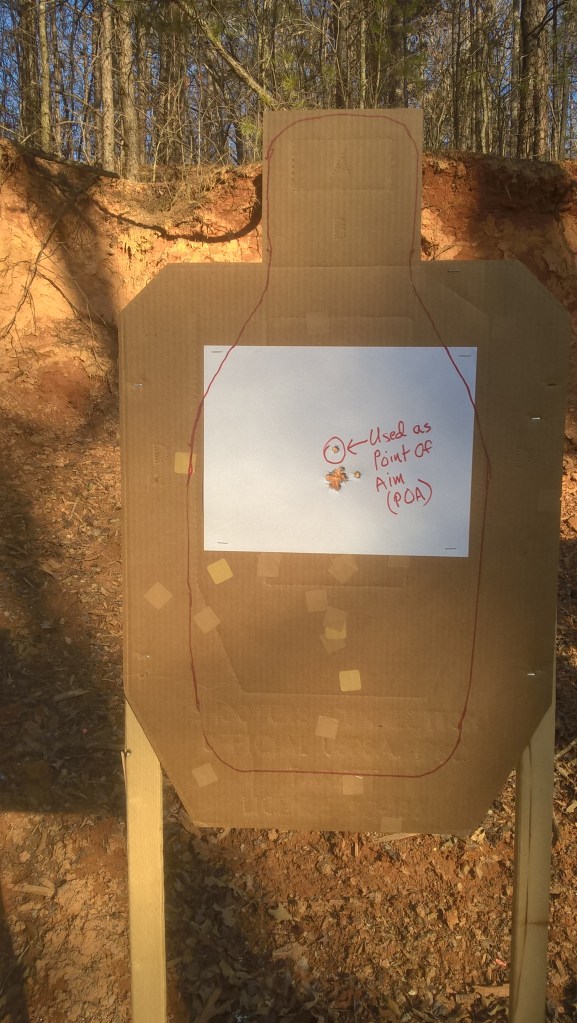
While this course of fire is simple, many newer gun owners may find it challenging. As can be seen in the pictures, the target is smaller than the silhouette target that many Private Citizens and POlice Officers are accustomed to shooting at. It also has the requirement of a 100% standard for the sequences. The 100% standard is the start of having a mindset of being accountable for every round.
Can’t help you
This email arrived from a friend today. Things like this are why I do what I do.
Yesterday I was filling my vehicle with gas at my neighborhood Shell station and out of the corner of my eye I saw an unkempt person lurking around the building and heading to the gas pumps. I lost sight of him for a moment due to vehicles entering and exiting the station. Suddenly, he was on the other side of my pump, headed in my direction.
My first visual image was Claude Werner, hand up, saying I can’t help you, followed by me doing the same thing, as I moved around the corner of my car to get an object and distance between the fellow and me. He did not even finish his opening line, he turned and looked for someone else to approach.
Claude, you taught me well! Thank you very much!
Note that this was a decision made in advance (to be aggressively uncooperative) and then chosen as a response in the moment. That’s the best way.
The ‘Wizard Drill’ and the J Frame
Ken Hackathorn created a very simple skill evaluation drill that he calls the ‘Wizard Drill.’ It only requires five rounds of ammo and can be shot on any range that allows work from the holster
Take an IDPA or IPSC (USPSA) target and place a 4 inch circle centered in the head of the target. You will shoot 4 strings of fire at 3, 5, 7, and 10 yards. Each string of fire has a time limit of 2.5 seconds with 2.7 allowable because of the length of the buzzer’s beep. The drill is shot from a concealed holster. If you use a pocket holster, you may start with the gun in your pocket and your hand on the gun. Otherwise, hands normal at sides, not touching the gun until the buzzer.


You must be logged in to post a comment.