Threat management interview on Ballistic Radio
John Johnston of Ballistic Radio and I spoke on the air last weekend about Threat Management.
Threat Management is a topic that is woefully under-represented in most people’s skill set. Going to the range occasionally only helps develop the shooting skills. In contrast, how much time do folks spend on the skills that lead to ‘non-shooting?’ A short list would include, but is not limited to:
Verbalization,
STOP! Don’t come any closer!
Making the shoot/no shoot decision,
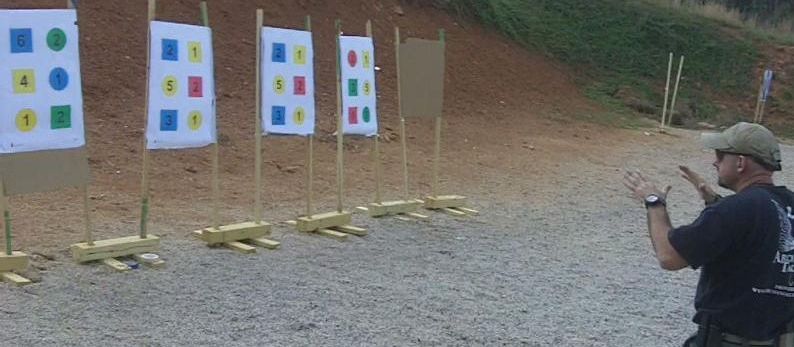
And adversary identification
Learning and practicing those skills can help us keep a situation under control before shooting and hopefully prevent a shooting at all.
Here’s the permalink to the interview. http://content.blubrry.com/ballisticradio/140824_BALLISTICS.mp3
SCCY pistol first impression
I was given the opportunity to shoot a SCCY CPX-2 pistol today. The pistol has been of some interest to me because of its small size, double action only mechanism, and relatively low price point. Many people are price constrained about what they can buy, so inexpensive but serviceable pistols are always of interest to me.
In the past I owned a Kel Tec P11, to which the CPX-2 bears a strong resemblance. I thought the P11 had promise as a pocket pistol for me. I couldn’t have been more wrong. The trigger was so bad that I could never get a split under .50. And it had the annoying tendency to not ignite +p ammo, which made no sense to me but was a well known problem at that time. Finally, I gave up and sold it to someone who really wanted it.
So the SCCY had to have a lot better trigger than the P11 to fill the bill for me. The only real way to test that is to shoot it. Through an unexpected coincidence, a meeting was arranged with the local representative, who met us at Sandy Springs Gun Club and Range with several pistols. He had a number of guns in a large laptop bag, just like I am prone to use as a range bag. He explained some of the features of the CPX-2.
- Very important to me was that it can be dryfired, which some KelTec pistols cannot.
- It also has a second strike capability, which I like. Although the standard doctrine upon receiving a click is to tap-rack, gunowners who are not well regulated don’t know what that phrase means, much less how or when to execute it. Having a second strike capability will allow an untrained user the opportunity to simply press the trigger again and maybe get a bang.
- It’s very easy to disassemble, which cannot be said for the Kahr, another popular DAO compact gun.
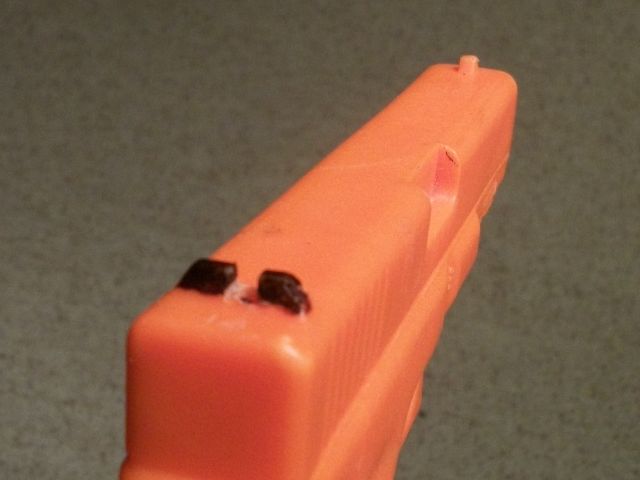
- The CPX-2 has a polymer front sight and a steel rear sight, unlike the P11. The rear sight has two huge white dots on it, which are much larger than the dot on the front sight. I dislike this ‘feature.’ If I bought one, a black Sharpie would be the first thing I would put to it.
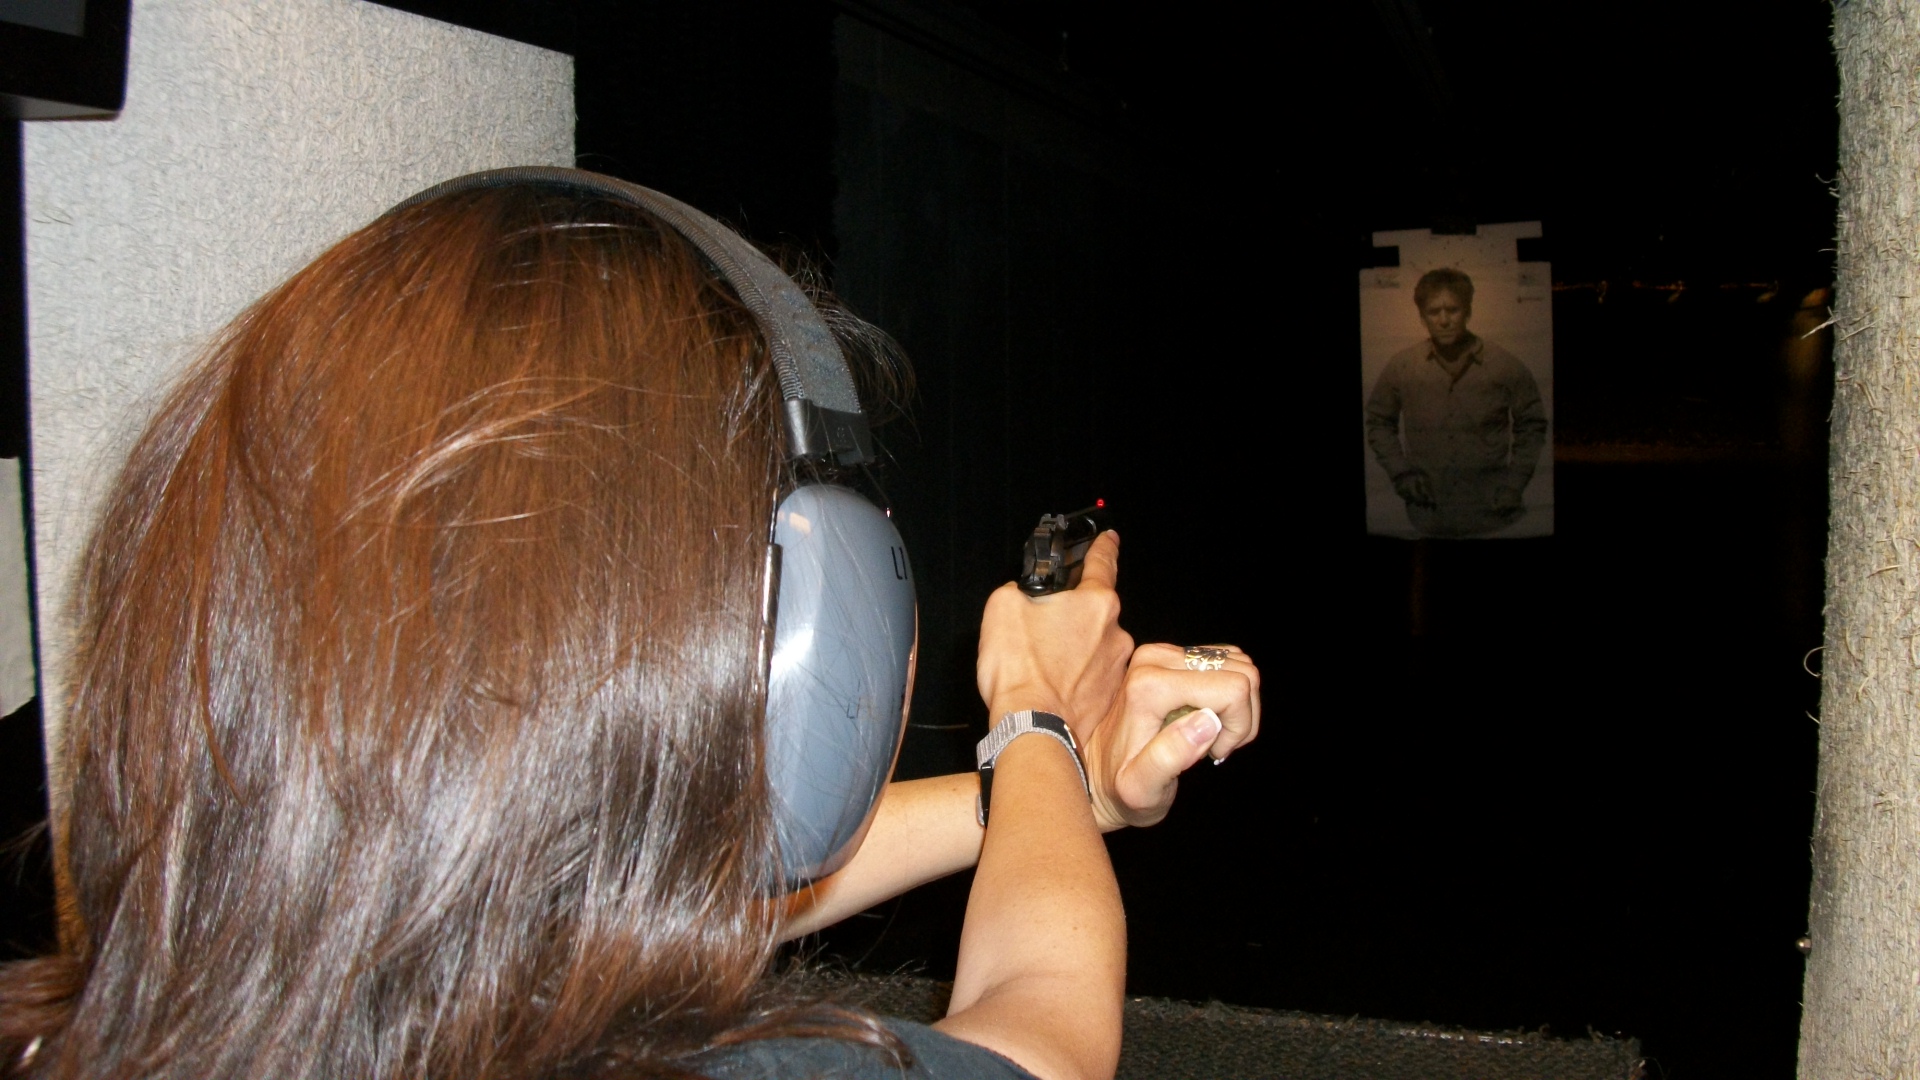
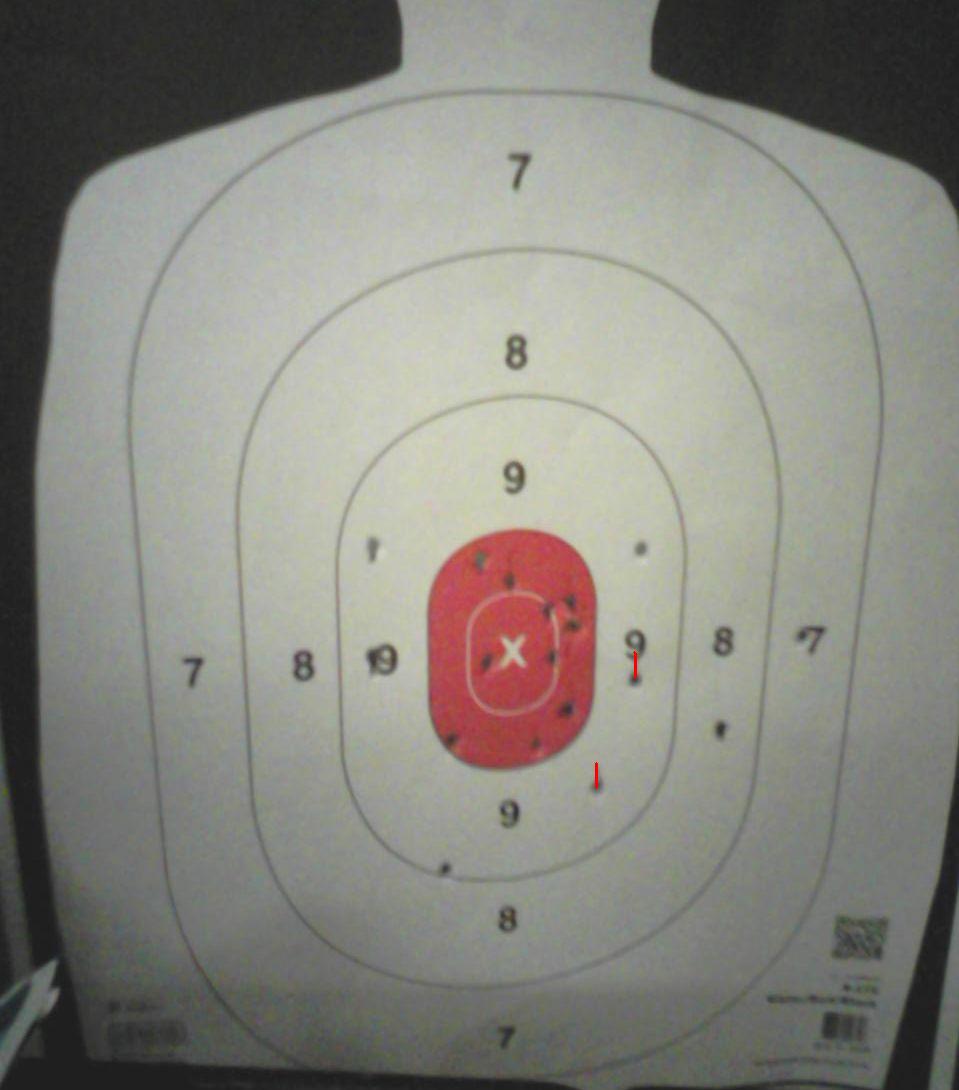
As an initial benchmark, I shot a variant of the LAPD Retired Officer Qualification Course. The course consists of 10 rounds shot at seven yards on a silhouette target. My variation is to use two magazines of five rounds each, one of which has a randomly inserted dummy round in it. Shoot five, reload five, and clear the dummy wherever it happens to show up is how I do the drill. I was easily able to shoot the course at speed with only two hits outside the 10 ring.
Although most personal protection incidents occur within seven yards or less, the need to shoot at longer distances is not unknown. My colleague Tom Givens, has documented several armed citizen shootings at distances from 15 to 22 yards, which represent about 5% of his students’ encounters.
To test the SCCY at distances like this, we set a target at 15 yards and fired a five shot group on the torso. I was able to shoot a five inch group, despite the distracting dots on the rear sight and the indoor lighting. Then I moved the target out to 20 yards and fired a five shot group at the head. Although it was only about four inches, it was centered slightly to the right of the head. I fired another group while really concentrating on the rear notch. This group was more satisfactory, with all the rounds hitting the head in a five inch circle. This exercise confirmed for me why I dislike three dot sights so much.
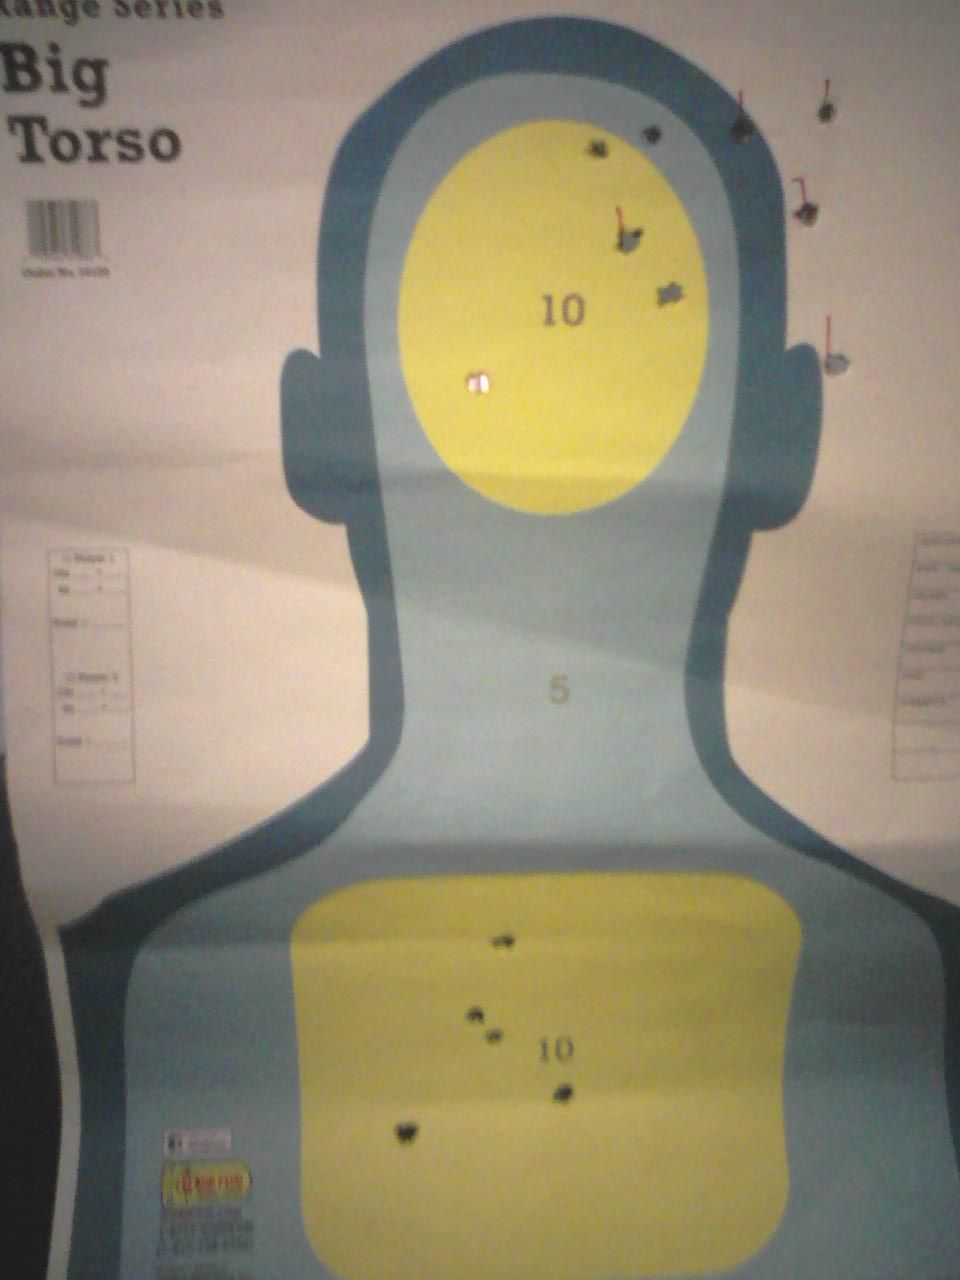
I finished by shooting five rounds at seven yards Strong Hand Only, followed by five rounds Weak Hand Only. The group was slightly larger but still acceptable.
The pistol’s handling qualities were good and we experienced no malfunctions. The only issue we encountered was with the slide failing to lock back when a friend shot the pistol also. This occurred because my friend doesn’t have the proper grip habit of keeping his thumb away from the side of the pistol.

The CPX-2 has a full size ‘Slide Hold Lever’ and if the thumb is not kept away from it, the pistol is not going to lock open on the last shot. It would also be easy to bump it up if the thumb were positioned under the lever. The rep said a flat lever was available from the factory.
There is also a laser available from ArmaLaser. The laser comes on when the pistol is gripped and requires no manual pressing of activation buttons.
Overall, after 100 rounds, my impression was quite favorable for an Every Day Carry piece. I may get one and try it out in IDPA to see what I can do with it.
Using pepper spray effectively
The second class I attended at Paul-E-Palooza 2 was OC and “less-lethal” for CCW folks given by Lt. Chuck Haggard of the Topeka Police Department. There was a little humor about the class title because to many attendees, ‘OC’ means Open Carry rather than Oleoresin Capsicum. As a result Chuck had to explain he was talking about pepper spray.
Chuck has extensive training and experience with pepper spray. He is a National instructor for the National Law Enforcement Training Center and an Adjunct instructor for Strategos International. He has also been featured as a guest on Ballistic Radio. Chuck stated that he has been sprayed with OC about 60 times, in the training context, and has sprayed somewhere around 1000 people. Most of his sprayees are Police Cadets since his department has a mandatory exposure to OC policy for its officers.
I wanted to take the class because I am a firm believer in carrying what I call ‘Intermediate Force Options.’ Pepper spray is one of those weapons that give us a response to predatory behavior not requiring deadly force. As I state in all my classes “Lacking an intermediate force option while you are armed with a firearm implies that all you are willing to do to protect yourself is kill someone.” That’s not a position most reasonable people would be comfortable in taking, given a little bit of thought.
The class began with a lecture including a review of OC history, products, training and best practices. It then moved on to aspects people need to know for effective use, carry and deployment. Once the lecture was completed, the class moved into the open for practical application with inert trainers. No live weapons, ammo or OC were allowed in the practical exercises. Dummy guns and inert pepper spray canisters, which sprayed water only, were furnished. Eye protection was also furnished to the students.
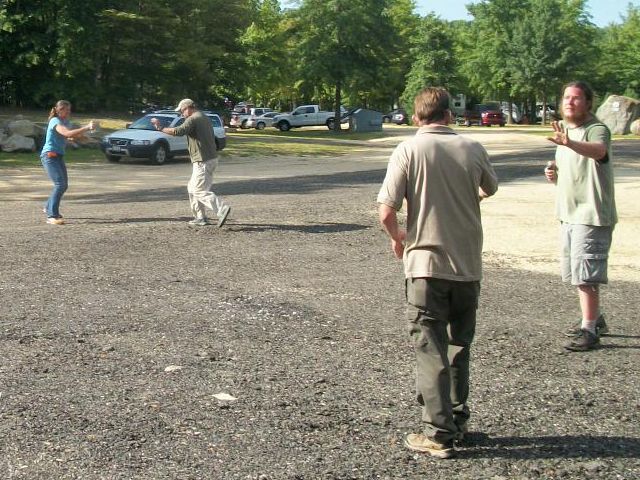
Once again, as at the Rangemaster Tactical Conference, I had the distinct honor and pleasure of beginning the demonstrations by spraying Chuck in the face with an inert container. We demonstrated two scenarios. In the first, Chuck began to encroach on my personal space while I attempted verbal dissuasion. When he continued to advance, I gave him a good dose and then quickly moved away while he simulated remembering a previous appointment. In the second scenario, after I sprayed him, he became irate and threatened me with a training knife. At that point, I transitioned to my dummy gun and gave him a good cowboy “Pow, pow, pow” while maneuvering away.
The second scenario was especially interesting for me because I ended up with the pepper spray container in my left hand and my dummy pistol in my right. I shot one handed while maneuvering away from him. I’m not sure how things ended up that way because I started with the can in my right hand. I’m curious whether I transferred the can initially or if I did a ‘Border Shift’ with the can when I started to draw my pistol. I do remember seeing my sights while I was shooting. My dummy pistol has a rear sight notch cut in it because I cannot abide a pistol without sights, even a dummy pistol.
After our demonstrations, the students then split up into two groups. Initially, one group played the predator while the other played the role of the defender. Then the groups switched roles. The students enacted both the non-lethal and lethal scenarios while spraying each other. The class concluded with a critique of spraying and maneuvering.
I don’t practice as much as I would like with my personal OC, a Zombie Spitfire from Sabre. The class gave me a little tuneup, as well as some interesting background on the evolution of pepper spray as an Intermediate Force Option.
Tactical Decision Making (Part II)
There are numerous definitions of Wargaming. Most of them are too elaborate for our use. The definition I am using now is: The process of evaluating your options in light of your situation and the circumstances. Wargaming is a way determining if:
- Your tactics work.
- The tactics employed contribute to your strategic end goal.
- There are significant possible negative outcomes
Wargaming has the following characteristics:
- Evaluates a possible Course of Action against opposing adversary.
- It is an iterative process of action, reaction, and counteraction.
- At a minimum, it should start if you go to Condition Orange. When you’re on the ground, in a pre-contact situation, the wargaming will not be very in depth. But the better your grasp of your end goals, possible options, and negative outcomes, the quicker and simpler it will be.
First, you have to decide what your end goal is. This should be done before you walk out the door of your home each day. Deciding your end goal does not mean saying “I would do this.” That is just one step of the process and not the first.
In my previous post about Tactical Decision Making, I listed some end goals and some possible negative outcomes. Both of those lists, and any additions you may have to them, are worth reviewing from time to time.
It’s extremely important to take into consideration the possible negative outcomes. Failure to consider consequences is a huge gap in most people’s analysis of the situation. Some of the consequences are legal but not all of them are.
Some concrete examples of negative outcomes are:
- Zimmerman shooting – Extensive and costly interaction with legal system ($2.5 million in attorney fees)
- Theodore Wafer shooting, Detroit – Murder conviction
- Jerome Ersland, Oklahoma City pharmacist – murder conviction, life sentence in prison
- Petit murders, Connecticut – Loss of wife and daughters under horrible circumstances
- Joseph Robert Wilcox, Las Vegas – murdered trying to stop an active killer
- Joe Hendrix, Georgia – shot an elderly man with Alzheimer’s – consequences to be discovered in the future
There are three areas you must consider as part of your wargaming. They are your situation, your options, and the circumstances; i.e., your surroundings and the event. We’ll discuss these in the next installment.
Understanding the risk of violent aggression
I couldn’t believe it was happening. It didn’t seem real.
–a common statement by victims of criminal violence
The first presentation I attended at Paul-E-Palooza 2 was The 5 Ws of Risk (of Violent Aggression) given by William Aprill of Aprill Risk Consulting. William is a criminal psychologist who gives the most in-depth look into the criminal mind of anyone in the training industry. Frankly, at times, it’s rather creepy hearing how crazy criminals can be.
His presentation used the classic 5 Ws; Who, What, When, Where, and Why to structure a discussion of how risk can develop and aggregate for the Private Citizen. Using that structure allows us to look at the ways we can put ourselves at risk and, conversely, how we can reduce our risk.
Beginning with Who, he explained the value of “pre-need planning.” Then he explained his concept of a ‘risk envelope.’ This concept describes how varying circumstances we put ourselves in can increase or decrease our risk of being victimized. The levels of aggression displayed by potential Violent Criminal Actors are the flip side of ‘Who.’
What explained the difference between being a target and a victim. The concept of ‘advantaging for dominance’ was also included among various factors.
The key point of When was “not at a time of our choosing.” This unpleasant fact resounds throughout the training community. Sage support for this comes from several sources.
- “When it’s least expected, you’re selected.” –John Farnam
- “You don’t choose when you’ll need your gun; someone else does. And they will typically only inform you at the last moment.” –Tom Givens
- “Initiative Deficit – A criminal will stack the odds in his favor and usually only initiates action when there is a high probability of success.” –SouthNarc
The Where component emphasized that “there are no ‘good’ neighborhoods” where crime does not happen. Criminals prefer to choose the location of ‘highest yield.’ He also discussed the limitations of thinking that by avoiding certain situations or locations we can eliminate our risk.
William’s explanation of Why is where he gets into the inner workings of the criminal mind. He detailed the difference between ‘Instrumental Violence’ and ‘Expressive Violence.’
There were numerous concepts and explanations that he used to expand the 5 Ws explanation.
- Primacy of pre-need decision-making.
- Preparation failures
- Response failures, e.g., “I couldn’t believe it was happening. It didn’t seem real.”
- And my favorite about relying on ‘gut instinct’ “Remember, your gut has shit for brains.”
William and I will be teaching a Decision Shooting Course on September 27, in the New Orleans area. This course will introduce participants to some of the unaddressed realities of violent criminal aggression and effective defensive responses. He will be covering the 5 Ws and their implications for the Armed Citizen. My portion will be about consciously thinking while being armed, which is the exact opposite of ‘muscle memory.’ It consists of: 1) assessing one’s own skills in relation to the situation, 2) weighing the legal justification for using deadly force, and 3) consciously making appropriate decisions in the presence or absence of justification.
For more information and to register, visit the event website.
Tactical Decision Making (Part I)
You keep using that word. I do not think it means what you think it means.
-– Inigo Montoya
My main presentation at Paul-E-Palooza 2 was entitled Tactical Decision Exercises. I wanted to do it because I have come to feel we in the training community concentrate on teaching marksmanship and manipulation skills at the expense of tactics and decision-making skills. As strange as it sounds, coming from someone of my background, I think that’s a problem. When I look at incidents that have had negative outcomes for the Citizen, it’s rarely because of a failure of mechanical skills. Most of the time, the failure is due to a bad decision, poor tactics, or a combination of both.
Trainers often refer to the Holy Grail of achieving ‘unconscious competence.’ However, good decision-making is usually a thoughtful conscious process. Consequently, I’m not sure that focusing our training methodologies on an unconscious process helps our students develop the thinking skills they need to make good decisions under stress. We need to have our mechanical skills adequately developed so we don’t have to focus on them but we also have to realize that they are an end to a means.
In our Grand Campaign, our ultimate object is to wage successful war on land in the heart of EUROPE against the main body of the GERMAN strategic reserve. It is true that we have to cross the enemy’s beaches, but that to us must be merely an episode. True, it is a vital episode and, if it is not successful, the whole expedition will fail. We must plan for the crossing of the beaches, but let us make sure that we get that part of the plan in its right perspective as a passing phase.
—General Morgan, Chief of Staff to Supreme Allied Commander, 1943
It’s not hard to find examples of ‘what if’ questions about personal protection situations on Internet forums and some respondents refer to ‘wargaming’ these hypothetical situations. The problem is that the term ‘wargaming’ is frequently used, but what it means is often misunderstood. What most people do when presented with a hypothetical ‘what if’ scenario is ‘brainstorming,’ not wargaming. Wargaming takes brainstorming at least two steps further by including the elements of consequences and an adversary, who also makes decisions about what to do.
The management consulting firm Booz Allen Hamilton consults regularly for the Department of Defense and other large clients about the wargaming process. Their website contains much useful information about the fundamentals of the process.
In order to wargame effectively, it’s important for us to understand the difference between strategy and tactics.
- Tactics – doing things right, which is what most training classes focus on.
- Strategy – doing the right things. This results from a thinking process, hopefully done ahead of time.
- The dividing line is physical contact. Once you make contact, you’re going to execute tactics, hopefully that support a strategy you have already developed.
- In my observation and experience, the conscious mind rapidly disappears upon contact, for most people. So, there’s not going to be much strategy development going on once contact is made. If you haven’t thought about the right things to do ahead of time, you’re unlikely to do so once you encounter a threat.
There are various military, police, and firefighting models for wargaming. However, the weakness of applying those models to our circumstances is that they are based on receiving a defined mission statement from a higher level of command. For example:
You will enter the continent of Europe and, in conjunction with the other Allied Nations, undertake operations aimed at the heart of Germany and the destruction of her Armed Forces.
–Combined Chiefs of Staff directive to General Eisenhower for Operation OVERLORD, the invasion of Nazi occupied Europe
However, we, as Private Citizens develop our own mission statements, based on our values and goals. That’s a major difference from the institutional models.
Without a mission statement, even effective brainstorming is difficult and wargaming is impossible because it’s unclear what you’re trying to accomplish. The object of wargaming is learning to make decisions with a positive strategic end goal in mind. And we definitely want to avoid negative outcomes.
Some positive end goals you might consider are:
- Enjoying life with your family and children
- Seeing your children grow up healthy and prosperous
- Participate in enjoyable hobbies
- Build a successful business
- Retire comfortably
Negative outcomes you most likely want to avoid are:
- Interaction with the legal system
- Serious Bodily Injury
- Death
- Misdemeanor or Felony conviction
- Going to jail or prison
- Loss of community and family associations (ostracization or separation)
- Shooting or otherwise hurting an innocent person
When I asked the class to write down their individual mission statements regarding personal protection, I noticed many did not. Please reflect on your goals and possible negative outcomes and then write down your mission statement for personal protection. I’ll discuss how it fits into the concept of wargaming and tactical decision exercises in the next few installments.
Ego defenses
The maximum effective range of an excuse is zero meters.
While comparing notes from our experiences at Paul-E-Palooza 2, a friend of mine noted how many excuses for poor hits he heard during the live fire block he attended. “I haven’t gotten used to the sights on my gun.” “The offset I have to use at this distance is throwing me off.” “When I shoot pistol in 3 Gun, I smoke it, but I can’t seem to hit these little targets.” Etc., etc., etc. Those are all ego defenses shooters use to avoid saying “When put to the test, it’s clear I’m not as proficient as I like to think I am.”
Let’s compare that with the Facebook commentary of a very smart and honest lady I coached a little during the same block.
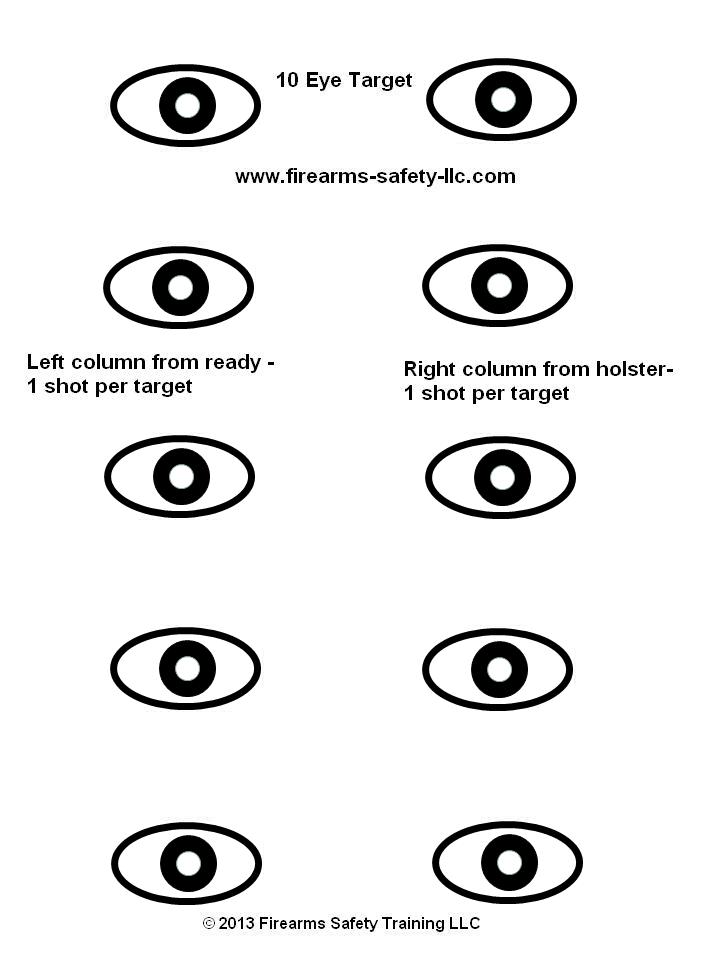
After this class I had a live fire with Dr. [Sherman] House. He did dot drills and eye targets. We shot at 3 and 5 yards at these tiny targets. Fact from Dr. House, under stress your shot pattern will double in size. [So,] We might as well practice on targets 1 ¾ inches big. Out of the 30 shooters, I suck because I anticipated recoil. [Obviously, from my point of view, she was far from being the only one whose performance could stand some improvement.] I got a private lesson by “THE PROFESSOR Claude Werner”. … Professor Werner taught me to focus on a slow trigger press. [Actually, I was trying to emphasize a smooth trigger press] When Doc Werner pressed my trigger while I had the sights aligned[,] I hit the target dead center. I know what to work on. I need to dry fire weekly.
At times, we all suck, on a relative basis. The way to get past it is to figure how to “shoot better,” as Bill Rogers puts it. Then accept that we need to do some work on our weakness and get to it without using a lame excuse as an ego defense.
A little coaching can help determine what the problem is. In the above lady’s case, she was very good at using her sights; when I pressed the trigger for her, the round struck exactly where it was supposed to. She just needs to work on her trigger manipulation. She self-identified the problem and the solution. I have no doubt she will work on it vigorously.
Many shooters spend a lot of time, money, and effort refining and changing their equipment in an attempt to improve their performance. It was interesting that even at a training conference like Paul-E-Palooza, during the charity auction, ‘cool’ equipment items sold at a premium to retail while training items sold at a discount to retail. My observation is that the solution usually resides inside the shooter rather than in a hardware solution. As one of my colleagues puts it: “I have a friend who will kill you with a Lorcin and there’s nothing you’ll be able to do about it.”
Scaling targets
Math is like going to the gym for your brain. It sharpens your mind.
“Claude, how do I shrink an IDPA target so it appears as though it is 25 yards away when my dry fire range is 7 yards? Thank you.”
Many people think they will never use elementary algebra once they leave high school but sometimes it still comes in handy. The above question can be simply solved through the use of cross-multiplication.
The first part of the problem is we have to determine the ratio of the two distances and then solve for the correct size (height) of the target. The IDPA target is 30 inches tall and would be full size at 25 yards. How tall would it be at seven yards?
| Height | 30 | x |
| yards | 25 | 7 |
Cross multiplication means the product of the upper left and lower right will be the same as the product of the lower left and upper right. So, 30 times 7 will equal 25 times x. This works out to 210 equals 25x. But we only want 1x, so we then divide both sides by 25. Our answer is 8.4. I.e., a target 8.4 inches tall at seven yards will have the same size ratio as a full size (30 inch) target at 25 yards. Granted, there are depth perception and visual acuity issues that come into play but it’s an imperfect world and we just do the best we can.
The second part of the problem is to make a target 8.4 inches tall out of the images available to us. I did this using crude methods but effective. Using an IDPA target image captured from the internet, I sent it to Print Preview.
The original size was way too small so I took a guess and enlarged it to 400 percent. I then took a ruler and measured the preview pane, which was 2.25 inches tall. This makes a relationship of 2.25 inches to an actual print page of 11 inches. The target image height is 8.4 inches so the task is to find the representative size on the screen. Cross multiples again can provide the answer.
| Actual height | 11 | 8.4 |
| Screen height | 2.25 | x |
This gives us 2.25 times 8.4 equal 11x. 18.816 equal 11x. 18.816 divided by 11 gives us 1.72, the desired screen height. However, the 400 percent image on the screen only measured 1.375, so I needed to find the correct print percentage. Doing another cross-multiplication answers that question.
| Screen height | 1.375 | 400 |
| Desired height | 1.72 | x |
Solving for x gives 500 percent, which I then printed and verified.
Since I do this regularly, I have a scaling spreadsheet set up in Excel. It allows me to do this kind of scaling in less time than it probably takes to read this post.
Why I hate the -3 zone
There is no substitute for knowledge.
-–W. Edwards Deming
One of the things I enjoyed most about my time at the elite Rogers Shooting School is the intellectual caliber of people I met there, both instructors and students. There were a fair number of highly educated people who came to the School on a regular basis. One said he came every year ‘to get his speedometer reset.” Some of them continue to stay in touch and I enjoy those conversations.
I recently received an email from a physician, who is an annual student, relating to some target design work I had been doing. He sent along his analysis of the IDPA target, based on the “ANTHROPOMETRY AND MASS DISTRIBUTION FOR HUMAN ANALOGUES,” which is the medical profession’s way of saying the dimensions of the human body.
He included a diagram of issues with the IDPA and IPSC Metric targets in relation to the actual size of the average male American. His diagram resonated with me because, for a long time, I have called the -3 zone of the IDPA target “the lawsuit zone.” The reason I say that is that the target is so large by that point that no part of the person’s body is actually going to be there. So a bullet striking that area would, in fact, just sail off into space. Most likely, it will strike “a busload of nuns and orphans being followed by a limousine full of personal injury lawyers having a conference call with the District Attorney.”
The anatomical analysis he did caused me to do some further research in the anthropometry document to create my own diagram. As I did so, it confirmed another unusuality of the targets; they have no neck. The head zone is not too bad of a match for the area of the male head from the eyebrows to the tip of the chin, especially if he has a jaw like Clutch Cargo, but there’s just no neck.
Visual indicators tend to convey information best, so I created a target image with colors to demonstrate the issues I noted.

Disregarding the head aspect, there were several things to be observed.
1) The -3 zone, or the D zone of the USPSA Metric, on the sides of the target is basically where a man’s arms are when they’re hanging by his side. A man holding a weapon at or near eye level would not have anything there below a line approximately even with the middle of the -0 zone. I marked this area in red on my target depiction.
2) The area of the -3 zone below the -1 zone very closely aligns with the area of the male body below the waist. I’m unenthused about that as a targeting area for reasons that will become obvious further on. That area is shaded in pink on my target image.
3) From about two inches above the bottom of the -0 zone down to the bottom of the -1 zone corresponds generally to the area from the xyphoid process to the waist. Emergency room physicians have told me that they consider this entire area to be an abdominal wound and not nearly as serious as a wound in the torso above that line. The yellow striped area on my image shows that zone.
4) Finally, by process of elimination, the area I shaded in orange is where all the “good stuff” is, as one physician put it to me. This is the area of the torso where a bullet has the best probability of quickly stopping a deadly threat to one’s life. Note that this area goes all the way up to the neckless chin.
My image is really a ‘best case’ example. To get an idea of what a true anatomical overlay would look like, my surgeon friend subsequently sent me a couple more images. Since he’s a physician, they’re much more illustrative than my drawing is. He overlaid them on the IPSC Metric target, but for the purposes of this discussion, the -3 and D zones are interchangeable. Note also that the -1 zone or C zone is no great shakes as a targeting area, either.


Note on the gross anatomy target that my yellow striped area corresponds to the infamous “gut shot.” While a serious wound in the long term sense, its ability to stop criminal action quickly is quite suspect.
Several articles have been written describing the geometry necessary to figure out where the vital organs are. Running a geometry problem in my head while someone is trying to do me serious bodily injury seems a bit much. However, I think an understanding of what actually constitutes the “high center chest” is useful. This is especially true since the IDPA and IPSC Metric targets are very commonly used in training classes.
And that’s why I hate the -3 zone. When I ran the Georgia State IDPA Championship for several years, I painted black over the -3 zone of all the targets so hits there would be scored a miss (-5). It caused a certain amount of grumbling but I really think people need to be confronted with the realities of personal protection.
Teaching the Snub Nose Revolver
No possible rapidity of fire can atone for habitual carelessness of aim with the first shot. —Theodore Roosevelt, (26th President of the United States) The Wilderness Hunter, 1893
Last night I taught my ‘Introduction to the J Frame Revolver’ class. It’s probably the last time I’m going to teach it; the market just isn’t there anymore and it’s hard to get much enrollment.
However, I’ve been teaching the snub heavily since before 9/11 and think I’ve evolved a very workable program. There are still many people who have snubs and some of them may be interested in knowing what they’re doing with it. To that end, I’m going to post my entire Program Of Instruction for anyone who wants to use it. The live fire portion is exactly 50 rounds. What I found was that casual shooters of the snub tend to experience a noticeable dropoff in performance after 50 rounds, so I cut it down to that.
Course Overview – A skill builder short course particular to 5 shot revolvers.
The intent is to show basic techniques and give a methodology for subsequent practice. “I cannot make you an expert in three hours but I can show you what to do and how to practice to increase your skill.”
Methodology
• Explanation of strength and weaknesses of the snub
• Demonstration of proper grip for revolvers. Some modification may be necessary based on an individual’s hands.
• Show different kinds of grips that can be installed on a snub to better fit a person’s hands.
• Explanation of sighting techniques and how range affects them
• Disciplined learning exercises, including ball and dummy and dryfire
• Ball and dummy is achieved by opening the cylinder after a few shots, spinning it, and then closing it without looking where the fired case(s) end up. Do this once or twice per cylinder.
• Concludes with a Qualification Course because everyone should have a benchmark of where they are. Shooters should also be able to demonstrate in court that they have a measureable degree of competency.
Snub Revolver Intro Class Practical Exercise (single relay)
Six Circle w/dot target (5 yards)

1) Demonstrate how to load with loose ammo and explain why that’s important.
2) Explanation of Spot shooting and how to pick a spot on your target
3) On top left row, fire a 5 shot group.
a. Dryfire
b. Livefire (5/5) (Spin cylinder 2X)
4) On center left row, from high ready, fire 1 shot 5 times
a. Dryfire
b. Livefire (5/10) (Spin cylinder 2X)
5) Explanation of proper drawstroke
6) On bottom left row, draw and fire 1 shot 5 times
a. Dryfire
b. Livefire (5/15) (Spin cylinder 2X)
7) On top right row, from high ready, fire 2 shots 2 times
a. Dryfire
b. Livefire (4/19) (Load with four plus fired case, spin cylinder)
8) On middle right row, draw and fire 2 shots 2 times
a. Dryfire
b. Livefire (4/23) (Load with four plus fired case, spin cylinder)
9) On bottom right row, from high ready, fire 5 shots 1 time
a. Dryfire
b. Livefire (5/28)
Tape hits outside of circle (this wasn’t necessary because the class was hitting pretty well)
10) On top right row, fire a 5 shot group, strong hand only.
a. Dryfire
b. Livefire (5/33) (Spin cylinder 2X)
11) On middle right row, from high ready, fire 1 shot 5 times, strong hand only.
a. Dryfire
b. Livefire (5/38) (Spin cylinder 2X)
12) On bottom right row, fire a 2 shot group, weak hand only.
a. Dryfire
b. Livefire (2/40)
Change targets [B-27]
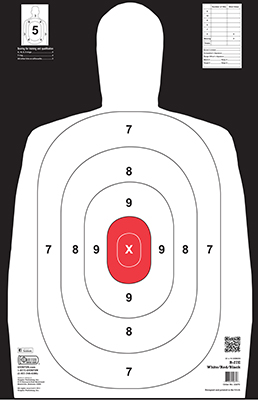
13) Shoot the LAPD Retired Officer Qualification Course
a. “The starting position for this qualifying course of fire will begin at the 7 Yard Line. When the target faces, the shooter will draw and fire 10 rounds at a single silhouette target. A score of 70 percent is required to pass the qualification. All rounds impacting anywhere on the body and head will receive full value and rounds impacting upon the arms are half value.” (10/50)
b. I chose the LAPD Retired Officer Course because the LAPD is a respected law enforcement organization, known for its emphasis on firearms proficiency. Since the LAPD considers this Course sufficient for its Retired Officers to demonstrate their ability to defend themselves, I think it’s a good choice for Armed Citizens, as well.
14) Record Student Performance on Qual Course.
15) Show various types of speedloaders and speed strip, where to get them, and how to use them. Explain strengths and weaknesses of each type.
a. HKS
b. Safariland
c. Jet Loader
d. SL Variant
e. Dade
f. Speed-Strips and Tuff-Strips
16) Explain idiosyncrasies of pocket holsters and how to use them correctly.
Adjourn to classroom to award certificates.
Pass out Armed Citizen Legal Defense Network booklet What Every Gun Owner Needs to Know About Self-Defense Law
Conclude with the message that we are more likely to be injured or killed in a car wreck than by a criminal. Mention that a Defensive Driving Course costs only $35 in Georgia and auto insurance companies are required to lower your insurance premium by 10% for taking it.
Some of the coursework is shown on the Personal Defense Network DVD Fundamental of Snub Nosed Revolvers for Defense

You must be logged in to post a comment.