A lesson from Jimmy Cirillo and the Stakeout Squad
I don’t want to burst any bubbles among the broad public but I have a different take on a very unfortunate incident than the family and the news reporter do.
A little background is in order. The NYPD Stakeout Unit, unofficially called the Stakeout Squad, was formed in 1968 and existed until 1973. Its formation was due to the large number of retail robberies occurring in New York City at the time, many of which resulted in the brutalization or murder of shopkeepers. The Squad was disbanded in 1973, allegedly for ‘efficiency’ reasons but the members generally conceded that it was because the Squad shot so many robbers, whom they caught red-handed and who decided to shoot it out rather than surrender. Jimmy Cirillo was one of the founding members and a good friend of mine. Jimmy died in a motor vehicle accident in 2007. His wit and wisdom will always be remembered by those of us who knew him.
Here is an incident synopsis from the full article:
Hero mom dies protecting her baby daughter
She was young, beautiful and tragically killed by her daughter’s father early Sunday morning. Now, Jessica Arrendale, 33, is being hailed by her family as a hero for saving her six-month old daughter’s life, even as she died from a bullet to the head.
It began Saturday night when Jessica and Cobie’s father, 30-year old Antoine Davis, went out for the evening. At some point, Ionniello said, Davis, a former Marine who served in Iraq, became belligerently drunk and abusive. It had happened many times, Ionniello said, but her daughter did not seem able to turn Davis away no matter how often he abused her.
Davis chased Arrendale up the stairs of her three-story townhome in the Oakdale Bluffs subdivision sometime around midnight, she said….
Arrendale locked herself in a bathroom. Davis got his gun, an assault rifle outfitted with a suppressor. He burst into the bathroom and, while Arrendale was still holding Cobie in her arms, shot the young mother in the head, Ionniello said…..
“He shot her and they (police) don’t know how she was able to twist her body and fall literally in the opposite direction,” Ionniello said. Instead of falling onto the floor, Ionniello said her daughter fell over the toilet, dropping little Cobie into the water-filled bowl….
The baby remained in the toilet, covered by her mother’s body, for 13-hours before officers finally stormed the townhouse and rescued her. She was cradled in the arms of an officer who rushed her outside to a waiting ambulance.
No one ‘makes decisions’ when they’ve been shot in the head, probably brain, with a 5.56mm bullet at point blank range. That’s an instant shutoff. In a macabre way, I would like to see the coroner’s report as to the extent of the damage to her brain. However, this immediately brought to mind something Jimmy Cirillo told me about his experiences in the Stakeout Squad shootings.
He observed that every time a perpetrator was instantly killed by Stakeout Squad gunfire, they fell where they stood and their legs were crossed as they fell. Usually, they were facing the opposite direction from the way they had been standing. Jimmy’s hypothesis was that one side of the brain shut off before the other causing one side of the body to collapse before the other, resulting in the turning of the body and the crossing of the legs.
He didn’t indicate he had any medical basis for his opinion. Therefore, I regard it as a hypothesis based on his observations of the numerous men he and the other members of the Stakeout Squad had killed.
My opinion is that the same thing happened to this poor young woman; her brain shut off sequentially, which caused her body to twist as it fell. It was random chance that protected her infant son from the crazed father. While I would like to accord her ‘hero’ status, I don’t see it that way. No offense to her is intended, I am sure she would have protected her child any way she could, had she been capable.
The lesson is this: be cautious about approaching predators after they’ve been shot; they might not be completely disabled. With handguns, the mechanism causing the opponent to stop is largely exsanguination, meaning blood loss. When someone falls after being shot and bleeding profusely, they may regain consciousness when the brain comes level with the heart. Central Nervous System (CNS) stops, such as this unfortunate young lady experienced, are the only really sure anchors.
For those interested in reading more about the Stakeout Squad, I recommend Paul Kirchner’s excellent book, Jim Cirillo’s Tales of the Stakeout Squad.
Challenging human predators
Pointing guns at people you have no intention of shooting to force compliance with your demands is poor business.
–Ed Head in his article Pistol Provocation
I agree with this statement and feel it can be even further amplified from the perspective of training people how to Control a Confrontation. The statement can be, and has been, misconstrued by the inexperienced into “I believe that the first time any bad guy should know you are armed is when he sees the muzzle flash.” As a philosophy, reluctance to display a firearm without firing is a mistake. The majority of criminals are looking for a victimization not a fight. The display of a firearm by the intended victim, along with the obvious intent to use it if necessary, is an indicator that the victimization has the potential to turn into a fight. That’s not what economic predators are looking for.
Let’s consider the Policy (556.80) of the Los Angeles Police Department for DRAWING OR EXHIBITING FIREARMS.
Officers shall not draw or exhibit a firearm unless the circumstances surrounding the incident create a reasonable belief that it may be necessary to use the firearm in conformance with this policy on the use of firearms.
Stated as a positive action when adjudicating Use of Force incidents, the LAPD Board of Police Commissioners generally uses language similar to the following, when the Drawing/Exhibiting was ruled justifiable.
The BOPC determined that all personnel had sufficient information to believe the situation might escalate to the point where deadly force may become necessary. Therefore drawing the weapon was in policy.
Armed Citizens need to practice two Presentations; 1) Challenge and 2) Shoot. I use the term Presentation in a broad sense because the pistol might be in a container other than a holster, for instance, someone at home may have a pistol in a container or safe. The principle still applies. While some trainers would say this violates Hick’s Law, the fact is that the effect of Hick’s Law has been proven to dissipate when training in the various options has been undertaken.
Challenging should be done from a Ready position that does not involve pointing the pistol at the aggressor, just as Ed states. If the necessity to shoot arises, the pistol is then brought on target and fired.
Contrary to popular opinion, there is no time difference between bringing the weapon onto target to fire vis-à-vis having the weapon already aimed at the target. Nor is there any demonstrable difference of starting out with the finger on the trigger v. off the trigger.
My experience is that very few gunowners practice the Presentation to Challenge nor firing beginning from a Challenge position. This is a major weakness in their skill sets. Challenging can easily be practiced at home with an inert (blue) gun. Anyone who is serious about improving their skillset should own a bluegun of their real defensive gun.
There is a caveat to this doctrine. A friend of mine lives and works in Central America as a security consultant and trainer. His counsel to me is that, in his experience over the past three decades, Latins rarely find the presence of a pistol unsettling “unless they are looking down the bore.” With the heavy influx of Central Americans into the United States lately, this may be a consideration.
Structured practice (Part I)
What exactly is Claude Werner’s ‘1,000 Day Dry Fire’ program? Is it published anywhere? Anybody tried it? What were the results? Would you do it again?
This question was asked on a forum I visit occasionally. In a narrow sense, the question refers to an idea I had a while ago. About 12 years ago, a friend was working on his Yoga instructor certification and had to do 1000 days straight of meditation. That inspired me, so I decided to do it with dryfire. He said that dryfire is my form of meditation; I will defer to his judgment on that. Another friend of mine wanted to try it last year, so I’m doing it with him now, my second time, his first. We’ll be finished at the end of 2015 but we both agree it’s become such a habit that we probably won’t stop then.
First of all, the ‘program’ is not any particular drill or set of drills. Rather, it’s the commitment to do dryfire each and every day, without fail, for 1000 straight days. If you miss a day, you have to start again at the beginning. The important thing is do some dry practice every single day, even if it’s just a little. My last trigger press is never more than 24 hours in the past. Days that I practice livefire are not exempt from the dryfire requirement. I like to finish each range session with a few dryfire trigger presses.
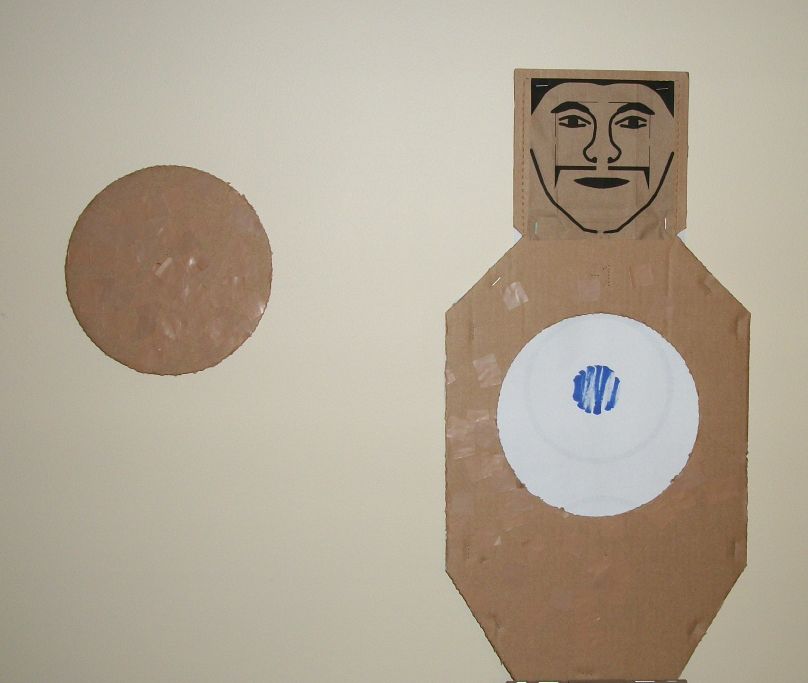
The first time I did the program, when I was at the GF’s house, I’d do it in the bathroom by using the tile intersections as targets. She finally figured out what I was doing and had me set up a little dryfire range in the spare bedroom. The range consisted of a reduced size target behind a picture and a cassette tape I had made with a specific regimen on it. Eight minutes and I was done.
The reason there’s not one drill or set of drills is to avoid boredom. I regularly change up my regimen. Run different qualification courses dryfire, practice bullseye shooting, run the NRA Defensive Pistol I & II, etc. It doesn’t matter. I make different targets and reduced size target arrays from time to time to change things up, as well.
The most important aspect of the program is that it represents a philosophy of practicing our skills on a regular basis. Those skills might be shooting, threat management, surveillance detection, pepper spray, unarmed combat, etc. Any physical skill is perishable, meaning after a length of time, it’s not as easily performed on demand. The ‘riding a bicycle’ analogy does not completely apply. When we get back on a bike after a long time, we have some time to refresh ourselves with those motor skills. If someone is attacking you, a refresher session for your personal protection skills is not an option for you. You need to be on your game at that point. Shooting skills are especially perishable for those who have never become Unconsciously Competent at them in the first place. That’s most people, frankly.
I dryfire even when I shoot an IDPA match. When I go through the “Unload and Show Clear” process, I don’t just do a trigger mash at the hip like most people. I pick out a spot on the berm, aim at it, and do a good dryfire trigger press. What I don’t want to do is to ever program myself to do a motor skill in a sloppy or detrimental way.
As a friend of mine once remarked, “Claude doesn’t do anything that doesn’t have a purpose.” My cardiologist told me “You are a very programmatic person.” Both of those are completely true, to the extent I can make it that way.
Threat management interview on Ballistic Radio
John Johnston of Ballistic Radio and I spoke on the air last weekend about Threat Management.
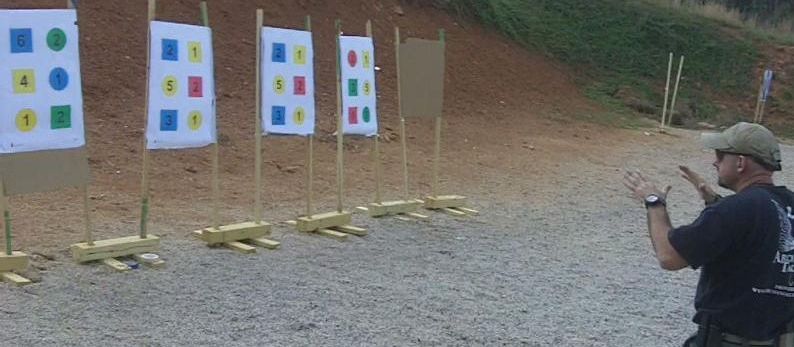
Threat Management is a topic that is woefully under-represented in most people’s skill set. Going to the range occasionally only helps develop the shooting skills. In contrast, how much time do folks spend on the skills that lead to ‘non-shooting?’ A short list would include, but is not limited to:
Verbalization,
STOP! Don’t come any closer!
Making the shoot/no shoot decision,
And adversary identification
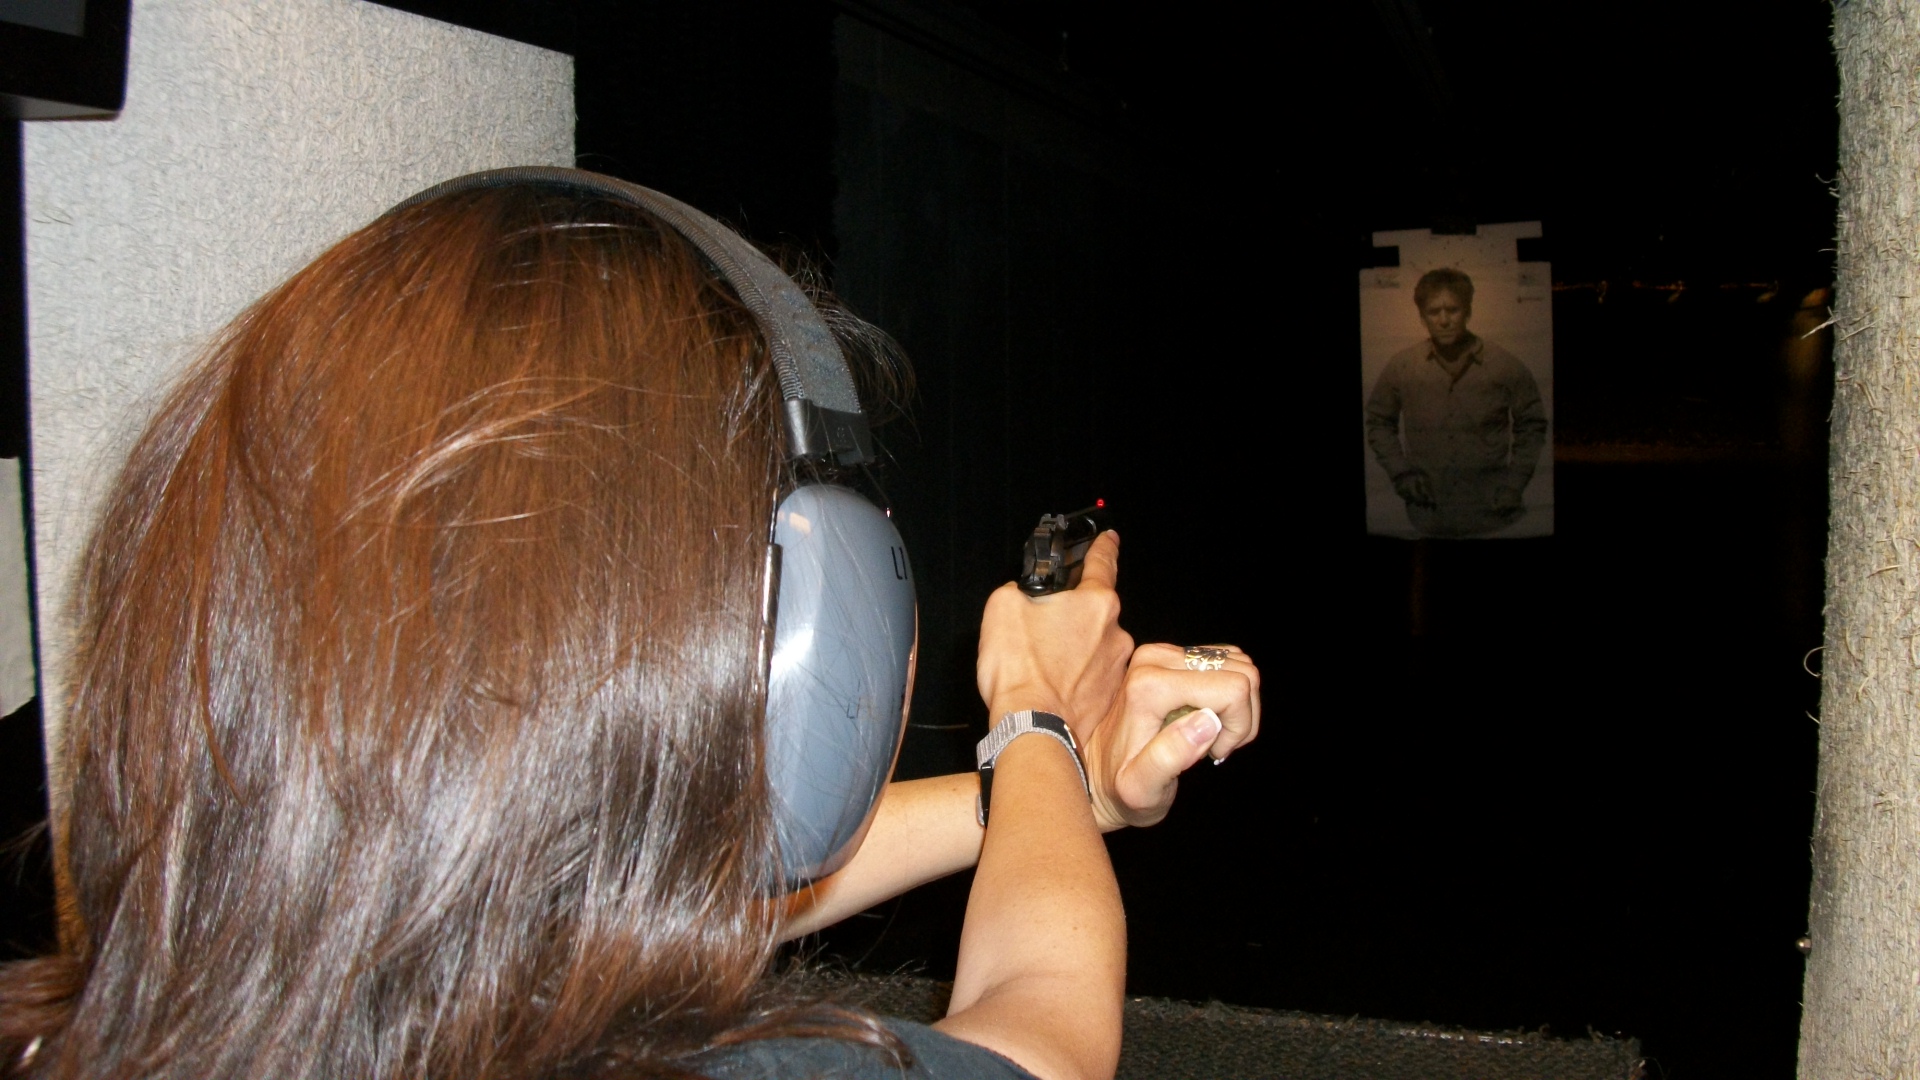
Learning and practicing those skills can help us keep a situation under control before shooting and hopefully prevent a shooting at all.
Here’s the permalink to the interview. http://content.blubrry.com/ballisticradio/140824_BALLISTICS.mp3
SCCY pistol first impression
I was given the opportunity to shoot a SCCY CPX-2 pistol today. The pistol has been of some interest to me because of its small size, double action only mechanism, and relatively low price point. Many people are price constrained about what they can buy, so inexpensive but serviceable pistols are always of interest to me.
In the past I owned a Kel Tec P11, to which the CPX-2 bears a strong resemblance. I thought the P11 had promise as a pocket pistol for me. I couldn’t have been more wrong. The trigger was so bad that I could never get a split under .50. And it had the annoying tendency to not ignite +p ammo, which made no sense to me but was a well known problem at that time. Finally, I gave up and sold it to someone who really wanted it.
So the SCCY had to have a lot better trigger than the P11 to fill the bill for me. The only real way to test that is to shoot it. Through an unexpected coincidence, a meeting was arranged with the local representative, who met us at Sandy Springs Gun Club and Range with several pistols. He had a number of guns in a large laptop bag, just like I am prone to use as a range bag. He explained some of the features of the CPX-2.
- Very important to me was that it can be dryfired, which some KelTec pistols cannot.
- It also has a second strike capability, which I like. Although the standard doctrine upon receiving a click is to tap-rack, gunowners who are not well regulated don’t know what that phrase means, much less how or when to execute it. Having a second strike capability will allow an untrained user the opportunity to simply press the trigger again and maybe get a bang.
- It’s very easy to disassemble, which cannot be said for the Kahr, another popular DAO compact gun.
- The CPX-2 has a polymer front sight and a steel rear sight, unlike the P11. The rear sight has two huge white dots on it, which are much larger than the dot on the front sight. I dislike this ‘feature.’ If I bought one, a black Sharpie would be the first thing I would put to it.
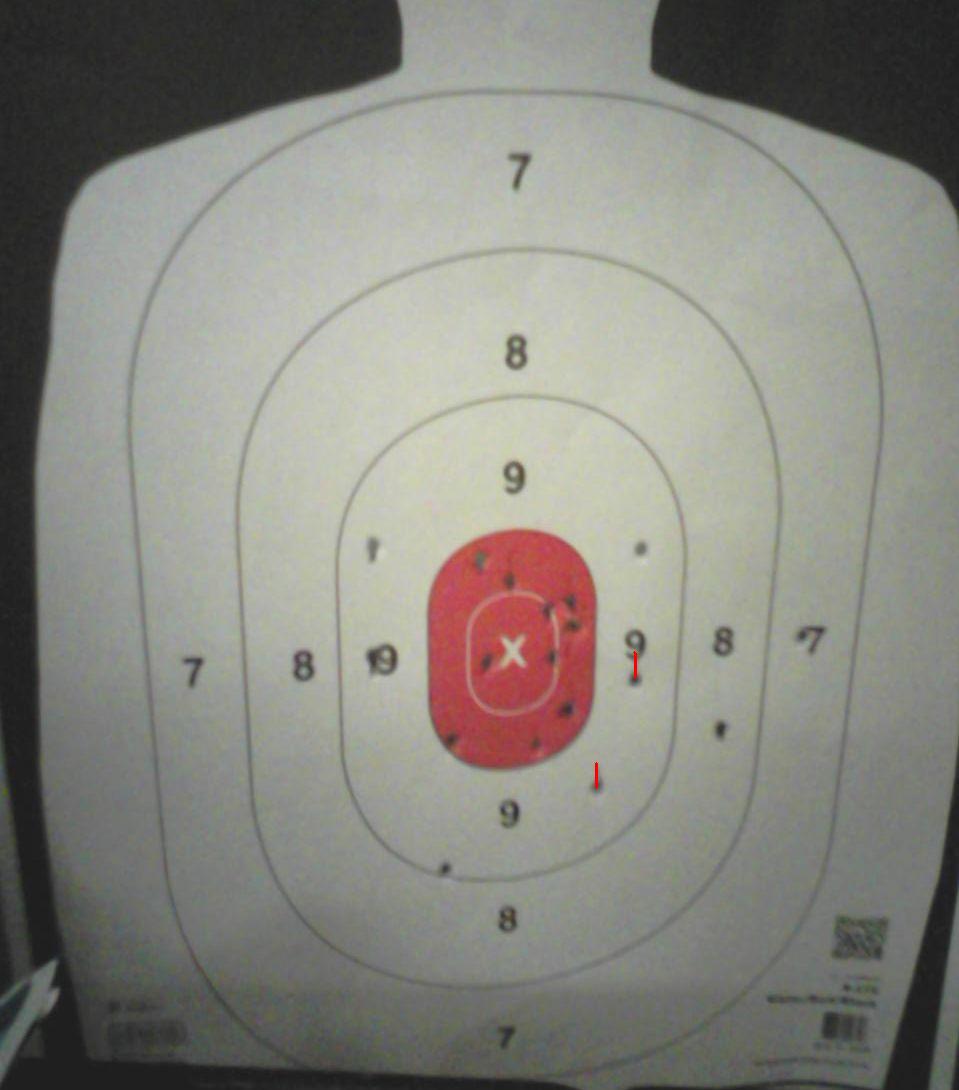
As an initial benchmark, I shot a variant of the LAPD Retired Officer Qualification Course. The course consists of 10 rounds shot at seven yards on a silhouette target. My variation is to use two magazines of five rounds each, one of which has a randomly inserted dummy round in it. Shoot five, reload five, and clear the dummy wherever it happens to show up is how I do the drill. I was easily able to shoot the course at speed with only two hits outside the 10 ring.
Although most personal protection incidents occur within seven yards or less, the need to shoot at longer distances is not unknown. My colleague Tom Givens, has documented several armed citizen shootings at distances from 15 to 22 yards, which represent about 5% of his students’ encounters.
To test the SCCY at distances like this, we set a target at 15 yards and fired a five shot group on the torso. I was able to shoot a five inch group, despite the distracting dots on the rear sight and the indoor lighting. Then I moved the target out to 20 yards and fired a five shot group at the head. Although it was only about four inches, it was centered slightly to the right of the head. I fired another group while really concentrating on the rear notch. This group was more satisfactory, with all the rounds hitting the head in a five inch circle. This exercise confirmed for me why I dislike three dot sights so much.
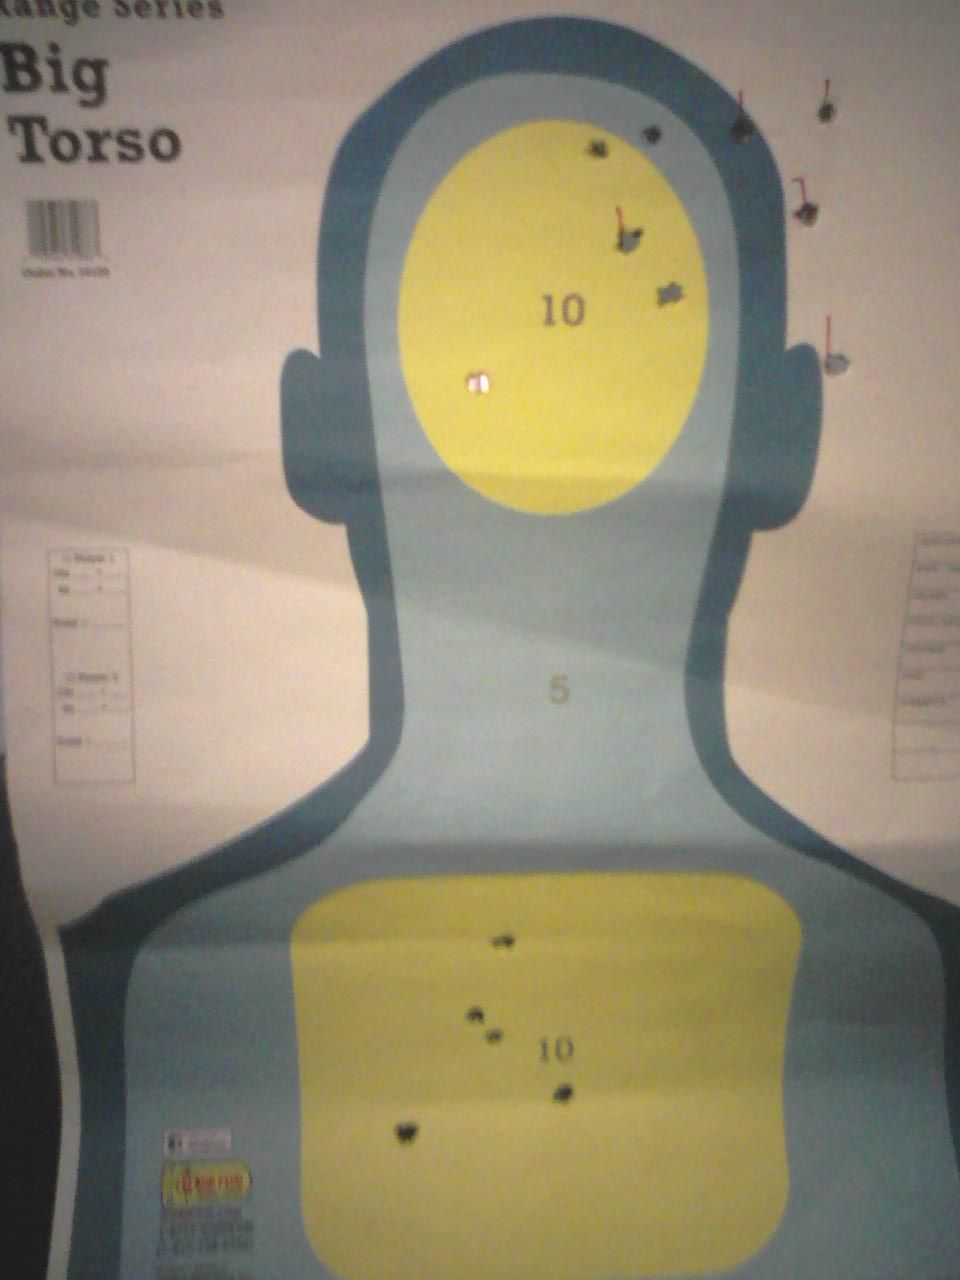
I finished by shooting five rounds at seven yards Strong Hand Only, followed by five rounds Weak Hand Only. The group was slightly larger but still acceptable.
The pistol’s handling qualities were good and we experienced no malfunctions. The only issue we encountered was with the slide failing to lock back when a friend shot the pistol also. This occurred because my friend doesn’t have the proper grip habit of keeping his thumb away from the side of the pistol.
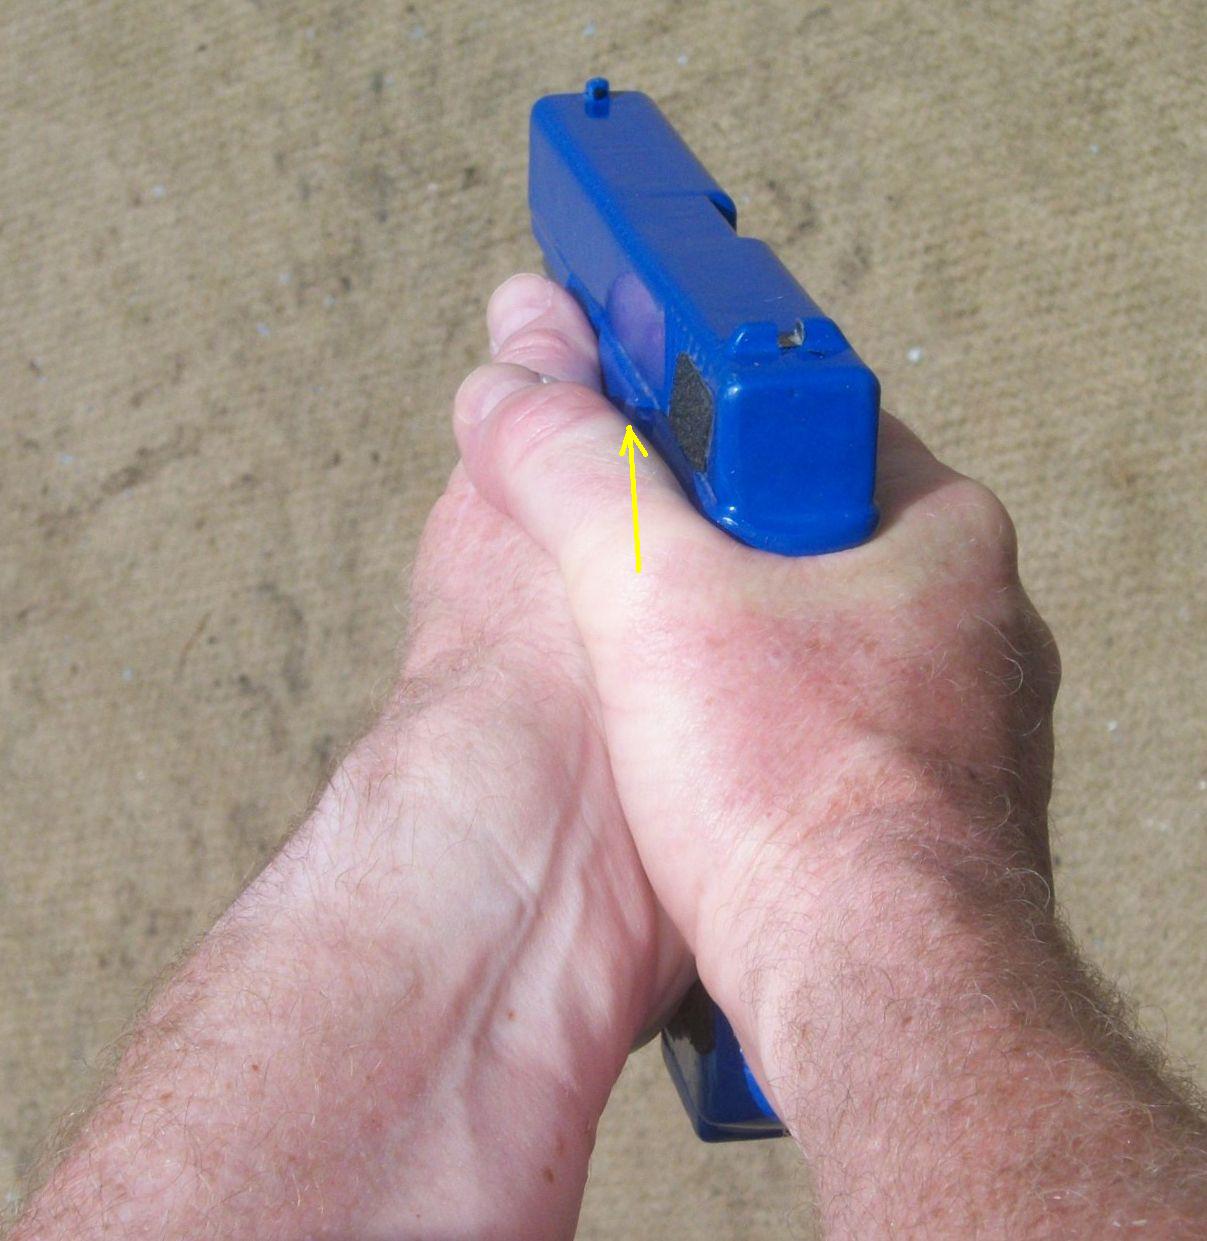
The CPX-2 has a full size ‘Slide Hold Lever’ and if the thumb is not kept away from it, the pistol is not going to lock open on the last shot. It would also be easy to bump it up if the thumb were positioned under the lever. The rep said a flat lever was available from the factory.
There is also a laser available from ArmaLaser. The laser comes on when the pistol is gripped and requires no manual pressing of activation buttons.
Overall, after 100 rounds, my impression was quite favorable for an Every Day Carry piece. I may get one and try it out in IDPA to see what I can do with it.
Ego defenses
The maximum effective range of an excuse is zero meters.
While comparing notes from our experiences at Paul-E-Palooza 2, a friend of mine noted how many excuses for poor hits he heard during the live fire block he attended. “I haven’t gotten used to the sights on my gun.” “The offset I have to use at this distance is throwing me off.” “When I shoot pistol in 3 Gun, I smoke it, but I can’t seem to hit these little targets.” Etc., etc., etc. Those are all ego defenses shooters use to avoid saying “When put to the test, it’s clear I’m not as proficient as I like to think I am.”
Let’s compare that with the Facebook commentary of a very smart and honest lady I coached a little during the same block.
After this class I had a live fire with Dr. [Sherman] House. He did dot drills and eye targets. We shot at 3 and 5 yards at these tiny targets. Fact from Dr. House, under stress your shot pattern will double in size. [So,] We might as well practice on targets 1 ¾ inches big. Out of the 30 shooters, I suck because I anticipated recoil. [Obviously, from my point of view, she was far from being the only one whose performance could stand some improvement.] I got a private lesson by “THE PROFESSOR Claude Werner”. … Professor Werner taught me to focus on a slow trigger press. [Actually, I was trying to emphasize a smooth trigger press] When Doc Werner pressed my trigger while I had the sights aligned[,] I hit the target dead center. I know what to work on. I need to dry fire weekly.
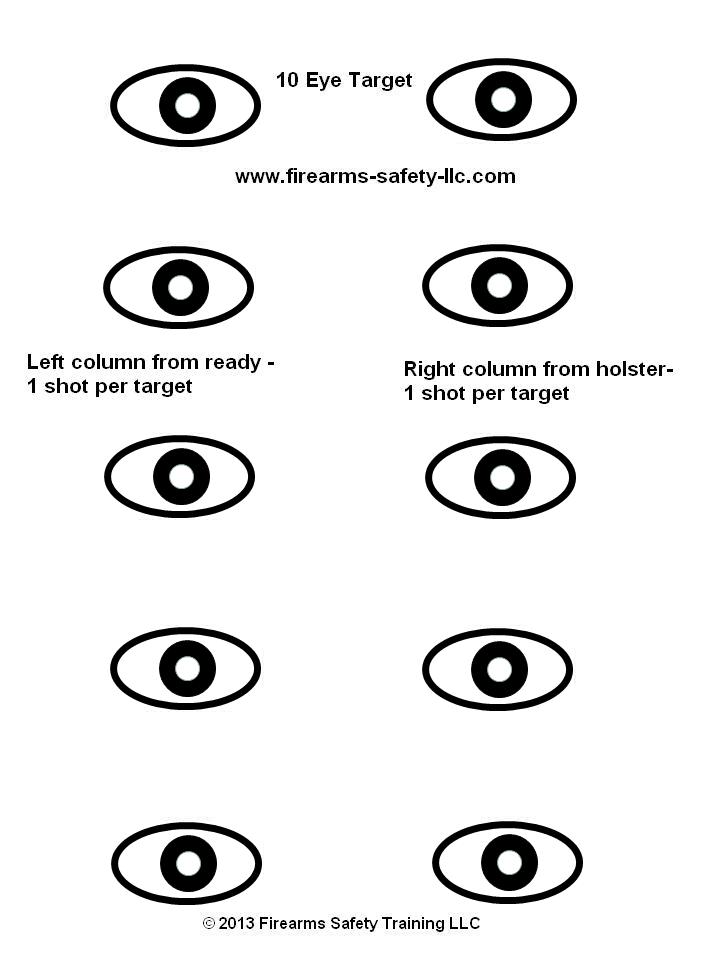
At times, we all suck, on a relative basis. The way to get past it is to figure how to “shoot better,” as Bill Rogers puts it. Then accept that we need to do some work on our weakness and get to it without using a lame excuse as an ego defense.
A little coaching can help determine what the problem is. In the above lady’s case, she was very good at using her sights; when I pressed the trigger for her, the round struck exactly where it was supposed to. She just needs to work on her trigger manipulation. She self-identified the problem and the solution. I have no doubt she will work on it vigorously.
Many shooters spend a lot of time, money, and effort refining and changing their equipment in an attempt to improve their performance. It was interesting that even at a training conference like Paul-E-Palooza, during the charity auction, ‘cool’ equipment items sold at a premium to retail while training items sold at a discount to retail. My observation is that the solution usually resides inside the shooter rather than in a hardware solution. As one of my colleagues puts it: “I have a friend who will kill you with a Lorcin and there’s nothing you’ll be able to do about it.”
Scaling targets
Math is like going to the gym for your brain. It sharpens your mind.
“Claude, how do I shrink an IDPA target so it appears as though it is 25 yards away when my dry fire range is 7 yards? Thank you.”
Many people think they will never use elementary algebra once they leave high school but sometimes it still comes in handy. The above question can be simply solved through the use of cross-multiplication.
The first part of the problem is we have to determine the ratio of the two distances and then solve for the correct size (height) of the target. The IDPA target is 30 inches tall and would be full size at 25 yards. How tall would it be at seven yards?
| Height | 30 | x |
| yards | 25 | 7 |
Cross multiplication means the product of the upper left and lower right will be the same as the product of the lower left and upper right. So, 30 times 7 will equal 25 times x. This works out to 210 equals 25x. But we only want 1x, so we then divide both sides by 25. Our answer is 8.4. I.e., a target 8.4 inches tall at seven yards will have the same size ratio as a full size (30 inch) target at 25 yards. Granted, there are depth perception and visual acuity issues that come into play but it’s an imperfect world and we just do the best we can.
The second part of the problem is to make a target 8.4 inches tall out of the images available to us. I did this using crude methods but effective. Using an IDPA target image captured from the internet, I sent it to Print Preview.
The original size was way too small so I took a guess and enlarged it to 400 percent. I then took a ruler and measured the preview pane, which was 2.25 inches tall. This makes a relationship of 2.25 inches to an actual print page of 11 inches. The target image height is 8.4 inches so the task is to find the representative size on the screen. Cross multiples again can provide the answer.
| Actual height | 11 | 8.4 |
| Screen height | 2.25 | x |
This gives us 2.25 times 8.4 equal 11x. 18.816 equal 11x. 18.816 divided by 11 gives us 1.72, the desired screen height. However, the 400 percent image on the screen only measured 1.375, so I needed to find the correct print percentage. Doing another cross-multiplication answers that question.
| Screen height | 1.375 | 400 |
| Desired height | 1.72 | x |
Solving for x gives 500 percent, which I then printed and verified.
Since I do this regularly, I have a scaling spreadsheet set up in Excel. It allows me to do this kind of scaling in less time than it probably takes to read this post.
Why I hate the -3 zone
There is no substitute for knowledge.
-–W. Edwards Deming
One of the things I enjoyed most about my time at the elite Rogers Shooting School is the intellectual caliber of people I met there, both instructors and students. There were a fair number of highly educated people who came to the School on a regular basis. One said he came every year ‘to get his speedometer reset.” Some of them continue to stay in touch and I enjoy those conversations.
I recently received an email from a physician, who is an annual student, relating to some target design work I had been doing. He sent along his analysis of the IDPA target, based on the “ANTHROPOMETRY AND MASS DISTRIBUTION FOR HUMAN ANALOGUES,” which is the medical profession’s way of saying the dimensions of the human body.
He included a diagram of issues with the IDPA and IPSC Metric targets in relation to the actual size of the average male American. His diagram resonated with me because, for a long time, I have called the -3 zone of the IDPA target “the lawsuit zone.” The reason I say that is that the target is so large by that point that no part of the person’s body is actually going to be there. So a bullet striking that area would, in fact, just sail off into space. Most likely, it will strike “a busload of nuns and orphans being followed by a limousine full of personal injury lawyers having a conference call with the District Attorney.”
The anatomical analysis he did caused me to do some further research in the anthropometry document to create my own diagram. As I did so, it confirmed another unusuality of the targets; they have no neck. The head zone is not too bad of a match for the area of the male head from the eyebrows to the tip of the chin, especially if he has a jaw like Clutch Cargo, but there’s just no neck.
Visual indicators tend to convey information best, so I created a target image with colors to demonstrate the issues I noted.

Disregarding the head aspect, there were several things to be observed.
1) The -3 zone, or the D zone of the USPSA Metric, on the sides of the target is basically where a man’s arms are when they’re hanging by his side. A man holding a weapon at or near eye level would not have anything there below a line approximately even with the middle of the -0 zone. I marked this area in red on my target depiction.
2) The area of the -3 zone below the -1 zone very closely aligns with the area of the male body below the waist. I’m unenthused about that as a targeting area for reasons that will become obvious further on. That area is shaded in pink on my target image.
3) From about two inches above the bottom of the -0 zone down to the bottom of the -1 zone corresponds generally to the area from the xyphoid process to the waist. Emergency room physicians have told me that they consider this entire area to be an abdominal wound and not nearly as serious as a wound in the torso above that line. The yellow striped area on my image shows that zone.
4) Finally, by process of elimination, the area I shaded in orange is where all the “good stuff” is, as one physician put it to me. This is the area of the torso where a bullet has the best probability of quickly stopping a deadly threat to one’s life. Note that this area goes all the way up to the neckless chin.
My image is really a ‘best case’ example. To get an idea of what a true anatomical overlay would look like, my surgeon friend subsequently sent me a couple more images. Since he’s a physician, they’re much more illustrative than my drawing is. He overlaid them on the IPSC Metric target, but for the purposes of this discussion, the -3 and D zones are interchangeable. Note also that the -1 zone or C zone is no great shakes as a targeting area, either.


Note on the gross anatomy target that my yellow striped area corresponds to the infamous “gut shot.” While a serious wound in the long term sense, its ability to stop criminal action quickly is quite suspect.
Several articles have been written describing the geometry necessary to figure out where the vital organs are. Running a geometry problem in my head while someone is trying to do me serious bodily injury seems a bit much. However, I think an understanding of what actually constitutes the “high center chest” is useful. This is especially true since the IDPA and IPSC Metric targets are very commonly used in training classes.
And that’s why I hate the -3 zone. When I ran the Georgia State IDPA Championship for several years, I painted black over the -3 zone of all the targets so hits there would be scored a miss (-5). It caused a certain amount of grumbling but I really think people need to be confronted with the realities of personal protection.
Teaching the Snub Nose Revolver
No possible rapidity of fire can atone for habitual carelessness of aim with the first shot. —Theodore Roosevelt, (26th President of the United States) The Wilderness Hunter, 1893
Last night I taught my ‘Introduction to the J Frame Revolver’ class. It’s probably the last time I’m going to teach it; the market just isn’t there anymore and it’s hard to get much enrollment.
However, I’ve been teaching the snub heavily since before 9/11 and think I’ve evolved a very workable program. There are still many people who have snubs and some of them may be interested in knowing what they’re doing with it. To that end, I’m going to post my entire Program Of Instruction for anyone who wants to use it. The live fire portion is exactly 50 rounds. What I found was that casual shooters of the snub tend to experience a noticeable dropoff in performance after 50 rounds, so I cut it down to that.
Course Overview – A skill builder short course particular to 5 shot revolvers.
The intent is to show basic techniques and give a methodology for subsequent practice. “I cannot make you an expert in three hours but I can show you what to do and how to practice to increase your skill.”
Methodology
• Explanation of strength and weaknesses of the snub
• Demonstration of proper grip for revolvers. Some modification may be necessary based on an individual’s hands.
• Show different kinds of grips that can be installed on a snub to better fit a person’s hands.
• Explanation of sighting techniques and how range affects them
• Disciplined learning exercises, including ball and dummy and dryfire
• Ball and dummy is achieved by opening the cylinder after a few shots, spinning it, and then closing it without looking where the fired case(s) end up. Do this once or twice per cylinder.
• Concludes with a Qualification Course because everyone should have a benchmark of where they are. Shooters should also be able to demonstrate in court that they have a measureable degree of competency.
Snub Revolver Intro Class Practical Exercise (single relay)
Six Circle w/dot target (5 yards)

1) Demonstrate how to load with loose ammo and explain why that’s important.
2) Explanation of Spot shooting and how to pick a spot on your target
3) On top left row, fire a 5 shot group.
a. Dryfire
b. Livefire (5/5) (Spin cylinder 2X)
4) On center left row, from high ready, fire 1 shot 5 times
a. Dryfire
b. Livefire (5/10) (Spin cylinder 2X)
5) Explanation of proper drawstroke
6) On bottom left row, draw and fire 1 shot 5 times
a. Dryfire
b. Livefire (5/15) (Spin cylinder 2X)
7) On top right row, from high ready, fire 2 shots 2 times
a. Dryfire
b. Livefire (4/19) (Load with four plus fired case, spin cylinder)
8) On middle right row, draw and fire 2 shots 2 times
a. Dryfire
b. Livefire (4/23) (Load with four plus fired case, spin cylinder)
9) On bottom right row, from high ready, fire 5 shots 1 time
a. Dryfire
b. Livefire (5/28)
Tape hits outside of circle (this wasn’t necessary because the class was hitting pretty well)
10) On top right row, fire a 5 shot group, strong hand only.
a. Dryfire
b. Livefire (5/33) (Spin cylinder 2X)
11) On middle right row, from high ready, fire 1 shot 5 times, strong hand only.
a. Dryfire
b. Livefire (5/38) (Spin cylinder 2X)
12) On bottom right row, fire a 2 shot group, weak hand only.
a. Dryfire
b. Livefire (2/40)
Change targets [B-27]
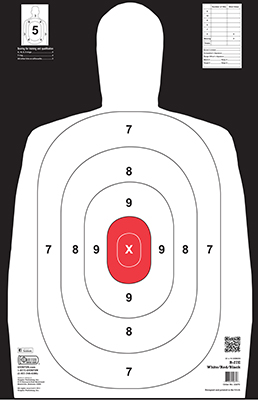
13) Shoot the LAPD Retired Officer Qualification Course
a. “The starting position for this qualifying course of fire will begin at the 7 Yard Line. When the target faces, the shooter will draw and fire 10 rounds at a single silhouette target. A score of 70 percent is required to pass the qualification. All rounds impacting anywhere on the body and head will receive full value and rounds impacting upon the arms are half value.” (10/50)
b. I chose the LAPD Retired Officer Course because the LAPD is a respected law enforcement organization, known for its emphasis on firearms proficiency. Since the LAPD considers this Course sufficient for its Retired Officers to demonstrate their ability to defend themselves, I think it’s a good choice for Armed Citizens, as well.
14) Record Student Performance on Qual Course.
15) Show various types of speedloaders and speed strip, where to get them, and how to use them. Explain strengths and weaknesses of each type.
a. HKS
b. Safariland
c. Jet Loader
d. SL Variant
e. Dade
f. Speed-Strips and Tuff-Strips
16) Explain idiosyncrasies of pocket holsters and how to use them correctly.
Adjourn to classroom to award certificates.
Pass out Armed Citizen Legal Defense Network booklet What Every Gun Owner Needs to Know About Self-Defense Law
Conclude with the message that we are more likely to be injured or killed in a car wreck than by a criminal. Mention that a Defensive Driving Course costs only $35 in Georgia and auto insurance companies are required to lower your insurance premium by 10% for taking it.
Some of the coursework is shown on the Personal Defense Network DVD Fundamental of Snub Nosed Revolvers for Defense
Gunhandling
Marksmanship, gunhandling, mindset. –The Combat Triad originated by Jeff Cooper.
I had two interesting experiences relating to gunhandling last week. Gunhandling is an often overlooked component of the Combat Triad.
The first was the result of shooting the Swiss concealed weapons qualification test. A friend of mine lives there and recently obtained his license. The Swiss don’t have a training requirement, per se; rather they have a testing process consisting of a written test on legal aspects and a practical test (what we would call a qualification course). They are both administered by the Swiss Polizei. The written test must be passed before the practical test can be taken.
He sent me the qualification course that is required to get the license. The material he sent me is in French, so I may have mistranslated it, but I believe all the strings start with empty chamber. Since whether to carry with a round in the chamber or not is frequently a topic of discussion among new weapons carriers, I decided to shoot it that way even if my translation was incorrect.
The course is shot at 7 meters, 5 meters, and 3 meters. At each distance, three strings of two shots each are fired. The time limits are 4.0 seconds, 3.5 seconds, and 3.0 seconds for each string, respectively. Each string starts with the pistol holstered and concealed. The target is a silhouette with a bottle shape on it, which appears to be roughly the size of an FBI ‘Q’ or the IDPA -0/-1 zone. The Swiss score this with a points system. Shots in the bottle count as one point, shots on the silhouette outside the bottle receive zero points, and shots that miss the silhouette result in a one point penalty. Shots over the allotted time also received one penalty point. Fourteen points are required to pass the test.
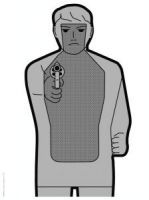
To get an initial feel for the difference between chamber empty and loaded chamber start, I did five one shot unconcealed draws using each technique. Overall, chamber empty was slower to the tune of .48 seconds average. I was shooting my Beretta 92G Centurion from a Safariland 567 open top holster.
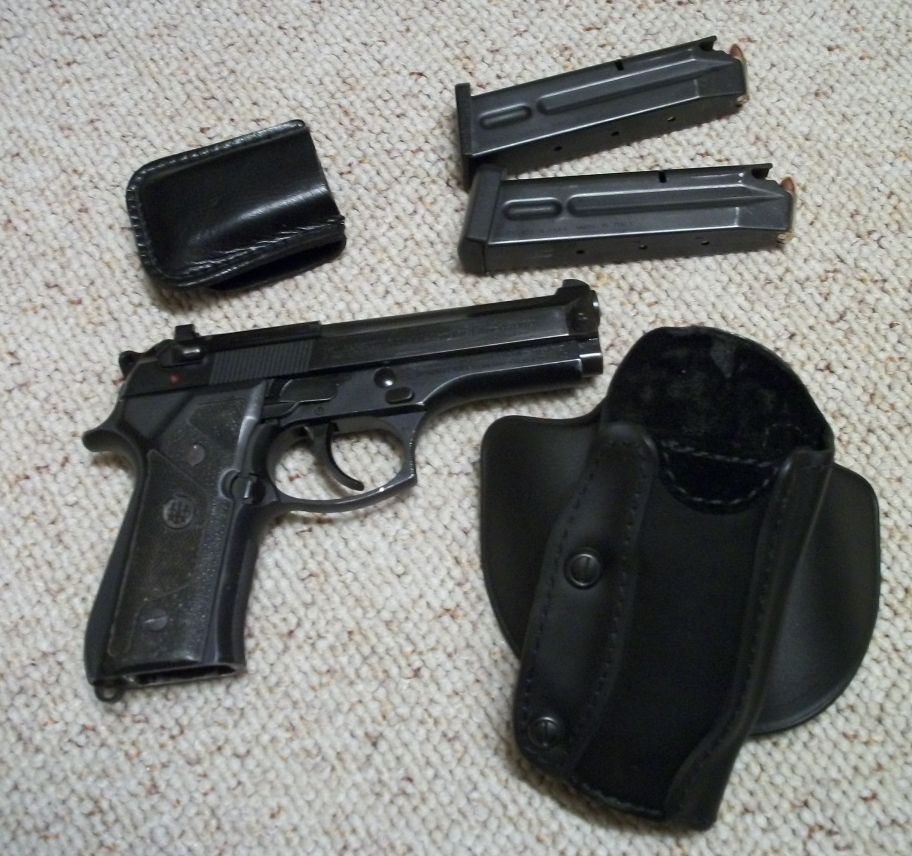
Having established a baseline difference, I proceeded to shoot the Swiss qual course twice, once with the chamber empty and once with a loaded chamber. I used the same gear but also my favorite concealment vest, a construction worker’s fluorescent vest. What I found was that chamber empty was not only slower (0.48-0.67 seconds) but somewhat less accurate than having a round in the chamber. I had to work really hard to get the front sight on target after loading the chamber. Unlike a smooth loaded chamber drawstroke, there’s a lot of rotational movement of the pistol going during the period of driving the gun to the target. I didn’t have any trouble making the times, but it’s not exactly a cakewalk, either. Not long into the course, the safety ears were beginning to hurt my fingers, which may have had some effect on the results, too.
Unchambered
Distance 1 2 3 Average
7m 2.84 2.67 2.77 2.76
5m 2.50 2.60 2.47 2.52
3m 2.17 2.46 2.07 2.23
Years ago, I took a pistol course from Kelly McCann. He said that the Israelis just accept that they are going to throw away the first shot when using the chamber empty technique. After doing this exercise, I can see why. With all the gun movement, and if using the strict Israeli technique, 90 degrees of rotating of the gun, it’s hard to get even the muzzle indexed on target, much less get the front sight on it. Notice also the inclined to the low left classic group, indicating the trigger jerking that was going on. I expect this is because of the amount of complex (gross simultaneous with fine) motor skills that are involved.
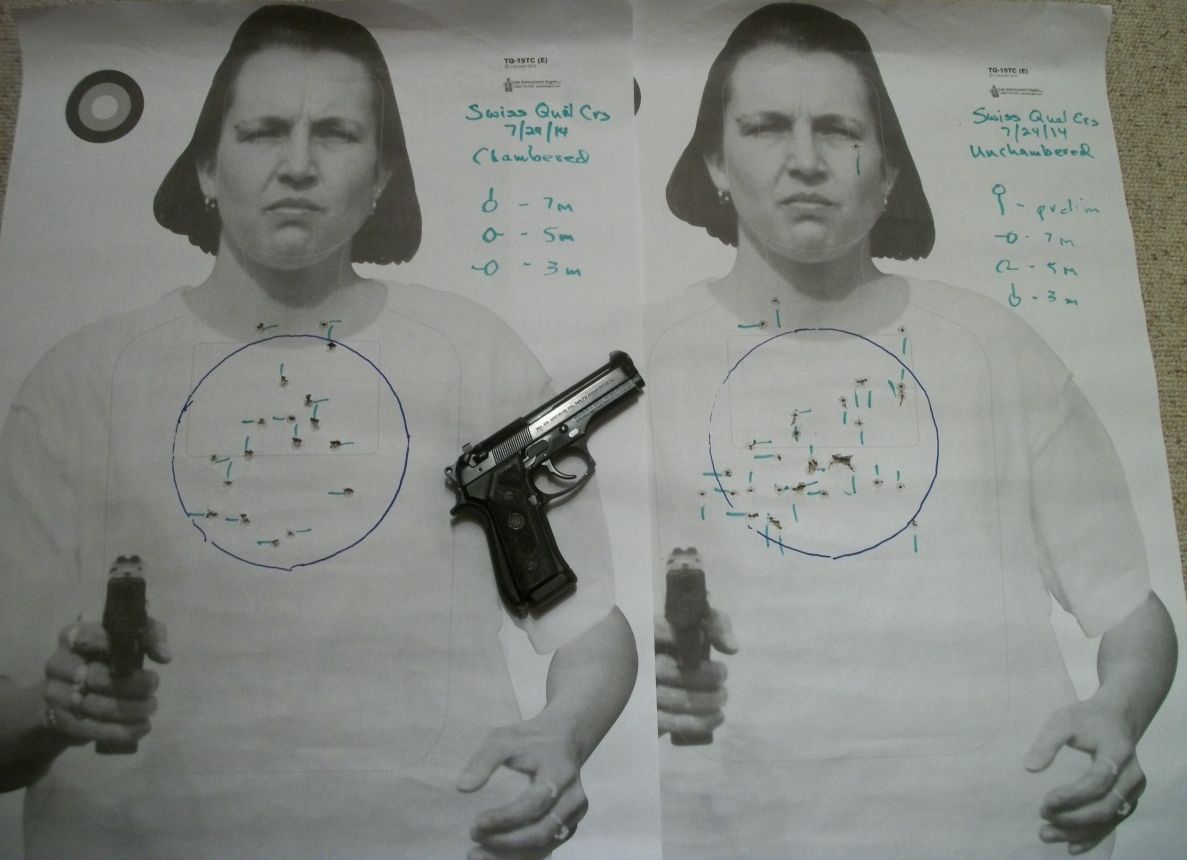
Note that I drew the IDPA -0 zone on the target after the shooting for analytical purposes.
The second observation occurred at an indoor IDPA match. There was a blind stage in which the shooter’s gun had a dummy round randomly inserted in the magazine, without being told it was there. While this isn’t strictly legal for IDPA, it did provide an interesting laboratory when watching the shooters’ reactions. I watched about 20 iterations of the stages, so it gave me a decent view across the range of shooter abilities, Novice through Master.
There was a wide range of reactions. Unfortunately, many people were positively flummoxed upon encountering the click. They would just look at their gun and not do anything. The Safety Officer had to tell several to 1) clear the malfunction and 2) how to do it. What I found disturbing was how many people immediately ejected that magazine and reloaded with a fresh one. The follow-on action to the reload was about evenly divided. Half would then work the slide to eject the dummy and resume shooting. The other half would attempt to fire the pistol again without clearing the dummy, which resulted in nothing happening. Then they would work the slide and resume shooting.
After the initial malfunction, which was set up to occur within the first few rounds, many shooters experienced a series of subsequent malfunctions. I wondered about this, so I asked the Safety Officer who was placing the dummy if he was doing anything else to their guns to mess them up. His answer was: “The first one is on me, the rest are all them.”
So, having a malfunction early in the string then produced a cascade of malfunctions for some shooters. Perhaps, this was due to grip issues or incorrect shooting posture, I’m not really sure. Observing this phenomenon gave me some serious food for thought. It’s well known that I don’t think spare ammunition is as necessary for Armed Citizens as is often made out to be the case. But if someone’s first reaction to a malfunction is to jettison their only magazine, that could be a big problem.
These two sets of observations reinforce to me that those who carry or keep pistols for personal protection need to do more practice than simply go to an indoor range and shoot a box of ammo periodically. Pistols are complex mechanical devices that require proper manipulation skills as well as acceptable marksmanship ability. I will talk about practice possibilities in the future.
 tacticalprofessor
You must be logged in to post a comment.