A Clarification
Brian Hill of The Complete Combatant likes to call me ‘The Clarifier.’ However, I apparently have slipped up on that. I received the following question today, via email.
“Comment: Is your “Concealed Carry Skills and Drills” ebook available and downloadable in PDF?”
Yes, it is.
The link to the ebook on my store is Concealedcarryskillsanddrills.com
Clicking on the above link will take you to where the ebook can be purchased. A download link will then be sent to your email. Clicking on the download link will send the PDF of the book to you.
My other ebooks are available by clicking on this link. Claude Werner’s ebooks. The Flashlight practice session of Indoor Range Practice Sessions is available there for FREE because I believe every gunowner should have some familiarity with how to use a flashlight in conjunction with their pistol. It could prevent the Negative Outcome tragedy of shooting a family member or someone else who shouldn’t be shot.
I hope that clarifies things.
The Origin and Evolution of Dot Torture
Dot Torture is a well known practice regimen among skilled shooters. Its origins and evolution are less well known, however.
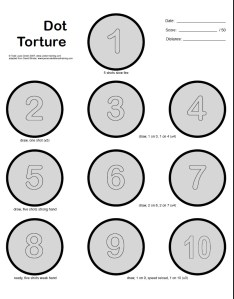
Shooting on dot targets, i.e., small filled in circles from 1.25 to 5.54 inches in diameter, as a speed shooting training and practice exercise, was originated by John Shaw, a World Champion shooter, in the early 1980s. In his book, You Can’t Miss: The Guide to Combat Pistol Shooting, he explains the training standard he established for his students. Until they could consistently hit the black bullseye (5.54 inches) of an NRA B-8 bullseye target from the holster in two seconds at seven yards, he didn’t allow them to move on to more advanced drills.
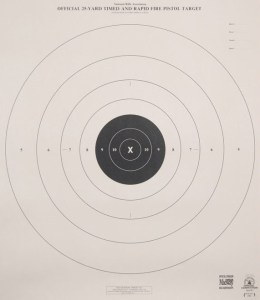
Shaw’s school, the Mid-South Institute of Self-Defense Shooting evolved the concept of dot shooting to a high level. Combined with shooting at steel targets, as originated by Bill Rogers, founder of the elite Rogers Shooting School, dot shooting became a standard component used in the practice regimens of knowledgeable shooters who aspired to a higher level of competency.
The concept of dot shooting was so effective at teaching shooters to hit the target, it quickly became part of military counter-terrorist pistol training. The US Army Special Forces developed a course called ‘Special Operations Training’ [SOT] during the 1980s to train its personnel to use the 1911 pistol at a level not seen before that time in the military.
Concealed Carry Skills and Drills – The Book
It’s finally done. My new book about Skills and Drills for those who Concealed (or Open) Carry. The book is based on my analysis of over 5,000 incidents involving Armed Citizens who successfully defended themselves and their loved ones.
Concealed Carry Skills and Drills book
Introduction
This book was designed to fill a need. For many gun owners, training is a resource intensive activity that they have difficulty affording in terms of time, money, distance, etc. Introductory Concealed Carry licensing classes generally focus mostly on legal aspects and non-shooting tasks such as situational de‑escalation. The only shooting task, if any, involved in a licensing course will usually be a ‘qualification’ or evaluation of the shooter’s ability to perform to an established standard. In most cases, that standard is quite low but it is still intimidating to many.
The gunowner is thereby placed in an unenviable situation. First, having to learn to shoot prior to attending a licensing course. Even with some instruction, which will often be informal by a friend or relative, this can be a difficult task. Second, assuming the person passes the licensing ‘qualification,’ they often ask the question “What do I do next?” The standard response is “Get more training.” Since spending a day or a weekend at a remote location ‘getting more training’ doesn’t fit into most people’s resource constraints, they simply choose not to unless it’s required at license renewal time.
Gun ranges are not ideal learning environments. Trying to get even informal instruction from someone else when people are shooting on either side of you is rarely productive. The question of what are appropriate tasks to learn and how do we practice them comes next. How do we make the best use of our limited resources at the range is another question. The horrible visualization on TV and in movies of what shooting looks like is non-helpful at best and destructive of proper conceptualization and skill development at worst.
Self-Study is an activity most of us are used to. It is how we often learn to drive a car and perform many other physical and athletic tasks. Not many people who play sports have ever been to a sports training camp. They just go out and practice the activity, play the game, figure out their weaknesses, and then practice some more.
The difficulty of Self-Study with firearms is the question of how to do it safely and properly. Guns are esoteric tools that are not intuitive to use. We have no instincts that prepare us for having explosions repeatedly go off two feet in front of our faces. Few other tools we use have the capability to cause instant death during a moment of ignorance or carelessness.
What this book provides is a guide through the process of improving your shooting skills on your own in the context of Personal Protection. Guided training with a competent instructor is still the best way to improve your skills and will yield the best results. However, an intelligent person who can follow directions can still learn a great deal on his or her own, given a suitable program.
This book is not a guide to becoming a Champion shooter or being able to shoot like a member of an elite military unit. What it can do is help you to become a safer, more competent shooter who can focus your cognitive abilities on the situation, instead of the gun, during a criminal encounter. It is also an excellent reference for more experienced shooters providing informal training to new shooters.
There are 30 different drills in the eBook. They focus on building Concealed Carry skills from the ground up and then refining them. The drills are structured in a stair step approach starting at a level that a new shooter can achieve and then work to a greater degree of difficulty and achievement. Different types of drills are coordinated to build a variety of skills at the same time.
The vast majority of Personal Protection incidents are simple, if rather frightening, events, and are quickly solved by untrained inexperienced persons. The issue is that if an incident goes wrong, it tends to go horribly wrong, a NEGATIVE OUTCOME. The odds are low but the stakes are very high. Helping the Armed Private Citizen stack the deck in their favor is the object of this book.
Armed Citizen® – July 2018 Analysis – Part III
Posts Part I and Part II broke out the circumstances and tasks of the incidents of this month’s (July 2018) Armed Citizen® column. Today let’s discuss the implications of the circumstances and tasks for those who own firearms for personal protection.
The most common task (all six incidents) accomplished was:
- Retrieve the firearm from storage.
There were no incidents this month in which the firearm was carried on the person’s body. This is a subjective call on the part of editors as to which of the plethora of Defensive Gun Uses to include in a monthly column. However, only 6 percent of the adult population has a license or permit to carry a weapon outside the home, according to John Lott’s Crime Prevention Research Center. It’s also commonly acknowledged that among those who have a license or permit to carry, actually carrying on the person is sporadic, at best. Accordingly, it is not surprising that the majority, perhaps vast majority, of Defensive Gun Uses do not occur in public places.
One implication of this fact is that a certain amount of emphasis should be placed on retrieving a firearm from its actual storage location, be it home or vehicle, and then putting it into operation. This is especially true if the firearm is kept in some sort of safe, whether it is large or small. If an autoloader is stored with the chamber empty, the need to be able to place the weapon into a fully fireable condition is also implied. Avoiding Negligent Discharges in the process is desirable.
Myths and Misconceptions
I was privileged to be the Guest Speaker at The Mingle 2018, a firearms community networking event this past Saturday. My topic was Myths, Misconceptions, and Solutions in the Firearms Training World. There is such a myriad of examples that I have decided to start writing #mythsandmisconceptionsmonday. I would like to acknowledge the influence John Farnam, Greg Hamilton, and Craig Douglas have had in the development of my fascination with the topic.
The misconception that resonated the most with the audience was Training is not an event, it’s a process. Too often in the training community, we put on a training event and our clients then leave with the impression they are ‘trained.’ Nothing could be further from the truth. Training is only the preparation for practice.
The Woman’s Gun Pamphlet
The Woman’s Gun Pamphlet came up in conversation during The Mingle yesterday. Since the original source is no more, I’m republishing this post for interested parties.

Through an oblique reference, I recently found a link to The Woman’s Gun Pamphlet.Edit: The link and the server appear to be gone. A PDF of the Pamphlet is available at the edit of this post.
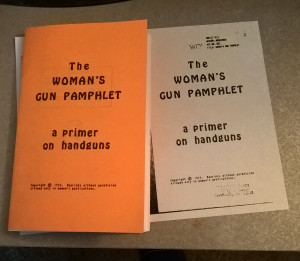
It’s a very interesting publication that was written and published by a colloquium of radical feminists in 1975. The intent was to provide information about both guns themselves and about personal protection attitudes to women of that era who knew nothing about guns or personal protection. As such, I consider it an historically significant document. There’s quite a bit of political rhetoric in it but also a goodly amount of information. Even dry practice is touched on. Some morsels of dry wit are quite entertaining.

Especially interesting to me is that it was written from the perspective of self-taught women of the time with some input from men and by doing primary…
View original post 239 more words
Why we wear caps on the range
The reason we wear caps on the range is to keep brass from hitting our faces. Especially to avoid having brass get behind your glasses and burn your face. I forgot to wear my cap two days ago and a piece of .22 brass got behind my glasses.
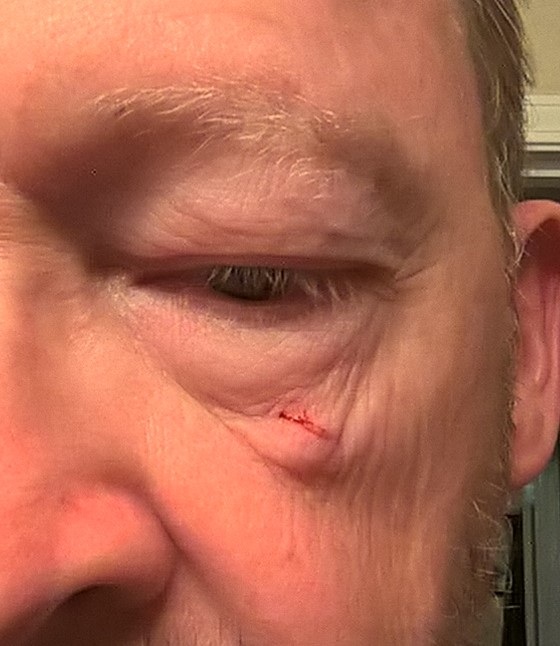
As you might imagine, it was painful. Fortunately, I maintained my composure and didn’t muzzle my friend who was with me. Wear your safety equipment, including a cap. Nonetheless, be mentally prepared to get burned by brass, maintain your composure and your muzzle discipline.
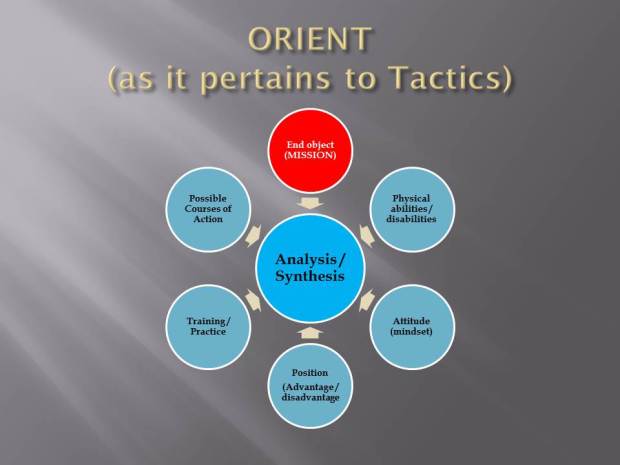
Another visit to John Boyd and OODA
A friend of mine shared a memory of this article on Facebook. I’m glad that he did.
I’ve evolved my thinking about Orient to include more nuance but the article is still a good primer on the depth of Boyd’s concept and how we can and should apply it.
“Orientation is the schwerpunkt [focal point]. It shapes the way we interact with the environment—hence orientation shapes the way we observe, the way we decide, the way we act.”
— John R. Boyd, Organic Design for Command and Control (1987)
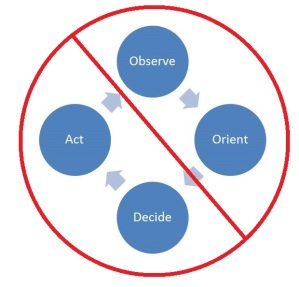
And please keep in mind that it does a disservice to Colonel Boyd’s ideas when they are reduced to a simplistic four point circular diagram.
How much does barrel length matter?
The timer and the target sometimes tell interesting and unexpected tales. A long held opinion is that a longer barrel is easier to shoot, both in terms of accuracy and shot to shot recovery, than a shorter barrel. For #wheelgunwednesday, I decided to put this theory to the test. Several different revolvers of varying frame sizes, weights, and barrel lengths were used to shoot a standard drill and compare results.
Justin Dyal wrote an article for SWAT Magazine about a drill he created called Five-Yard Roundup. It was used as the semi-final test at the Rangemaster 2018 Tactical Conference. Especially in the context of snub revolvers, it’s a good test of skills that may be required for personal protection.
Wheelgun Wednesday
For some reason, #wheelgunwednesday had never crossed my radar before yesterday. Viewing this as a serious deficiency on my part, I decided to shoot the IDPA 5×5 Classifier with some revolvers. It’s a 25 round Course of Fire shot entirely at 10 yards.
I like the 5×5 because it’s five shot friendly and is a demanding skill drill. As some shooters have observed, the IDPA 5×5 is not as easy as it looks. It shares this in common with the 5^5 drill that I designed.
Whenever a Course of Fire is shot repeatedly, there’s a ‘training effect.’ This means that simply understanding the sequence helps the shooter do better. Since I was shooting service revolvers down to Airweight J Frames, I chose to bias the training effect in favor of the J Frames, which are inherently harder to shoot. The order I chose to shoot the wheelies was:
- Model 66, four inch (.38 Special)
- Model 65, three inch (.38 Special)
- M&P 5 screw, 2 inch (.38 Special)
- Model 640-1, 2 ¼ inch (.38 Special)
- Model 36-1, 3 inch (.38 Special)
- Model 642-2, 2 inch (.38 Special)
- Model 30, 3 inch (.32 S&W Long)
- Model 432PD, 2 inch (.32 S&W Long)
Shooting the guns from heavy to light also helped keep me from getting beaten up by recoil early in the process. I’m glad I approached it that way.
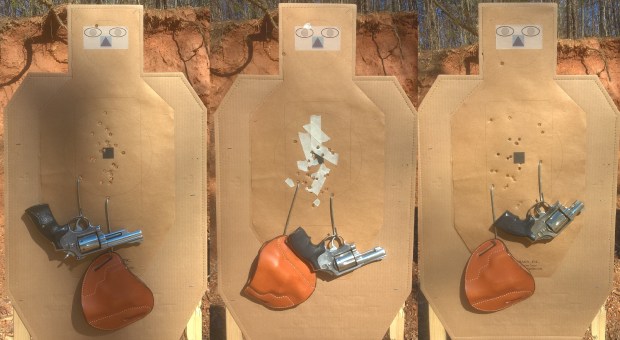
For the K Frames, I used the KIS “Keepin’ It Sippel” holster from Leather Creek holsters. It’s a very comfortable holster that distributes the weight of a service pistol well on the belt and allows a quick presentation. For the reload on String 3, I used a Safariland Comp II speedloader and pouch. When I bought the M&P 5 screw, it had the half moon front sight that was commonly used in the pre-1950s era. This is not an easy sight to see, so I flattened the rear with a file, serrated it, and painted it fluorescent orange with a white undercoat. All of the K frames also have had the rear sight blackened with a Sharpie to provide more contrast and reduce glare.
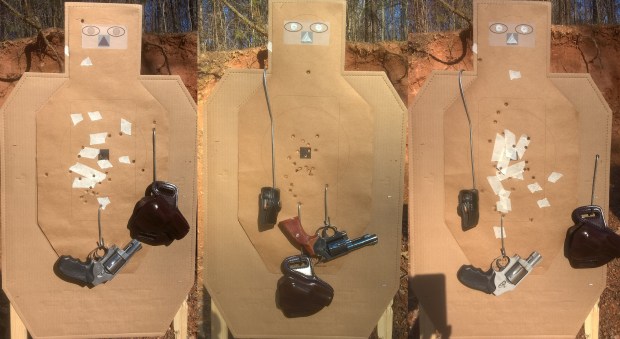
For the J Frame .38s, I used a Galco ‘Concealable’ holster. The forward molded design makes it very comfortable because it doesn’t press on my hip bone at the four o’clock position. Reloading was done with a Safariland Comp I speedloader and pouch.
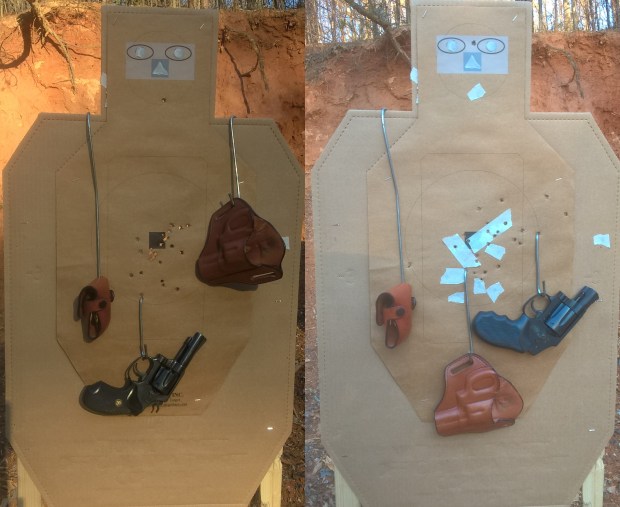
For the J Frame .32s, I used a Bianchi Model 57 ‘Remedy’ holster. This is also a comfortable forward molded design. Reloading was done with an HKS 32-J speedloader and Bianchi pouch.
The ammo used was mostly Tula 130 grain FMJ .38 Special. I can’t recommend this ammo. Probably because of the steel case, it’s very difficult to extract. Most of the time, I have to use a rubber mallet to give the extractor rod a whack to eject the cases. I bought a case of it and when it’s used up, that’s the last I will ever buy. When the stage required a reload, I started with Federal American Eagle 130 grain FMJ, which extracts easily.
In the .32s, I used Georgia Arms .32 S & W Long 85 grain Jacketed Hollow Point and Fiocchi 97 grain FMJ. They both shoot to similar point of impact and proved reliable in the .32s.
#wheelgunwednesday, it’s going to be more of a habit from now on.
Note that the holsters were provided to me at no cost by the manufacturers but I receive no compensation for my evaluation.


You must be logged in to post a comment.