The Value of Spot shooting
#Fridayfundamentals
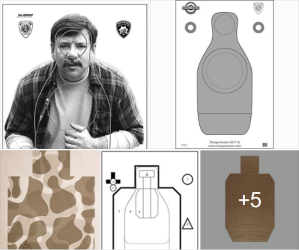
A friend of mine asked an excellent question on Facebook. “If you were going to pick a target for general training purposes, which of these nine would it be?” He included a photo array of commonly used silhouette targets.
My reply was:
Since I am a believer in and practitioner of spot shooting, there’s [sic] none of these I find particularly appealing.
The Basics and Beyond
#Fridayfundamentals
The NRA Basics of Pistol Shooting course qualification has changed in the past few years. The old standard was to be able to hit a paper plate at 15 feet. The new standard is 5 shots/5 hits into a 4 inch circle at 10 feet. It must be done 4 times to qualify at the first (Red) Level. The tries do not have to be consecutive. Additional qualifications at 15 feet (White Level) and 20 feet (Blue Level) are available for those who pass the Red Level. There is no time limit. This is deceptively simple but many people who think they can shoot to this standard cannot.
Here is a target that you can download to try it out for yourself. It’s printable on standard printer paper.
4 inch circles with one inch centers portrait
You should be able to make the five hits in four consecutive tries at all three distances if you consider yourself a proficient shooter. If all the rounds don’t hit the circles in four consecutive tries, then dry practice all 20 cycles at the distance you didn’t make it. The dry practice should help you tune up your sight picture and trigger manipulation. After the dry practice, reshoot the stage at that distance. This totals a minimum of 60 rounds of disciplined fundamental shooting.
Putting the Qualification on Steroids
After you are able to successfully complete all three levels (Red, White, and Blue), you may want to really challenge yourself. Here’s the qualification on steroids using the downloadable target.
Start at 10 feet (Red Level). Shoot one shot into each circle as five separate strings. String one starts on circle one. String two starts on circle two. String three on circle three, etc. Finish with String five starting on circle one.
Putting it on steroids will teach you the visual patience to make sure your sights are well aligned before you break the shot when you are transitioning from target to target. It will also force you to press the trigger smoothly when you make a target transition.
Tactical Professor books (all PDF)
Serious Mistakes Gunowners Make http://seriousgunownermistakes.com
Indoor Range Practice Sessions http://indoorrangepracticesessions.com
Concealed Carry Skills and Drills http://concealedcarryskillsanddrills.com
Advanced Pistol Practice http://bit.ly/advancedpistolpractice
Shooting Your Black Rifle http://shootingyourblackrifle.com
Defense in Depth
#Fridayfundamentals
Stolen pistol leads to reckless endangerment charge for Stamford man
By John Nickerson Published 4:28 pm EDT, Wednesday, October 2, 2019
When I posted the story on my Tactical Professor Facebook page as a Negative Outcome, the following question came up.
Which reminds me: this question is probably been addressed here before but for those of us who haven’t caught it are there any vehicle storage lock boxes that have good non shitty locks that we can buy on Amazon or a brick and mortar store?
I use a lockbox that I bought at Academy Sports for 10 bucks. Any defense can be defeated. Just as in the military, defense in depth is how we prevent a defense from being easily defeated. By using multiple barriers, we encourage a thief to move on before he gets our gun. It’s the opposite of leaving a gun in the door pocket of an unlocked car left outside at night. Here’s how I do it:
1. Think ‘be discreet.’ Visually inspect the area to see who is around.
2. Have your pistol box in the trunk, already secured by its cable to the hinge of the trunk lid. If your vehicle doesn’t have a trunk, place the box in some spot that is accessible to you and out of sight of casual passers-by and has a solid attachment point for the cable.
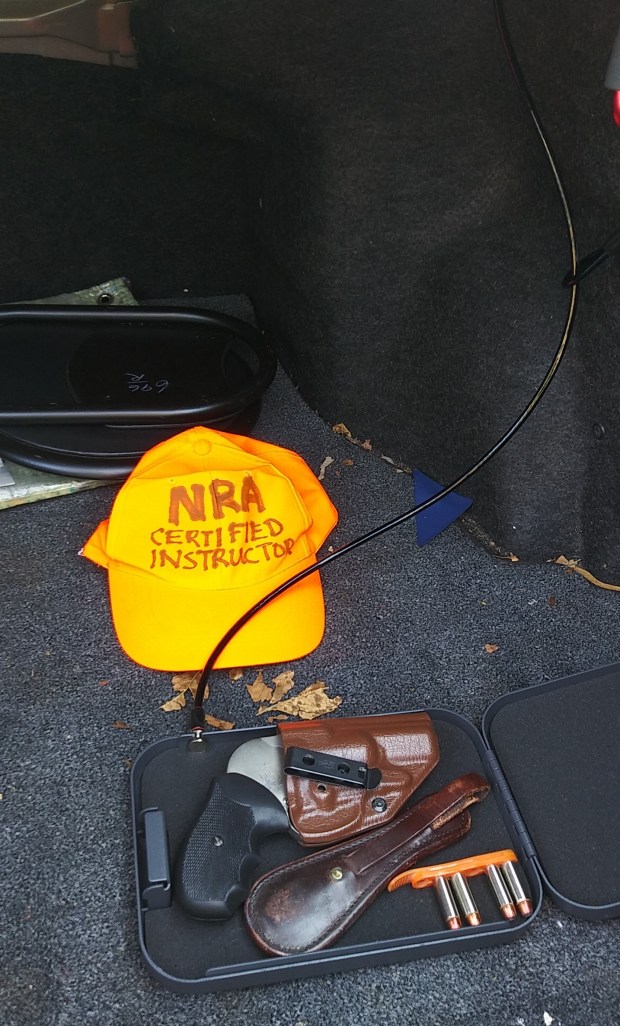
3. Open the trunk.
4. Quickly palm your pistol and put your hand with the pistol into the trunk. This is where having a small pistol really helps.
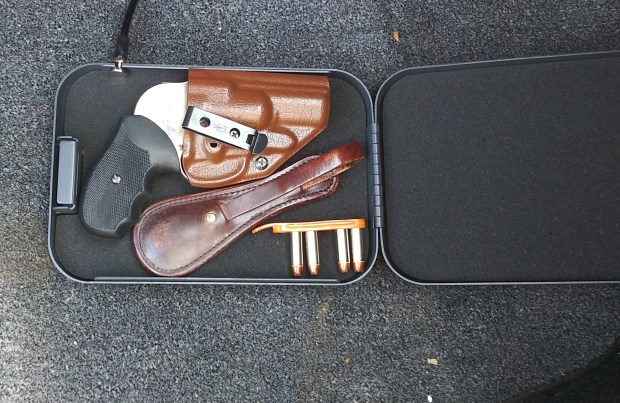
5. Place pistol and any other weapons into the lockbox.
6. Lock the box.
7. If your holster doesn’t fit in the box, place it near the box.
8. Close the trunk.
9. Lock the car doors.
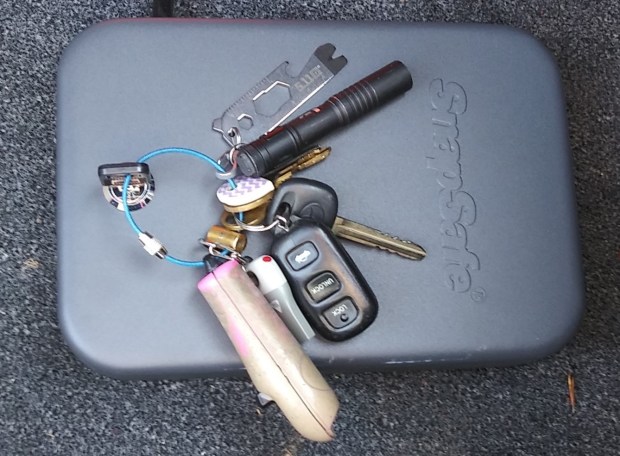
For years, I used a box with a combination lock but I’ve come to the conclusion that, for me, a key lock was faster and more convenient. The key is permanently on my keyring. I’m good at maintaining possession of my keys so I’m not concerned about not having the key to the box.
I only leave my revolver in the car when I have a good reason to; going into my home at night is not a good reason. Going into non-permissive environments or perhaps to the doctor are good reasons.
My thanks to the gentleman who asked about the topic. That was a good suggestion for a blog post. He wins free copies of Serious Mistakes Gunowners Make and Concealed Carry Skills and Drills.
Tactical Professor books (all PDF)
Serious Mistakes Gunowners Make http://seriousgunownermistakes.com
Indoor Range Practice Sessions http://indoorrangepracticesessions.com
Concealed Carry Skills and Drills http://concealedcarryskillsanddrills.com
Advanced Pistol Practice http://bit.ly/advancedpistolpractice
Shooting Your Black Rifle http://shootingyourblackrifle.com
DRY PRACTICE WITH REVOLVERS
#Fridayfundamentals
I am really enjoying getting back into the habit of structured dry practice. Revolvers are great tools for dry practice, in some ways better than autoloading pistols.
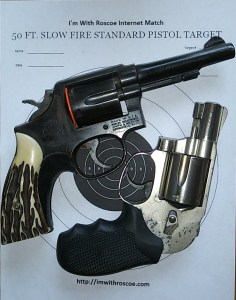
This month, I am serving as the Match Director for the I’m With Roscoe http://imwithroscoe.com 2019 Internet Match. It’s based on the Pocket Revolver Championship of the US Revolver Association. The Championship, along with the other USRA Championships, is described in A.L.A. Himmelwright’s 1915 book Pistol and Revolver Shooting. https://www.amazon.com/Pistol-Revolver-Shooting-L-Himmelwright-ebook/dp/B00AQM9SK0
The course of fire is quite demanding. Originally, it consisted of five strings of five shots in 30 seconds at 50 yards on the original NRA B-6 bullseye target. It is shot one-handed. Since not many people have access to a 50 yard range, I changed it to using an NRA B-2 target at 50 feet. The B-2 is the 50 foot reduction of the B-6 so this was an easy change. Official Rules are available on the IWR Facebook page. https://www.facebook.com/groups/370742620287566/
Since it is a demanding course of fire, I’ve been doing dry practice for when I have the opportunity to shoot it live. My preparation is to work on the fundamentals. I practice with two revolvers each day, my pencil barrel Model 10 and my Model 38-2 J frame.
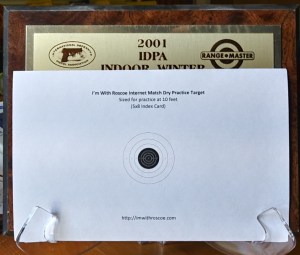
I created a reduced size target for dry practice, scaled for use at 10 feet. It is printed on a 5×8 index card. The target is stored behind a plaque for safety reasons. I take it out and position it when I start the session. Immediately after finishing the session, I conceal the target back behind the plaque prior to reloading my gun.
Since they’re both older guns, I protect their firing pins (hammer noses). For the K frame, I’m using a piece of plastic that fills in the rear of the cylinder. It was manufactured years ago by a gunsmith in New Jersey, long since out of business. The plastic has proven remarkably durable though. For the 38-2, I’m using ST Action Pro Dummy Rounds that I filled the primer pocket in with hot melt glue.
For a timer, I use the Dry Fire Practice Par Timer, from the Google App store, on my phone. It’s set to give me five strings of 30 seconds each with a six second delay between strings. At the beep, I snap five times single action. My actual times are working out to about 25-26 seconds per string. This allows some leeway to accommodate recoil management when I live fire. I rest briefly between the strings.
What I am concentrating on when snapping is minimizing my wobble zone, pressing the trigger smoothly, and following through. These are especially important when shooting one handed. The follow-through is the aspect I have to personally work hardest on. Of those three fundamentals, follow-through is the hardest to learn in live fire so the dry practice is doing me a great deal of good.
It’s been good getting back into daily dry practice. I include dry practice in my shooting workbooks for a reason; it works. If you would like to try your hand at it, this is the reduced scale target. IWR Internet Match dry practice target 5×8 10 feet
Tactical Professor books
Indoor Range Practice Sessions http://indoorrangepracticesessions.com
Concealed Carry Skills and Drills http://concealedcarryskillsanddrills.com
Advanced Pistol Practice http://bit.ly/advancedpistolpractice
Shooting Your Black Rifle http://shootingyourblackrifle.com/
Serious Mistakes Gunowners Make http://seriousgunownermistakes.com
Press the trigger smoothly
#fridayfundamentals
One of the components of NOT producing buckshot targets with a pistol is pressing the trigger smoothly and straight to the rear. With Double Action handguns, either revolvers or autoloaders, this is especially true but it applies to any handgun or rifle. Revolver shooters must master this skill if they want the wheelgun to be anything more than an “arm’s length gun.”

Buckshot with a handgun
Now that the weather is turning colder and, for some folks, snowy, we have the opportunity to work on our trigger press in dry practice. Here are two drills that can dramatically increase your ability to manipulate the trigger correctly.
Repetition and Progression (Part 2)
#fridayfundamentals
The most important Fundamental of all is to be sure your gun works. A recently purchased used revolver seemed okay in most aspects except the cylinder lockup had a hitch. Upon actually shooting it, it worked fine for the first 10 rounds. After that, the trigger could not be pulled with the cylinder closed. As I suspected, something was wrong with the center pin spring and the center pin would not push the bolt into position when the cylinder closed. Moving the bolt into position before it will fire is fundamental to double action revolver design.
Upon examining it later, there was no center pin spring, hence the issue. Someone had obviously messed with it because the extractor rod came free quite easily. Fortunately, the sear/bolt spring for a S&W fit adequately and fixed the problem.
As my colleague, the late Paul Gomez, was fond of saying, “Shoot Yor ….. Guns.”
After repairing it, I used it for another form of progression in practice, increasing distance incrementally. Starting out at a close distance, marking your target after each string, and then increasing the distance gives you an indication of where your strengths and weakness lie. Knowing them gives you an idea of what to practice next.
Repetition and Progression
#fridayfundamentals
A client asked for a private lesson as preparation for an upcoming class at the elite Rogers Shooting School. Rogers is a very structured learning environment, so the format for the lesson was obvious. Fundamental to learning to shoot at a high level are Repetition and Progression, which are the underlying structure at Rogers. You don’t learn to shoot well by thinking about it, you learn by doing it. Visualization is a useful learning technique but you have to know what to visualize before visualization can have any value.
The Origin and Evolution of Dot Torture
Dot Torture is a well known practice regimen among skilled shooters. Its origins and evolution are less well known, however.

Shooting on dot targets, i.e., small filled in circles from 1.25 to 5.54 inches in diameter, as a speed shooting training and practice exercise, was originated by John Shaw, a World Champion shooter, in the early 1980s. In his book, You Can’t Miss: The Guide to Combat Pistol Shooting, he explains the training standard he established for his students. Until they could consistently hit the black bullseye (5.54 inches) of an NRA B-8 bullseye target from the holster in two seconds at seven yards, he didn’t allow them to move on to more advanced drills.

Shaw’s school, the Mid-South Institute of Self-Defense Shooting evolved the concept of dot shooting to a high level. Combined with shooting at steel targets, as originated by Bill Rogers, founder of the elite Rogers Shooting School, dot shooting became a standard component used in the practice regimens of knowledgeable shooters who aspired to a higher level of competency.
The concept of dot shooting was so effective at teaching shooters to hit the target, it quickly became part of military counter-terrorist pistol training. The US Army Special Forces developed a course called ‘Special Operations Training’ [SOT] during the 1980s to train its personnel to use the 1911 pistol at a level not seen before that time in the military.

You must be logged in to post a comment.